Featured
How To Clean Trail Running Shoes
Modified: August 19, 2023
Looking to clean your trail running shoes? Check out our featured guide on how to keep your shoes dirt-free and ready for your next adventure.
Introduction
Trail running is a thrilling and adventurous activity that allows you to connect with nature while getting a great workout. But after a few intense treks through muddy trails and rugged terrains, your trail running shoes can end up looking worse for wear. That’s why it’s essential to know how to properly clean and maintain your trail running shoes.
Cleaning your trail running shoes not only improves their appearance but also helps prolong their lifespan. When dirt, mud, and debris accumulate on your shoes, they can cause excessive wear and tear on the material, leading to potential damage. Additionally, neglecting to clean your shoes can lead to unpleasant odors and decreased performance.
Fortunately, cleaning trail running shoes doesn’t have to be a daunting task. With a few simple steps and the right supplies, you can have your shoes looking and smelling fresh in no time. In this article, we will guide you through the process of cleaning trail running shoes to ensure they stay in peak condition.
Before we dive into the steps, let’s take a look at some of the reasons why it’s important to clean your trail running shoes regularly:
- Enhanced Durability: Regular cleaning removes dirt and debris that can deteriorate the shoe materials, increasing their longevity.
- Improved Performance: Clean shoes provide better traction and grip, enhancing your performance on the trails.
- Prevention of Odors: Keeping your shoes clean helps prevent unpleasant odors caused by sweat and bacteria.
- Maintenance of Breathability: Cleaning removes clogged mud and dirt, allowing the shoes to maintain their breathable properties.
Now that we understand the importance of cleaning trail running shoes, let’s gather the necessary supplies and get started on restoring your shoes to their former glory.
Why it’s important to clean trail running shoes
Trail running is an exhilarating sport that pushes your limits and allows you to explore the great outdoors. However, the adventurous nature of trail running also means that your shoes will inevitably face tough conditions. From muddy trails to rocky terrains, your trail running shoes can quickly accumulate dirt, debris, and grime. That’s why it’s crucial to understand why cleaning these shoes is so important.
Firstly, regular cleaning of your trail running shoes helps enhance their durability. When you run on uneven and unpredictable surfaces, dirt particles and debris can get trapped in the shoe’s materials. Over time, this can cause unnecessary wear and tear, leading to premature damage and reducing the lifespan of your shoes. By regularly cleaning your shoes, you remove these abrasive particles, allowing your shoes to maintain their integrity for longer.
In addition to durability, cleaning your trail running shoes also plays a crucial role in maintaining their performance. As trail runners, we rely on our shoes for traction and grip on unpredictable terrains. When dirt and mud cake onto the outsoles, it can hinder the shoe’s ability to provide optimal grip. By cleaning your shoes, you ensure that the outsoles are free from debris, allowing for better traction and improved performance on the trails.
Another important reason to clean your trail running shoes is to prevent unpleasant odors. After a long and challenging run, it’s normal for your shoes to accumulate sweat, bacteria, and other odor-causing agents. Failure to clean your shoes can result in persistent odors that not only affect your overall running experience but also make your shoes less appealing to wear. By regularly cleaning your shoes, you eliminate these odor-causing agents, leaving them fresh and ready for your next adventure.
Maintaining breathability is another critical aspect of cleaning trail running shoes. Trail running shoes are designed to be breathable, allowing air to circulate and keep your feet cool and comfortable. However, if your shoes are clogged with mud and dirt, their breathability is compromised. Cleaning your shoes removes these obstructions, ensuring that your feet remain well-ventilated and reducing the risk of discomfort and blisters.
As we can see, there are several compelling reasons why cleaning trail running shoes should be a priority. By enhancing durability, improving performance, preventing odors, and maintaining breathability, you not only prolong the lifespan of your shoes but also enhance your overall trail running experience. Now that we understand the importance of cleaning, let’s move on to the supplies you’ll need to effectively clean your trail running shoes.
Supplies you’ll need
Before you embark on cleaning your trail running shoes, it’s important to gather the necessary supplies. Having the right cleaning tools and products will ensure that you can effectively and efficiently clean your shoes, leaving them looking and smelling fresh. Here are the supplies you’ll need:
- Soft-bristled brush: A soft-bristled brush is essential for removing dirt, mud, and debris from your shoes without causing damage to the material. Look for a brush with bristles that are firm enough to dislodge stubborn dirt but gentle enough to avoid scratching or tearing the shoe’s surface.
- Mild detergent or shoe cleaner: You’ll need a mild detergent or a specialized shoe cleaner to effectively clean your trail running shoes. Avoid using harsh chemicals or bleach, as they can damage the shoe’s material. Look for a cleaner that is specifically designed for athletic shoes or opt for a mild detergent that is suitable for hand-washing delicate fabrics.
- Water: You’ll need water to create a cleaning solution and to rinse off the shoes. Make sure you have access to clean, lukewarm water.
- Microfiber cloth or sponge: A soft microfiber cloth or sponge is ideal for gentle scrubbing and wiping away excess cleaning solution. Avoid using harsh scrub brushes or abrasive materials that can damage the shoe’s surface.
- Old toothbrush: An old toothbrush can be handy for tackling hard-to-reach areas or for cleaning the outsole of the shoe. Use a toothbrush with soft bristles to avoid scratching the shoe’s surface.
- Old newspapers or paper towels: These will come in handy for stuffing the shoes after cleaning to help them maintain their shape and aid in the drying process.
- Optional: Waterproofing spray: If your trail running shoes are made of materials that require waterproofing, consider investing in a waterproofing spray. This will help protect your shoes from water damage and keep your feet dry during wet trail conditions. Make sure to choose a spray that is compatible with the material of your shoes.
Gather these supplies before you begin cleaning your trail running shoes. Having everything within reach will make the cleaning process much smoother and ensure that you can give your shoes the care they deserve. With the right supplies in hand, we can now move on to the step-by-step process of cleaning your trail running shoes.
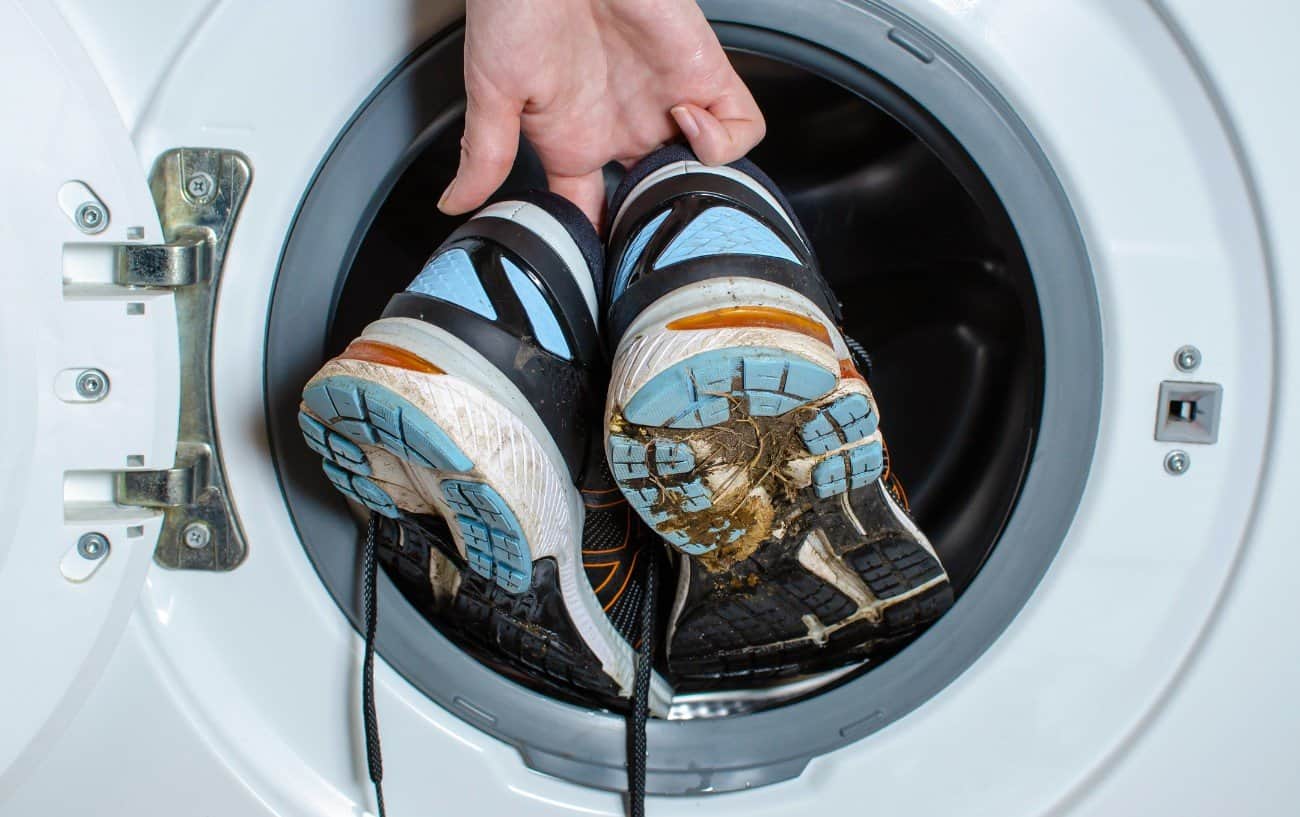
Step 1: Remove excess dirt and debris
The first step in cleaning your trail running shoes is to remove any excess dirt and debris that may have accumulated on the surface. This will make the cleaning process more effective and prevent further scratching or spreading of dirt during the cleaning process. Here’s how to remove excess dirt and debris from your shoes:
- Tap the shoes together: Start by tapping the soles of your shoes together to dislodge any loose dirt, stones, or debris that may be stuck in the treads. This will help remove larger particles before moving on to more thorough cleaning.
- Use a soft-bristled brush: Take your soft-bristled brush and gently brush away any remaining dirt or debris from the surface of your shoes. Pay attention to the seams, crevices, and hard-to-reach areas. Avoid applying excessive pressure or scrubbing too vigorously, as this may damage the shoe’s material.
- Remove the laces (if applicable): If your trail running shoes have laces, it’s a good idea to remove them before cleaning. This will allow you to clean the shoes more effectively and reach all areas, including the eyelets and tongue. You can either hand wash the laces separately or replace them if they are worn out.
- Use a toothbrush for stubborn dirt: For stubborn dirt or grime that won’t come off with the soft-bristled brush, use an old toothbrush. Wet the brush slightly and gently scrub the affected areas in a circular motion. Be careful not to apply too much pressure to avoid causing damage to the shoe’s surface.
By thoroughly removing excess dirt and debris from your trail running shoes, you prepare them for the next step in the cleaning process. The goal here is to get rid of any loose particles that could potentially scratch or further dirty the shoes during the subsequent cleaning steps. With Step 1 complete, we can now move on to Step 2: preparing a cleaning solution.
Step 2: Prepare a cleaning solution
Once you have removed the excess dirt and debris from your trail running shoes, it’s time to prepare a cleaning solution that will effectively lift stains and grime from the surface of the shoes. Here’s how to prepare a suitable cleaning solution:
- Check the shoe’s label: Before preparing a cleaning solution, check the shoe’s label or manufacturer’s instructions for any specific cleaning recommendations. Some shoes may require a specific type of cleaner or may have restrictions on certain ingredients.
- Use a mild detergent: If there are no specific cleaning requirements, a mild detergent will usually suffice for cleaning trail running shoes. Fill a basin or bowl with lukewarm water and add a small amount of mild detergent. Avoid using harsh chemicals or bleach, as they can damage the shoe’s material.
- Mix the solution: Gently mix the water and detergent solution until it forms a soapy mixture. Ensure that the detergent is well-dissolved and evenly distributed in the water.
- Optional: Add a specialized shoe cleaner: If you have a specialized shoe cleaner that is designed for athletic or trail running shoes, you can add it to the cleaning solution as per the manufacturer’s instructions. This can provide additional cleaning power and help remove stubborn stains.
Preparing a proper cleaning solution is essential for effectively removing dirt, stains, and grime from your trail running shoes. The mild detergent or specialized shoe cleaner will help break down the dirt and lift it away from the shoe’s surface. Remember to always follow the instructions provided by the shoe’s manufacturer or the cleaner’s packaging for the best results. With the cleaning solution ready, we can now move on to Step 3: scrubbing the shoes.
Step 3: Scrub the shoes
Now that you have prepared the cleaning solution, it’s time to start scrubbing your trail running shoes to remove any stubborn stains and grime. Proper scrubbing techniques will help ensure a thorough clean without causing damage to the shoe’s material. Follow these steps to effectively scrub your shoes:
- Dip the brush or sponge into the cleaning solution: Take your soft-bristled brush or sponge and dip it into the cleaning solution. Make sure it is evenly soaked but not dripping with excess liquid.
- Gently scrub the shoes: Starting from the toe area, gently scrub the shoes using circular motions. Pay attention to any areas that have noticeable stains or dirt buildup. Be thorough but gentle, avoiding excessive pressure that could damage the material. Remember to scrub the sides, heel, and sole of the shoes as well.
- Focus on problem areas: For particularly stubborn stains or dirt, apply a bit more pressure with the brush or use an old toothbrush to target those specific spots. Continue scrubbing until you are satisfied with the cleanliness of the shoes.
- Clean the laces (if applicable): If you removed the laces before cleaning, take this opportunity to scrub them as well. Use the brush or a cloth soaked in the cleaning solution to clean each lace thoroughly, removing any dirt or stains. Rinse them with clean water and set them aside to dry.
As you scrub, periodically dip the brush or sponge back into the cleaning solution to ensure that you are working with a clean and effective cleaning tool. Avoid using excessive force or scrubbing too vigorously to prevent damage to the shoe’s surface. Once you are satisfied with the cleanliness of your shoes, it’s time to move on to Step 4: rinsing off the cleaning solution.
Step 4: Rinse the shoes
After scrubbing your trail running shoes to remove dirt and stains, the next step is to rinse off the cleaning solution. Rinsing ensures that no residue is left behind, leaving your shoes clean and ready for drying. Follow these steps to properly rinse your shoes:
- Prepare clean water: Fill a basin or sink with clean, lukewarm water. Ensure that the water is neither too hot nor too cold, as extreme temperatures can damage the shoe’s material.
- Dip the shoes into the water: Submerge your trail running shoes in the water, swishing them gently to allow the water to penetrate the material and rinse away the cleaning solution. Use your hands or a soft cloth to lightly agitate the shoes and help remove any remaining residue.
- Rinse thoroughly: Take the shoes out of the water and rinse them under a gentle stream of clean water. Pay attention to all areas, including the tongue, sides, and sole, to ensure that all traces of the cleaning solution are removed.
- Repeat if necessary: If you notice any lingering soap residue or see suds forming during rinsing, repeat the process of dipping and rinsing the shoes until the water runs clear and no soap remains.
It is important to thoroughly rinse off the cleaning solution to avoid any potential damage or discoloration. Soap residue left on the shoes can not only affect the appearance but also attract dirt and make them dirty again more quickly. Once you have rinsed the shoes, it’s time to move on to the next step: air drying.
Step 5: Air dry the shoes
After rinsing off the cleaning solution, it’s time to let your trail running shoes air dry. Proper drying is crucial to avoid damage to the shoe’s material and ensure that they return to their optimal condition. Follow these steps to effectively air dry your shoes:
- Remove excess water: Gently squeeze the shoes with your hands to remove any excess water. Do not twist or wring the shoes, as this can cause misshaping or damage.
- Stuff the shoes with newspaper or paper towels: Take some old newspaper or paper towels and crumple them into small balls. Stuff the balls into the shoes, ensuring that they are evenly distributed inside. This will help the shoes maintain their shape while absorbing moisture.
- Avoid direct sunlight or heat sources: Place your shoes in a well-ventilated area away from direct sunlight and heat sources like radiators or heaters. Excessive heat can cause the shoe’s material to warp or shrink, affecting their fit and performance.
- Allow sufficient drying time: Give your shoes ample time to air dry naturally. Depending on factors such as humidity and material, drying time can vary. It is recommended to leave them to dry for at least 24 hours, or until they are completely dry to the touch.
- Optional: Speed up drying with a fan or air circulation: If you’re in a hurry or need to expedite the drying process, you can place a fan near the shoes or ensure there is adequate air circulation in the drying area. This can help facilitate faster evaporation of moisture.
It’s important to resist the temptation to speed up the drying process by using artificial heat sources like hairdryers or heaters. These can cause irreversible damage to the shoe’s materials and structure. Instead, allow your shoes to dry naturally at room temperature. Once they are completely dry, you can move on to the optional step of re-treating the shoes to enhance their performance and protection.
Step 6: Re-treat the shoes (optional)
After cleaning and drying your trail running shoes, you have the option to re-treat them to restore their water resistance and protective qualities. Re-treating is especially beneficial for shoes made with materials that require waterproofing or extra protection. Follow these steps to re-treat your shoes:
- Choose an appropriate product: Select a waterproofing or protective spray that is suitable for the material of your trail running shoes. Read the product label or instructions to ensure compatibility.
- Clean the shoes (if necessary): Before re-treating, ensure that your shoes are clean and dry. Remove any dirt or debris that may have accumulated during the drying process using a soft brush or cloth.
- Apply the protective spray: In a well-ventilated area, spray the product evenly over the surface of your shoes. Be sure to cover all areas, including the uppers, sides, and the toe cap. Follow the instructions on the product label regarding the distance and amount of spray to apply.
- Allow the shoes to dry: Let the shoes air dry after applying the protective spray. This typically takes a few hours, but drying times may vary depending on the product and environmental conditions. Avoid wearing the shoes until they are completely dry.
- Test the water resistance: Once the shoes are fully dry, you can test their water resistance by applying a few drops of water onto the surface. If the water beads up and rolls off, it indicates that the re-treatment has been successful.
Re-treating your trail running shoes can help extend their longevity and maintain their performance in challenging conditions. However, it’s important to note that re-treatment products may need to be reapplied periodically, depending on usage and exposure to elements. Always refer to the specific product recommendations for re-application intervals.
By following these steps, you can effectively re-treat your trail running shoes, enhancing their protective qualities and ensuring they are ready to take on the next adventure.
Conclusion
Cleaning and maintaining your trail running shoes is vital for their longevity, performance, and overall condition. Regular cleaning removes dirt, debris, and stains that can cause premature wear and damage. By following the steps outlined in this guide, you can effectively clean your trail running shoes and keep them in peak condition. Here’s a quick recap of the steps:
- Remove excess dirt and debris: Tapping the shoes and using a soft-bristled brush helps remove loose dirt and debris.
- Prepare a cleaning solution: A mild detergent or specialized shoe cleaner mixed with water forms an effective cleaning solution.
- Scrub the shoes: Gently scrub the shoes using circular motions, focusing on problem areas and using a toothbrush for stubborn dirt.
- Rinse the shoes: Rinse off the cleaning solution with clean water, ensuring no residue remains.
- Air dry the shoes: Allow your shoes to air dry naturally, stuffing them with newspaper or paper towels to maintain their shape.
- Re-treat the shoes (optional): If necessary, re-treat your shoes with a waterproofing or protective spray to enhance their water resistance and durability.
Remember to always check the manufacturer’s instructions for specific shoe care recommendations, as different materials may require different cleaning methods. It’s also essential to avoid using harsh chemicals or abrasive tools that can damage your shoes.
By regularly cleaning and maintaining your trail running shoes, you’re not only prolonging their lifespan but also ensuring they perform at their best on challenging terrains. So, take the time to give your shoes the care they deserve, and enjoy many more exciting and successful trail running adventures.