Featured
How To Use Exercise Bike
Modified: January 2, 2024
Learn how to use an exercise bike to stay fit and healthy. Our featured guide provides step-by-step instructions and tips for maximizing your workout.
Introduction
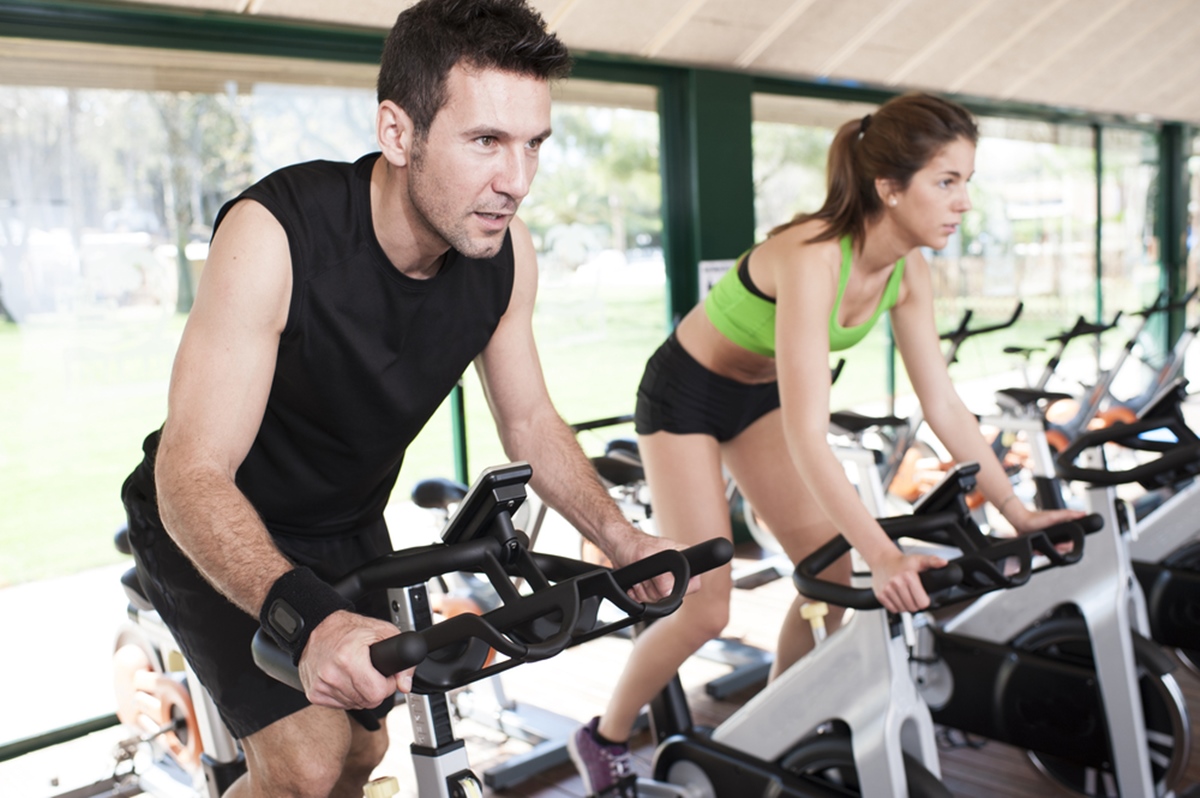
Welcome to the world of exercise bikes! Whether you’re a fitness enthusiast looking to add variety to your workout routine or a beginner searching for a convenient and accessible way to get fit, an exercise bike can be a great investment. With its low-impact design and adjustable intensity levels, an exercise bike provides an effective cardiovascular workout while minimizing stress on your joints.
In this article, we will guide you through the basics of using an exercise bike and help you make the most out of your sessions. From setting up the bike to monitoring your progress, we’ll cover all the essential steps to ensure a safe and productive workout.
Using an exercise bike is not only convenient but also versatile. Whether you prefer a leisurely ride or a high-intensity interval training (HIIT) session, an exercise bike can cater to your fitness goals. With proper technique and a well-planned routine, you can burn calories, improve your cardiovascular health, and strengthen your leg muscles.
Before you hop on the bike, it’s important to familiarize yourself with its features and settings. Understanding how to adjust the seat and handlebars, reading the display console, and selecting the appropriate resistance level are all key factors in optimizing your workout experience. Additionally, warming up, cooling down, and monitoring your progress are important aspects of any successful exercise regimen.
So, whether you’re a beginner or an experienced rider, this article will provide you with the knowledge and guidance you need to enjoy and maximize your exercise bike workouts. Let’s get started!
Step 1: Setting up the Exercise Bike
Before you can start pedaling away, it’s important to properly set up your exercise bike. Follow these steps to ensure a safe and comfortable ride:
- Choose the right location: Find a dedicated space in your home for your exercise bike. Ensure that the area is well-ventilated and has enough room for you to move around the bike comfortably.
- Check the stability: Place the exercise bike on a level surface and make sure it is stable. Adjust the leveling feet or stabilizers on the bike, if available, to ensure a secure and balanced position.
- Secure the pedals: If your exercise bike has toe cages or straps on the pedals, adjust them to fit your feet securely. This will prevent your feet from slipping during the workout and provide stability.
- Connect the power (if applicable): If your exercise bike has an electrical component, such as a display console or resistance control, ensure it is connected to a power source. Follow the manufacturer’s instructions for proper power supply.
- Adjust the bike’s height: Most exercise bikes allow you to adjust the seat height. Stand next to the bike and adjust the seat so that it aligns with your hip bone. This position ensures proper leg extension during the workout.
- Tighten the seat and handlebars: Use the provided adjustment knobs or levers to secure the seat and handlebars in place. Make sure they are tightly fastened to prevent any unwanted movements during your ride.
- Inspect the bike: Before you start pedaling, check the bike for any loose bolts or damaged components. Pay attention to the pedals, frame, and cables. If you notice any issues, contact the manufacturer or a professional for assistance.
By following these steps, you can ensure that your exercise bike is set up correctly, providing a stable and safe platform for your workouts. Once you have completed the setup process, you’re ready to move on to the next step: adjusting the seat and handlebars for optimal comfort and proper riding posture.
Step 2: Adjusting the Seat and Handlebars
Properly adjusting the seat and handlebars of your exercise bike is crucial for maintaining a comfortable and efficient riding position. Follow these guidelines to ensure a proper fit:
- Seat height: Stand next to the bike and adjust the seat height so that it aligns with your hip bone. This allows for proper leg extension during the pedaling motion. When sitting on the bike, your legs should be slightly bent at the bottom of the pedal stroke.
- Seat position: Move the seat forward or backward to find a position that allows for a slight bend in your knees when your feet are placed on the pedals. This helps prevent strain on your knees during the workout.
- Handlebar height: The handlebars should be positioned at a height that allows for a relaxed and natural grip. Adjust the handlebars so that you can reach them comfortably without straining your back or shoulders.
- Handlebar position: Some exercise bikes allow you to adjust the horizontal position of the handlebars. Position them so that your arms are slightly bent and your shoulders are relaxed. This helps to maintain good posture throughout your ride.
- Experiment and adjust: Everyone’s body proportions are different, so don’t be afraid to experiment with different seat and handlebar positions to find what feels most comfortable for you. Small adjustments can make a big difference in your overall riding experience.
Properly adjusting the seat and handlebars of your exercise bike is essential to prevent discomfort, minimize the risk of injury, and ensure an efficient pedal stroke. A correct riding position allows you to engage the appropriate muscles and maximize the benefits of your workout.
Once you have adjusted the seat and handlebars to your liking, it’s time to familiarize yourself with the display console of the exercise bike. This will allow you to track your progress, monitor your heart rate, and make informed decisions about your workout intensity. We’ll cover this in the next step.
Step 3: Understanding the Display Console
The display console on your exercise bike provides valuable information about your workout and allows you to customize your session according to your fitness goals. Here’s how to understand and utilize the display console:
- Power on the console: Most exercise bikes have a power button or a quick start option. Press the appropriate button to turn on the console.
- Display metrics: The console will typically show information such as time, speed, distance, calories burned, and heart rate. Familiarize yourself with these metrics as they will help you monitor your progress and make adjustments to your workout.
- Heart rate monitoring: Many exercise bikes come with built-in heart rate sensors on the handlebars. To track your heart rate, place your hands on the sensors and allow a few seconds for the console to display your heart rate. Alternatively, you can use a compatible chest strap or other wearable heart rate monitor.
- Workout programs and resistance levels: Some exercise bikes offer pre-programmed workout routines and various resistance levels. Explore the options on the console to select a program that aligns with your goals or manually adjust the resistance level to increase or decrease the intensity of your workout.
- Customize your workout: Depending on the features of your exercise bike, you may be able to set goals, create user profiles, or save your preferred settings. Take the time to explore the console and personalize your workout experience.
Understanding the display console of your exercise bike allows you to track your progress, make informed decisions about your workout intensity, and stay motivated during your sessions. The metrics provided can help you set goals, challenge yourself, and see improvements over time.
Now that you’re familiar with the display console, it’s important to warm up your muscles and prepare your body for the workout. We will discuss warm-up exercises in the next step.
Step 4: Warming Up before the Workout
Warming up before your exercise bike workout is crucial to prepare your muscles and joints for the upcoming physical activity. A proper warm-up routine increases blood flow, raises your heart rate, and reduces the risk of injury. Here are a few warm-up exercises to consider:
- Light cardio: Start your warm-up with 5-10 minutes of light cardio exercises such as brisk walking or jogging in place. This elevates your heart rate and warms up your entire body.
- Dynamic stretches: Perform dynamic stretches, which involve moving parts of your body through a full range of motion. Examples include arm swings, leg swings, torso twists, and high knee marches. These stretches help improve flexibility and loosen up your muscles.
- Cycling at low intensity: Spend a few minutes pedaling on the exercise bike at a low resistance level. This allows your muscles to gradually adapt to the cycling motion and further warms up your legs.
- Joint mobility exercises: Incorporate gentle movements that target your joints, such as ankle circles, shoulder rolls, and wrist rotations. These exercises help lubricate the joints and improve their range of motion.
Remember to perform each warm-up exercise smoothly and without any sudden or jerky movements. Take deep breaths throughout the warm-up routine to oxygenate your muscles and mentally prepare for the workout ahead.
A proper warm-up not only primes your muscles and joints for the exercise but also helps you mentally transition into the workout mindset. By taking a few minutes to warm up, you can prevent injuries, enhance your performance, and enjoy a more effective workout. Once you’re adequately warmed up, it’s time to move on to the next step: choosing the right resistance level on your exercise bike.
Step 5: Choosing the Right Resistance Level
Choosing the appropriate resistance level on your exercise bike is crucial to ensure an effective and challenging workout. The resistance determines how difficult it is to pedal, and selecting the right level can help you achieve your fitness goals. Here’s how to choose the right resistance:
- Start light: If you’re new to exercising or using an exercise bike, begin with a low resistance level. This allows you to get comfortable with the bike’s mechanics and establish proper pedaling form.
- Increase gradually: As your muscles warm up and you gain more confidence, gradually increase the resistance level. Aim for a level that challenges you without causing excessive strain or compromising your form.
- Adapt to your goals: The resistance level you choose depends on your fitness goals. If your aim is to improve endurance and burn calories, opt for a moderate resistance that allows you to sustain pedaling for an extended period. If you’re looking to build strength and power, increase the resistance for shorter intervals or incorporate high-intensity sprints.
- Listen to your body: Pay attention to how your body responds to each resistance level. If you’re struggling to maintain a steady pace or experiencing discomfort, it may be a sign that the resistance is too high. Conversely, if you’re pedaling with ease, consider increasing the difficulty.
- Vary the resistance: To keep your workouts challenging and prevent plateaus, vary the resistance throughout your session. Alternate between higher and lower levels to simulate different terrains or workout intensities.
Remember, the right resistance level for you may be different from someone else’s. Listen to your body and adjust accordingly to find the balance between a challenging workout and maintaining proper form.
Once you’ve chosen the appropriate resistance level, it’s time to begin your workout. In the next step, we’ll explore various riding techniques and strategies to optimize your exercise bike sessions.
Step 6: Starting Your Workout
Now that you’ve set up your exercise bike, adjusted the seat and handlebars, warmed up, and chosen the right resistance level, it’s time to kick-start your workout. Here are some tips to make the most out of your exercise bike session:
- Set your workout goals: Before you begin pedaling, establish clear goals for your workout. Whether it’s targeting a specific distance, duration, or calorie burn, having a goal in mind helps keep you focused and motivated.
- Focus on form: Maintain proper form while cycling on the exercise bike. Keep your back straight, engage your core muscles, and relax your shoulders. Ensure that your pedaling motion is smooth and controlled.
- Pedal at a comfortable cadence: Aim for a cadence (pedal revolutions per minute) that feels comfortable for you. Generally, a cadence of 80-100 RPM is a good target for most workouts. This helps maintain a steady and efficient pedal stroke.
- Vary your workout: To prevent boredom and challenge different muscle groups, consider incorporating a variety of workout techniques. You can mix steady-state riding, where you maintain a consistent pace, with intervals of increased intensity or hill climbs.
- Stay hydrated: Keep a water bottle nearby and drink water regularly during your workout. Proper hydration is important to replace fluids lost through sweat and maintain your performance.
- Listen to music or watch entertainment: Many exercise bikes have built-in speakers, or you can use headphones, to listen to music or watch videos while you ride. This can provide entertainment and help pass the time during longer workouts.
- Pay attention to your body: Monitor how your body feels during the workout. If you experience any pain, dizziness, or shortness of breath, slow down, decrease the resistance, or stop the workout if necessary. It’s important to prioritize your safety and well-being.
Remember to pace yourself and gradually increase the intensity of your workouts over time. Consistency is key when it comes to seeing progress in your fitness journey.
As you reach the end of your workout, it’s important to properly cool down and transition your body back to a resting state. We’ll cover the cooling-down process in the next step.
Step 7: Monitoring Your Progress
Monitoring your progress is an essential aspect of any fitness routine, including your exercise bike workouts. By keeping track of your performance and improvements, you can stay motivated and make informed decisions about your training. Here are some effective ways to monitor your progress:
- Keep a workout log: Maintain a journal or use a fitness tracking app to record your workout details, including distance, duration, calories burned, and resistance level. This allows you to track your progress over time and identify patterns or areas for improvement.
- Set measurable goals: Establish specific and measurable goals for your exercise bike workouts. For example, aim to increase your riding time or distance by a certain percentage each week. Having concrete goals helps create focus and provides a sense of achievement when you reach them.
- Use the built-in console metrics: Most exercise bikes come with a display console that shows metrics such as time, distance, speed, and calories burned. Regularly check and compare these metrics to gauge your progress and set benchmarks for future workouts.
- Monitor heart rate: If your exercise bike has a heart rate monitor, keep an eye on your heart rate during your workouts. This metric provides insights into the intensity and effectiveness of your sessions. Aim to gradually increase your heart rate within a safe and comfortable range over time.
- Track body measurements and weight: Consider measuring and recording your body measurements, such as waist circumference or body fat percentage, along with your weight. While the number on the scale may not always reflect changes in body composition, these measurements can provide a more comprehensive picture of your progress.
- Listen to how you feel: Pay attention to how your body feels during and after your workouts. Notice improvements in endurance, strength, and overall energy levels. Feeling more confident and motivated is a clear indication of progress.
Regularly monitoring your progress allows you to celebrate your wins, identify areas for improvement, and adjust your training as needed. Remember, progress takes time, and small improvements add up over the long term. Stay consistent, stay motivated, and enjoy the journey!
As you near the end of your workout, it’s important to cool down and allow your body to gradually return to its resting state. We’ll discuss the cooling-down process in the next step.
Step 8: Cooling Down after the Workout
Completing a proper cool-down after your exercise bike workout is just as important as warming up before it. Cooling down allows your body to gradually transition from an elevated state to a resting state and helps prevent muscle soreness and stiffness. Follow these steps to cool down effectively:
- Reduce the intensity: Gradually decrease the resistance and pedal at an easy pace for the last few minutes of your workout. This allows your heart rate and breathing to gradually return to normal.
- Perform gentle stretches: After you hop off the bike, take a few minutes to stretch your muscles. Target major muscle groups like your calves, hamstrings, quadriceps, and hips. Hold each stretch for 15 to 30 seconds and focus on deep, controlled breathing.
- Hydrate: Drink water to replenish fluids lost during your workout. Rehydrating is important for recovery and helps prevent dehydration.
- Practice deep breathing: Spend a few minutes focusing on deep breaths, inhaling deeply through your nose and exhaling slowly through your mouth. This helps promote relaxation and aids in the recovery process.
- Move around: Engage in light physical activity, such as walking or gentle stretching, to continue promoting blood circulation and prevent muscles from tightening up too quickly.
A proper cool-down allows your heart rate to gradually decrease and helps remove waste products, such as lactic acid, from your muscles. It also promotes flexibility and reduces the risk of post-workout muscle soreness.
By incorporating a cooling-down routine into your exercise bike workouts, you’re setting yourself up for a faster recovery and minimizing any potential discomfort or stiffness that may occur later on. Take the time to cool down after each session to optimize your overall workout experience.
Once you’ve completed the cool-down, it’s time to properly exit the exercise bike. We’ll cover this in the final step of our guide.
Step 9: Properly Exiting the Exercise Bike
Properly exiting the exercise bike is the final step in your workout routine. While it may seem simple, it’s important to take the time to exit the bike safely and correctly. Follow these steps to properly exit the exercise bike:
- Slow down your pedaling: Before you prepare to dismount, gradually decrease your pedaling speed and resistance level to a gentle pace. This helps you maintain balance and stability.
- Secure your feet: If your exercise bike has toe cages or straps, loosen them and remove your feet from them. Ensure that your feet are free from the pedals before attempting to dismount.
- Place both hands on the handlebars: Keep both hands firmly on the handlebars for support as you prepare to exit the bike.
- Shift your weight to one side: While maintaining a firm grip on the handlebars, shift your weight slightly to one side and lift one foot off the pedal.
- Swing your leg over the frame: Using the foot that is lifted off the pedal, swing your leg over the bike frame in a smooth and controlled manner. Be mindful of any cables or console components and ensure you clear them as you dismount.
- Place both feet on the floor: Once you have successfully swung your leg over the frame, place both feet on the ground. Make sure you have a stable footing before fully releasing your grip on the handlebars.
- Step away from the bike: Move away from the exercise bike, allowing other individuals to use it if necessary. Take a moment to stretch and cool down further, if desired.
- Clean and maintain: After your workout, take a few moments to wipe down the exercise bike with a clean cloth or disinfectant wipe. This helps keep the equipment in good condition and ready for your next session or for others to use.
Properly exiting the exercise bike ensures your safety and prevents any accidental mishaps. Take care in following these steps to maintain your balance and avoid any potential injuries. By observing these guidelines, you can conclude your exercise bike workout with confidence and look forward to your next session.
Conclusion
Congratulations! You have reached the end of our guide on how to use an exercise bike effectively. By following these steps, you are well-equipped to enjoy safe, challenging, and rewarding workouts on your exercise bike. Let’s recap what we’ve covered:
We began with the importance of setting up your exercise bike correctly, ensuring stability and comfort during your workouts. Then, we discussed how to adjust the seat and handlebars to achieve optimal riding posture. Understanding the display console and its metrics allowed you to track your progress and customize your workouts accordingly. Proper warm-up exercises prepared your muscles for the intensity of the workout, and choosing the right resistance level was crucial to achieving your fitness goals.
We also emphasized the significance of monitoring your progress through various methods, such as keeping a workout log and tracking metrics provided by the exercise bike’s console. Cooling down after your workout and properly exiting the exercise bike help prevent injury and promote a smoother recovery. By adhering to these steps, you can maximize the benefits of your exercise bike workouts.
Remember, the key to success is consistency and gradual progression. Start at a comfortable level and gradually increase the intensity and duration of your workouts. Listen to your body, stay hydrated, and be mindful of your workout goals. Don’t forget to enjoy the process and celebrate your achievements along the way.
Now, it’s time to apply what you’ve learned and embark on your exercise bike journey. Whether you’re incorporating it into your fitness routine, using it for rehabilitation, or simply seeking a convenient and effective way to stay active, an exercise bike can be a valuable tool in achieving your fitness goals.
So, hop on your exercise bike, pedal away, and enjoy the countless benefits it has to offer. Happy riding!