Home>Misc>Featured>How To Position Saddle On A Triathlon Bike

Featured
How To Position Saddle On A Triathlon Bike
Modified: March 1, 2024
Learn how to position your saddle on a triathlon bike with our featured guide, ensuring optimal comfort and performance.
Introduction
Welcome to the world of triathlon! As an aspiring triathlete, you know that every aspect of your training and equipment plays a crucial role in your performance. One key component that often gets overlooked is the positioning of your saddle on your triathlon bike. Getting your saddle position right can greatly impact your comfort, efficiency, and power output during both training sessions and races.
Proper saddle positioning is essential because it helps you maintain an optimal cycling posture, distribute your weight evenly, and minimize the risk of potential injuries. So, whether you’re a seasoned triathlete looking to fine-tune your setup or a beginner trying to set up your bike for the first time, understanding how to position your saddle correctly is paramount.
In this article, we will guide you through the process of positioning your saddle on a triathlon bike, step by step. We will cover the importance of correct saddle position, how to prepare your bike for saddle positioning, the steps to adjust the saddle height, fine-tuning the saddle fore-aft position, determining the saddle tilt, finding the optimum saddle position for comfort and performance, and common mistakes to avoid when positioning the saddle.
Understanding this information will not only enhance your riding experience but also allow you to maximize your potential on the bike. So, let’s delve into the details of how to position your saddle on a triathlon bike and take your performance to new heights!
Understanding the Importance of Correct Saddle Position
When it comes to triathlon training and racing, every second and every watt counts. And one often overlooked aspect that can make a significant difference is the correct positioning of your saddle on your triathlon bike.
The saddle position plays a crucial role in your overall cycling efficiency and comfort. Proper saddle position ensures that you maintain a stable and balanced riding posture, allowing you to generate power efficiently and reduce the risk of injury.
One of the key benefits of correct saddle position is optimizing your pedaling mechanics. When your saddle is correctly positioned, it allows for a full range of motion of your hips and legs. This means that you can engage your muscles more effectively during each pedal stroke, resulting in increased power output. Additionally, proper saddle position minimizes the risk of developing muscular imbalances or overuse injuries by evenly distributing the workload across your muscles.
Furthermore, maintaining the correct saddle position also contributes to improved aerodynamics. In triathlon racing, reducing drag is crucial to enhance your speed and efficiency. A well-positioned saddle helps you maintain a streamlined, low-profile position on the bike, minimizing wind resistance and allowing you to maintain a faster pace with less effort.
Comfort is another crucial aspect linked to correct saddle positioning. A poorly positioned saddle can lead to discomfort, numbness, or pain, particularly in sensitive areas such as the perineum or sit bones. By positioning the saddle correctly, you can alleviate pressure on these areas, enhancing your comfort and reducing the likelihood of saddle sores or long-term discomfort.
It’s important to note that correct saddle position is not a one-size-fits-all approach. Each individual has unique anatomical characteristics and biomechanics, and what works for one rider may not work for another. Therefore, finding the optimal saddle position requires some experimentation and adjustments.
Now that we’ve established the importance of correct saddle position, let’s move on to the next section, where we’ll guide you through the steps to prepare your triathlon bike for saddle positioning.
Preparing Your Triathlon Bike for Saddle Positioning
Before you start adjusting and fine-tuning the position of your saddle, it’s important to ensure that your triathlon bike is prepared for the process. Taking the following steps will help create a solid foundation for finding the optimal saddle position:
- Clean and inspect your bike: Begin by giving your bike a thorough cleaning. This will not only make it easier to see the components but also help you identify any wear and tear that might affect the saddle positioning process. Check for any loose or damaged parts and address them before proceeding.
- Check your bike fit: If you haven’t had a professional bike fitting, it’s a good idea to schedule one before adjusting your saddle position. A bike fit expert will assess your individual biomechanics and make recommendations on saddle height, fore-aft position, and tilt based on your unique needs and goals.
- Gather necessary tools: To adjust your saddle position, you may need various tools such as a hex wrench or Allen key to loosen and tighten bolts. Make sure you have the required tools on hand before starting the process.
- Measure your current saddle position: Before making any adjustments, it’s helpful to measure and note down your bike’s current saddle position. This will serve as a reference point in case you want to revert to the previous position or make incremental changes during the adjustment process.
- Set aside dedicated time: Positioning your saddle requires time and patience. Set aside a dedicated block of time, preferably when you won’t be rushed or interrupted, to focus solely on getting the position right. This will allow you to make precise adjustments and evaluate the effects of each change without distractions.
By following these preparatory steps, you will be well-equipped to begin the process of adjusting your saddle position. Remember that achieving an optimal saddle position is a collaborative effort between your body and your bike. So, let’s move on to the next section, where we’ll guide you through the step-by-step process of adjusting the saddle height on your triathlon bike.
Steps to Position the Saddle on Your Triathlon Bike
Now that you’ve prepared your triathlon bike and gathered the necessary tools, it’s time to start adjusting the saddle position. Follow these step-by-step instructions to find the optimal saddle position for your comfort and performance:
- Start with the saddle height: Begin by adjusting the saddle height. To determine the correct height, sit on your bike with your heels resting on the pedals. Your legs should naturally straighten with a slight bend in the knees. Use a tape measure to ensure that the distance between the center of the pedal axle and the top of the saddle is the same for each leg. Make small adjustments and re-measure until you find the right height.
- Move on to the fore-aft position: Once you’ve set the saddle height, it’s time to fine-tune the fore-aft position. Sit on your bike, place your feet on the pedals, and adjust the saddle to align the forward part of your kneecap with the axle of the pedal. This position ensures proper alignment of your knee and reduces the risk of strain or injury. You may need to make small adjustments to achieve the ideal position.
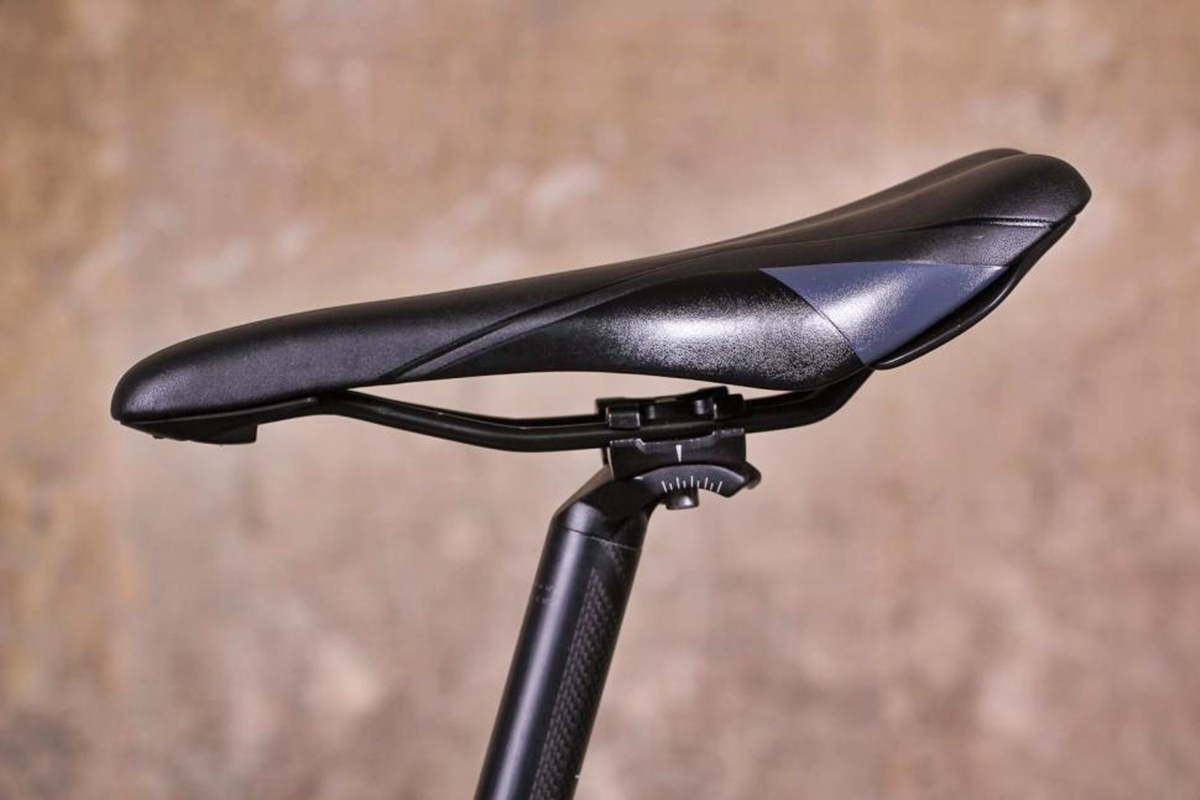
- Consider saddle tilt: The tilt of your saddle affects your weight distribution, comfort, and power transfer. Generally, a neutral (horizontal) position is recommended, but individual preferences may vary. Experiment with small adjustments to find the tilt that feels most comfortable for you. Keep in mind that a too-forward or too-rearward tilt can lead to discomfort or excessive pressure on sensitive areas.
- Test and evaluate: Once you’ve made adjustments to the saddle position, take your bike for a test ride. Pay attention to how your body feels in the new position. Notice any discomfort or areas of pressure. It may take several rides and further minor adjustments to find the perfect saddle position for your body. Take your time and listen to your body’s feedback as you make refinements.
- Consider professional bike fitting: If you’re struggling to fine-tune the saddle position on your own or if you want to optimize your bike setup for maximum performance, consider consulting with a professional bike fitter. They have the knowledge and expertise to assess your specific biomechanics and make recommendations tailored to your needs.
Remember, finding the ideal saddle position is an ongoing process. As your fitness, flexibility, or cycling goals change, you may need to make further adjustments. Regularly reassessing your saddle position ensures that you’re always riding in the most comfortable and efficient manner.
Now that you’ve learned how to adjust the saddle height, fore-aft position, and tilt, it’s time to delve deeper into fine-tuning these adjustments and determining the optimum saddle position for your comfort and performance.
Adjusting the Saddle Height
The first step in positioning your saddle on a triathlon bike is adjusting the saddle height. Getting the correct saddle height is crucial for optimal power transfer and comfort during your rides. Follow these steps to adjust the saddle height:
- Initial setup: Start with a rough estimate of the saddle height. Sit on your bike with your cycling shoes on and place your heels on the pedals.
- Check leg extension: Pedal backward until your lead leg is at the bottom of the pedal stroke. Your leg should be fully extended and almost straight, with a slight bend in the knee. Adjust the saddle height up or down until you achieve this extension.
- Check knee angle: Your knee should be in a slightly bent position when the ball of your foot is on the pedal with your foot parallel to the ground. If your knee is too bent or too straight, make small adjustments to the saddle height until you find a comfortable knee angle.
- Confirm proper foot position: Ensure that your foot is positioned correctly on the pedal, with your knee tracking over the ball of your foot. Improper foot position can cause knee pain or discomfort, so adjust the saddle height if needed to align your foot and knee properly.
- Consider personal preference: While there are general guidelines for saddle height, it is important to consider your personal comfort and pedaling style. Some riders may prefer a higher saddle for more power, while others may feel more comfortable with a slightly lower saddle. Experiment with different heights to find what works best for you.
- Make incremental adjustments: It’s important to make small changes when adjusting saddle height. Move the saddle up or down by millimeters at a time to fine-tune the position. Take note of any changes in your comfort and power output as you make these adjustments to find the sweet spot for your saddle height.
Remember to keep a level head when adjusting saddle height. Small adjustments can have a significant impact on your comfort and performance. Take the time to test your new saddle height and make any necessary refinements based on your riding experience. Regularly reevaluate your saddle height as your fitness level, flexibility, or riding goals change.
Now that you’ve successfully adjusted the saddle height, it’s time to move on to fine-tuning the fore-aft position of the saddle to further optimize your bike fit and riding experience.
Fine-Tuning the Saddle Fore-aft Position
After ensuring the correct saddle height, the next step in positioning your saddle on a triathlon bike is fine-tuning the fore-aft position. Proper fore-aft adjustment helps optimize your power transfer, balance, and comfort on the bike. Follow these steps to fine-tune the fore-aft position of your saddle:
- Position your pedals: Place your feet on the pedals and position them parallel to the ground. Ensure that your feet are in the same position and angle as when you ride.
- Identify key landmarks: Identify the bony prominence just below your kneecap, referred to as the tibial tuberosity. Use a plumb bob or a laser level to drop a vertical line from the tibial tuberosity. This will serve as a reference point for the fore-aft adjustment.
- Align the tibial tuberosity: Sit on your bike and position your lead leg so that the tibial tuberosity is directly above the axle of the pedal. This alignment ensures proper knee tracking and minimizes the risk of strain or injury.
- Check for knee over pedal spindle: Pedal backward until your lead leg is at the bottom of the pedal stroke. Check the position of your forward knee in relation to the pedal spindle. The ideal position is to have the knee directly above the pedal spindle or slightly behind it. Adjust the saddle forward or backward to achieve this alignment.
- Consider personal preference and riding style: While aligning the tibial tuberosity and achieving proper knee tracking are important, personal preference and riding style also play a role in determining the optimal fore-aft position. Some riders may prefer a more forward position for a more aggressive aerodynamic posture, while others may feel more comfortable with a slightly more relaxed position. Experiment with different fore-aft positions to find what works best for you.
- Make incremental adjustments: Similar to adjusting the saddle height, it’s crucial to make small changes when fine-tuning the fore-aft position. Move the saddle forward or backward in small increments (millimeters at a time) and test each adjustment on your rides. Pay attention to your comfort, power output, and any changes in knee pain or discomfort as you make these adjustments.
Remember to take the time to test each fore-aft adjustment and make any necessary refinements based on your riding experience. Small changes in the fore-aft position can have a significant impact on your overall bike fit and performance. Regularly reassess the fore-aft position of your saddle as your fitness level, flexibility, or riding goals change.
Now that you have dialed in the fore-aft position, the next step is to determine the optimal saddle tilt for your comfort and performance.
Determining the Saddle Tilt
When positioning your saddle on a triathlon bike, the saddle tilt is a critical factor that affects your weight distribution, comfort, and power transfer. Finding the optimal saddle tilt can greatly enhance your riding experience. Follow these steps to determine the correct saddle tilt:
- Level your bike: Start by ensuring that your bike is level. Use a bubble level or a smartphone app with a leveling feature to make sure that the top of the saddle is parallel to the ground.
- Align your sit bones: Sit on the saddle and find your sit bones, also known as the ischial tuberosities. These bony structures should bear most of your weight when seated on the bike. Ensure that your sit bones are positioned evenly on the widest part of the saddle.
- Feel for comfort: Take note of how the saddle feels beneath you. If you feel excessive pressure or discomfort in certain areas, it may indicate an incorrect saddle tilt.
- Make small adjustments: Start with a neutral saddle tilt position. Typically, a level or slightly nose-up position is recommended for most riders. However, personal preference and anatomical differences may require slight variations. Make small adjustments to the saddle tilt, using increments of a few degrees at a time, to find the most comfortable position for you.
- Ride and evaluate: Take your bike for a test ride after each adjustment. Pay attention to any changes in comfort, power output, and overall riding experience. Note any discomfort, numbness, or pressure points, as these may indicate an incorrect saddle tilt.
- Consult a professional: If you’re having difficulty determining the optimal saddle tilt or experiencing ongoing discomfort, it may be beneficial to consult a bike fit professional. They can assess your individual biomechanics and make specific recommendations tailored to your needs.
Remember that saddle tilt is a personal preference, and there is no definitive “correct” position for everyone. It’s crucial to find the tilt that feels most comfortable and supportive for you. Experiment with small adjustments and trust your body’s feedback to guide you to the optimal saddle tilt.
Now that you have successfully determined the saddle tilt, it’s time to find the ultimate position that balances comfort and performance for your triathlon bike.
Finding the Optimum Saddle Position for Comfort and Performance
After adjusting the saddle height, fore-aft position, and tilt, it’s time to find the optimum saddle position that combines comfort and performance on your triathlon bike. Here are some guidelines to help you find the sweet spot:
- Listen to your body: Pay attention to how your body feels when riding in the adjusted saddle position. Notice any areas of discomfort, pressure points, or numbness. Your body’s feedback is invaluable in finding the optimum saddle position.
- Balance comfort and power: Aim to find a position that maximizes comfort without sacrificing power output. It’s important to strike a balance between being relaxed and maintaining an efficient pedaling biomechanics.
- Take note of power transfer: During your rides, observe your power output and overall cycling performance in the adjusted saddle position. Notice if there are any improvements or changes compared to your previous position. This will help you fine-tune your setup even further.
- Make incremental adjustments: If you’re not completely satisfied with the saddle position, don’t be afraid to make small adjustments. Move the saddle up or down, forward or backward, or tweak the tilt by a few degrees at a time. Take note of each change and evaluate its effect on your comfort and performance.
- Prioritize long-term comfort: While it’s essential to optimize your performance, prioritize long-term comfort and injury prevention. An ideal saddle position should reduce the risk of developing discomfort, saddle sores, or overuse injuries.
- Consider professional bike fitting: If you’re struggling to find the optimum saddle position or want to maximize your bike setup, consider a professional bike fitting. A bike fit expert can assess your individual biomechanics, make personalized recommendations, and help you achieve the best possible saddle position for your body and goals.
Remember that finding the optimum saddle position may take some time and experimentation. It’s a continuous process, as your fitness level, flexibility, and goals may evolve over time. Regularly reevaluate your saddle position to ensure it remains optimal for your cycling experience.
Now that you have a good understanding of finding the optimum saddle position, let’s explore some common mistakes to avoid when positioning the saddle on your triathlon bike.
Common Mistakes to Avoid When Positioning the Saddle
When it comes to positioning the saddle on your triathlon bike, there are several common mistakes that riders often make. Avoiding these mistakes will help ensure that you find the optimal saddle position for your comfort and performance. Here are some key pitfalls to avoid:
- Setting saddle height too low or high: Incorrect saddle height can lead to discomfort, reduced power output, and increased risk of injury. Make sure to follow the proper guidelines and adjust the saddle height to achieve the correct leg extension and knee angle.
- Ignoring proper leg extension: Failing to achieve the proper leg extension can result in decreased power transfer and inefficient pedaling mechanics. Avoid leaving your knees too bent or too straight by fine-tuning the saddle height accordingly.
- Overlooking fore-aft position: Neglecting the fore-aft position of the saddle can result in improper knee tracking, leading to strain or injury. Take the time to align your knee over the pedal spindle to optimize your biomechanics.
- Neglecting saddle tilt: Incorrect saddle tilt can cause discomfort, pressure points, and instability. It’s important to find the correct balance between a level or slightly nose-up position that feels comfortable for you. Don’t neglect this crucial adjustment.
- Not testing and evaluating: Simply adjusting the saddle without testing it on the bike can lead to suboptimal positioning. Take the time to go out for rides and evaluate how the adjusted saddle position feels in terms of comfort and performance.
- Ignoring individual differences: Everyone’s body is unique, and what works for one rider may not work for another. Avoid adopting a one-size-fits-all approach and consider your own comfort, flexibility, and riding style when positioning the saddle.
- Skipping professional bike fitting: While it is possible to adjust the saddle position on your own, a professional bike fitting can provide a comprehensive assessment tailored to your specific needs. Consider investing in a bike fit to optimize your position and prevent potential issues.
Avoiding these common mistakes will help you achieve a more comfortable and efficient saddle position on your triathlon bike. Take the time to fine-tune your setup and listen to your body’s feedback to find the best position that suits your individual needs and goals.
With these guidelines in mind, you are well-equipped to position your saddle correctly and enhance your triathlon bike riding experience. So, go ahead and apply these tips to optimize your saddle position for both comfort and performance!
Conclusion
Positioning the saddle on your triathlon bike is a crucial aspect of achieving optimal comfort and performance. By following the steps outlined in this article, you can find the perfect saddle position that suits your body and goals.
We began by emphasizing the importance of correct saddle position and how it can impact your efficiency, power output, and overall cycling experience. We then guided you through the process of preparing your triathlon bike for saddle positioning, including cleaning and inspecting your bike, checking your bike fit, gathering necessary tools, and measuring your current saddle position.
We proceeded to explain the steps involved in positioning the saddle on your triathlon bike, starting with adjusting the saddle height to achieve proper leg extension. We then discussed how to fine-tune the fore-aft position to optimize knee alignment and balance. Next, we explored how to determine the correct saddle tilt for comfortable riding. We emphasized the importance of incremental adjustments and testing each change to find the sweet spot.
We also highlighted the need to consider your personal preference, riding style, and individual anatomical differences when positioning the saddle. Additionally, we cautioned against common mistakes such as setting the saddle height too low or high, neglecting fore-aft position, and skipping professional bike fitting.
By avoiding these mistakes and implementing the tips and guidelines provided, you will be able to find the optimum saddle position that allows for both comfort and performance. Remember that saddle positioning is not a one-time task; it should be regularly reassessed and adjusted as your body, fitness level, and goals evolve.
So, take the time to experiment, listen to your body, and seek professional guidance when needed. With the right saddle position, you can optimize your triathlon bike riding experience, improve your power output, and enjoy your training and races to the fullest.
Now it’s time to get on your bike, put these recommendations into practice, and feel the difference that a well-positioned saddle can make in your triathlon journey!
