Home>Misc>Featured>How To Use Coverstitch Machine For Activewear
Featured
How To Use Coverstitch Machine For Activewear
Published: October 12, 2023
Learn how to use a coverstitch machine for activewear with our featured guide, providing step-by-step instructions and tips for perfect stitches every time.
Introduction
Welcome to the exciting world of activewear sewing! Whether you’re a fitness enthusiast or simply enjoy the comfort and versatility of activewear, learning how to use a coverstitch machine is a game-changer. A coverstitch machine allows you to create professional-looking hems, finish edges, and add decorative stitching to your activewear garments.
In this article, we will delve into the essential techniques and tips for using a coverstitch machine specifically for activewear sewing. Whether you’re a beginner or an experienced sewist looking to take your activewear sewing to the next level, this guide will provide you with valuable insights to successfully utilize a coverstitch machine.
Activewear fabrics, such as jersey knits and stretchy materials, require specialized sewing techniques to ensure durability and flexibility. The coverstitch machine excels in sewing these types of fabrics, providing stretchy seams that can withstand the rigors of physical activities.
By understanding the nuances of the coverstitch machine and applying the correct sewing techniques, you’ll be able to create high-quality activewear garments that are both stylish and functional.
In the following sections, we will explore the different components of a coverstitch machine and how to prepare it for use. We’ll also discuss the process of threading the machine, adjusting stitch settings, and various sewing techniques specifically tailored for activewear. Additionally, we’ll provide troubleshooting tips for common issues and share some helpful tricks to make your coverstitch machine experience even more enjoyable.
So, grab your activewear fabric, thread, and let’s dive into the world of coverstitch machines and activewear sewing – an adventure that will empower you to create your own unique garments that not only look great but also enhance your active lifestyle.
Understanding the Coverstitch Machine
Before we delve into using a coverstitch machine for activewear sewing, let’s familiarize ourselves with the key components and functions of this versatile machine.
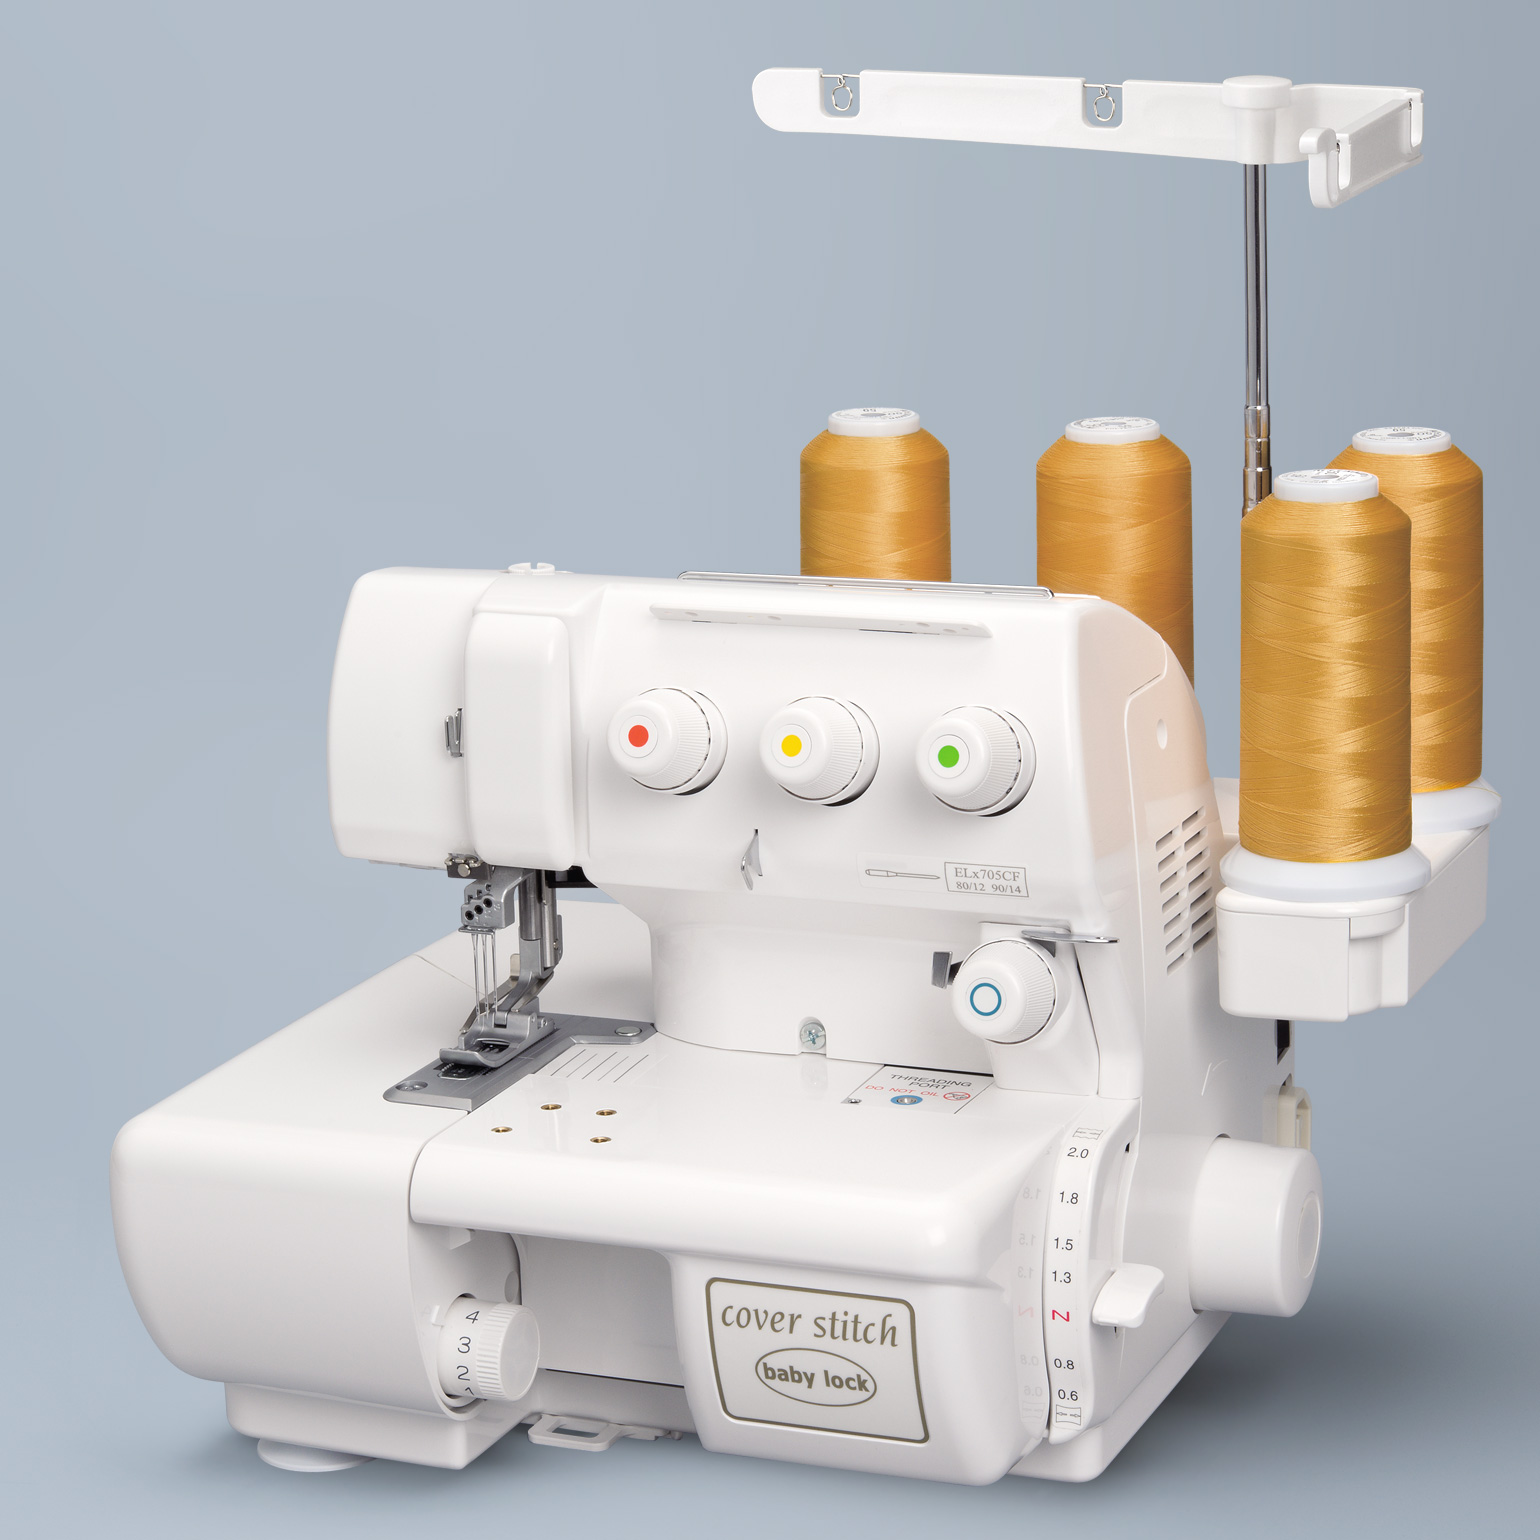
The coverstitch machine is specifically designed to create professional-looking hems, finish edges, and add decorative stitching to various fabrics, including activewear materials. It features three needles and a looper system that work together to form the distinctive coverstitch pattern on the right side of the fabric, while the underside remains flat.
Some coverstitch machines also offer the capability to create a chain stitch, which is a popular choice for decorative stitching on activewear garments.
When using a coverstitch machine, it is important to understand the different parts and their functions:
- Presser Foot: The presser foot holds the fabric in place and helps guide it through the machine.
- Needle Plate: The needle plate has guidelines and markings to assist in sewing straight and even stitches.
- Looper System: The looper system consists of upper and lower loopers, responsible for forming the stitches on the underside of the fabric.
- Tension Controls: The tension controls allow you to adjust the tension of the thread, ensuring balanced and even stitches.
- Stitch Length and Width Adjustments: These controls allow you to customize the length and width of the coverstitch and chain stitches.
- Thread Guide: The thread guide directs the threads to the proper threading paths, ensuring smooth stitches.
Understanding these components will help you navigate your coverstitch machine with confidence and achieve optimal results in your activewear sewing projects.
It’s worth noting that different coverstitch machines may have slightly different configurations and features. Consult your machine’s manual for specific instructions and guidelines.
Now that we have a solid understanding of the coverstitch machine and its components, let’s move on to the next section, where we’ll discuss the necessary steps to prepare the machine for use.
Preparing the Coverstitch Machine for Use
Before diving into your activewear sewing project, it’s essential to properly prepare your coverstitch machine. Taking the time to set up and organize your machine will ensure smooth and hassle-free sewing sessions. Here are the steps to prepare your coverstitch machine:
- Clean and Oil the Machine: Before every sewing session, it’s a good practice to clean the machine and remove any dust or lint that may have accumulated. Additionally, lubricate the machine as per the manufacturer’s instructions to ensure smooth and efficient operation.
- Choose the Correct Needles: For activewear sewing, it’s important to use appropriate needles. Ballpoint or stretch needles are ideal for sewing on knits and stretchy fabrics. Consult your machine’s manual to determine the appropriate needle type and size for your project.
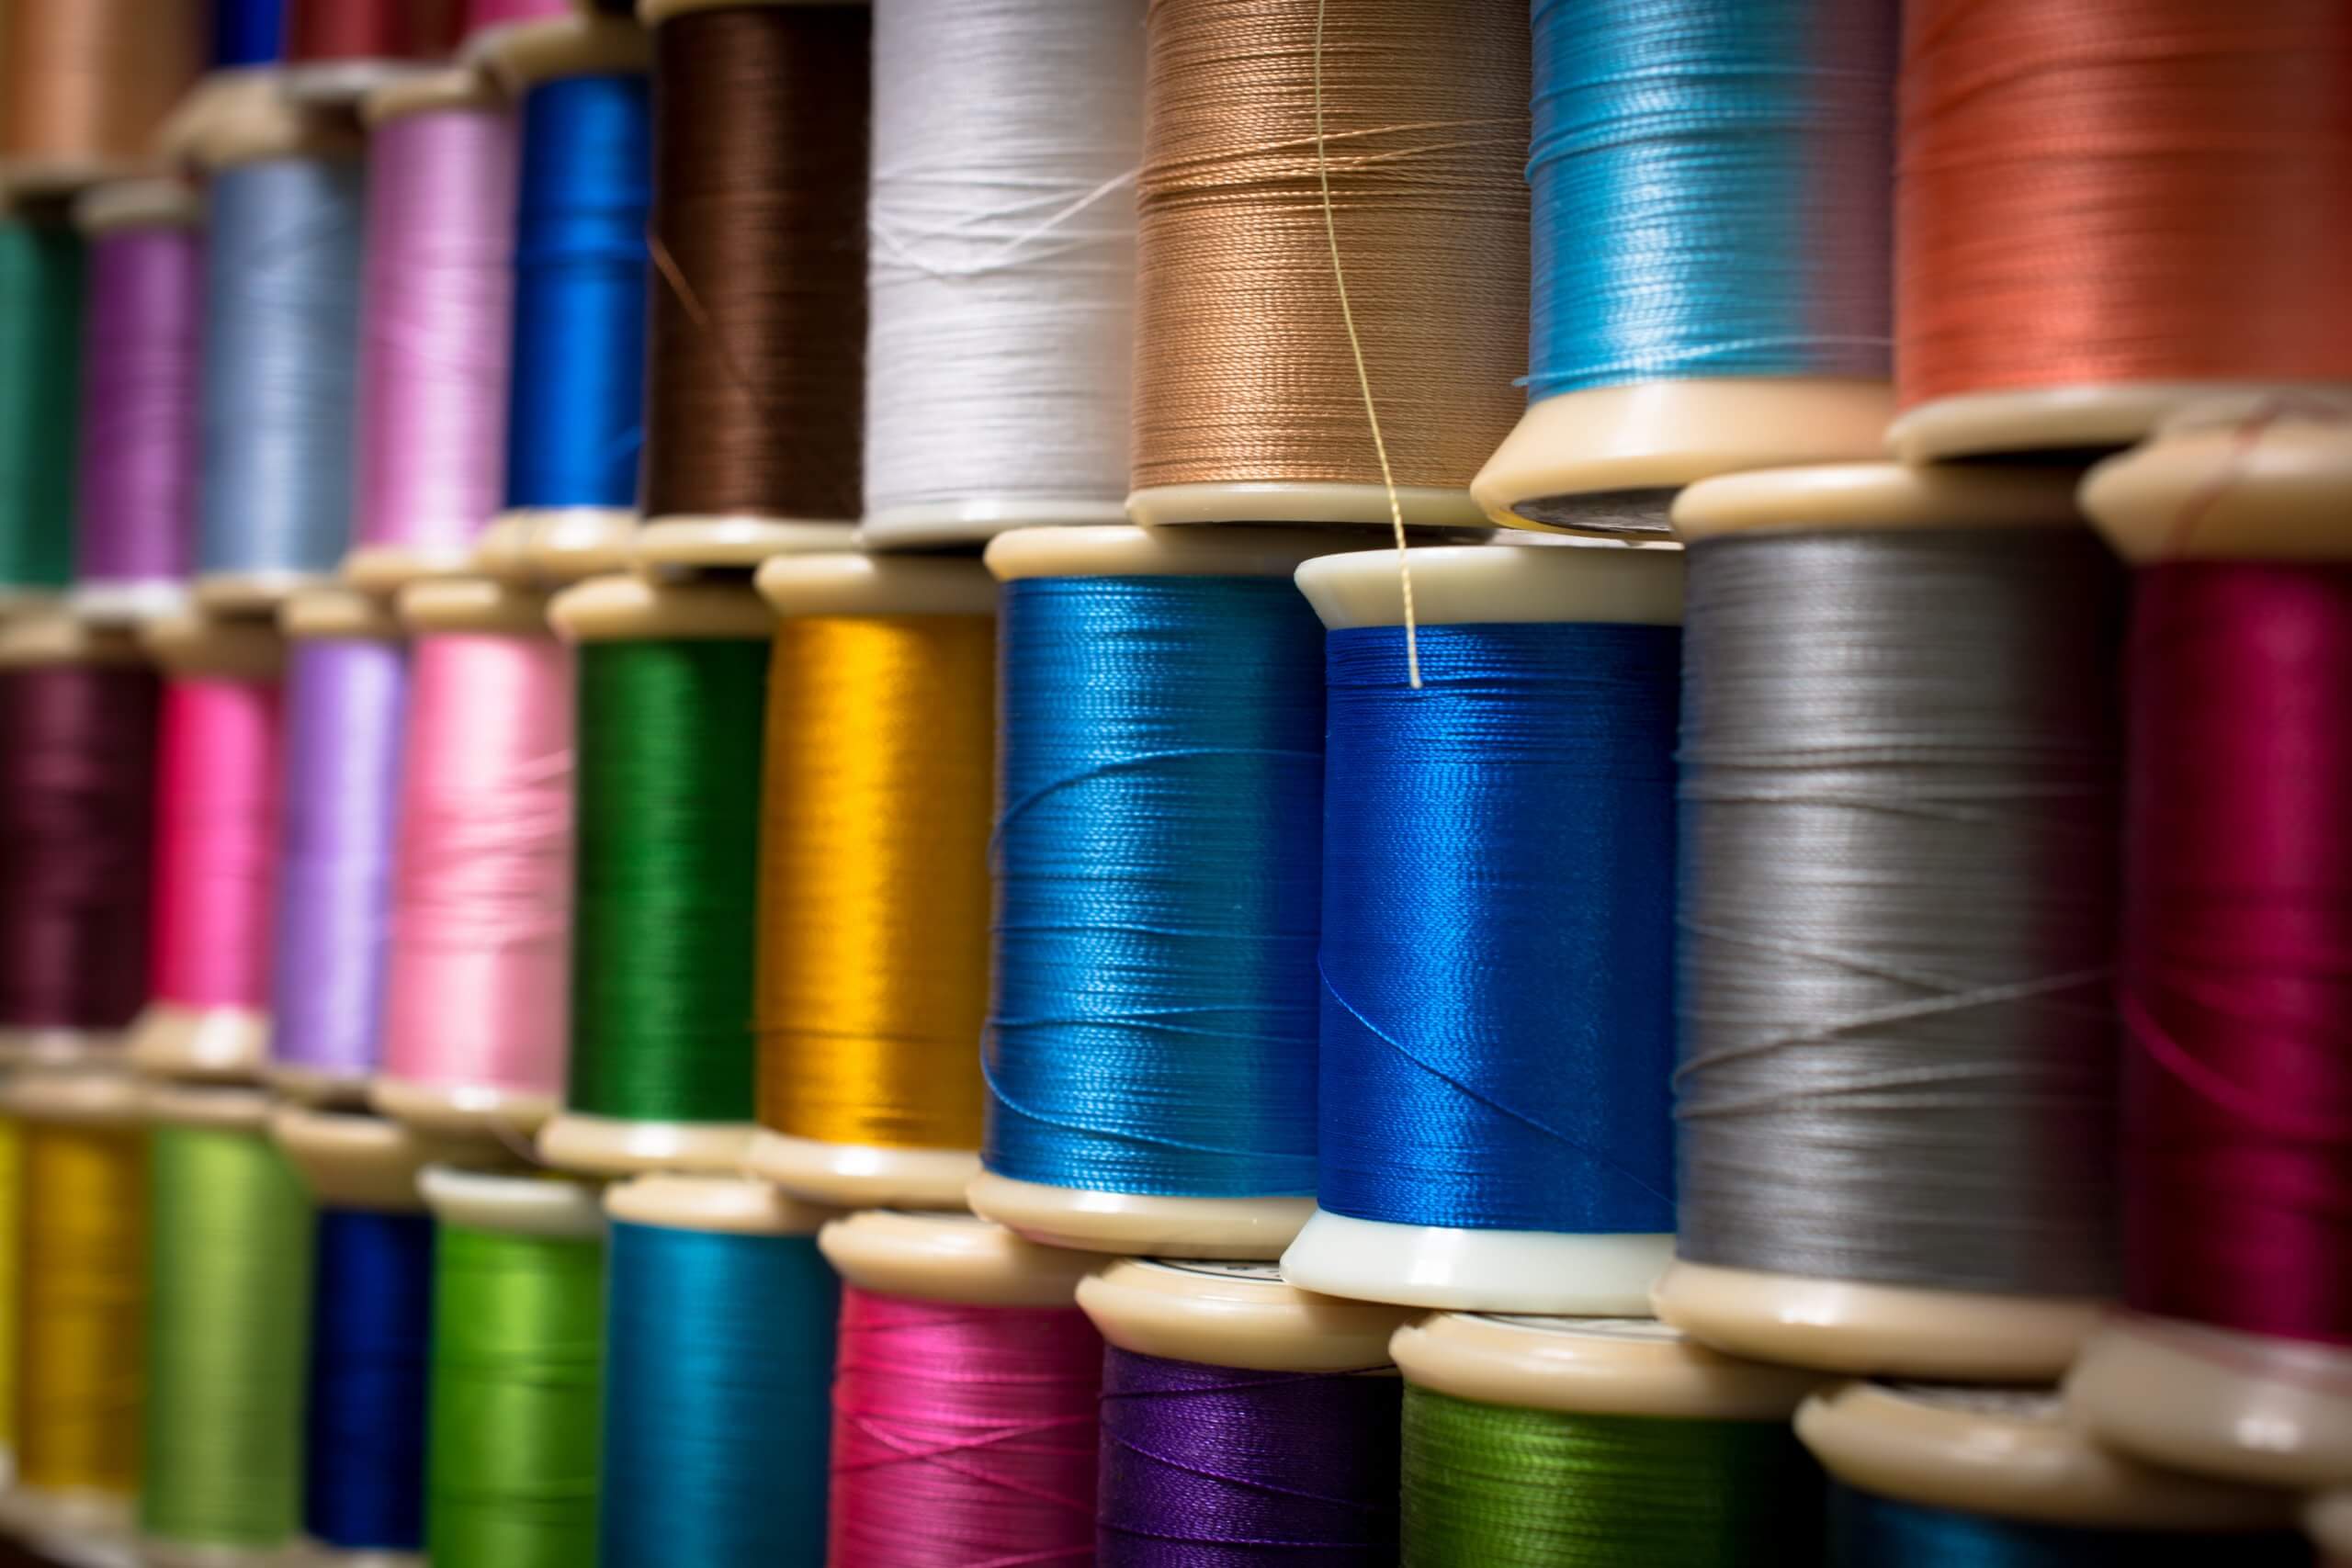
- Select the Right Threads: Choosing the right thread is crucial for the durability and visual appeal of your activewear garments. Opt for high-quality polyester or nylon threads that have good stretch and strength. Match the thread color to your fabric for a seamless finish.
- Prepare Bobbins: Wind bobbins with matching thread color to have them ready for quick thread changes during sewing. Ensure that the bobbin is properly inserted and secured in the bobbin case.
- Gather Necessary Tools and Accessories: Have all the necessary tools and accessories within reach, including a seam ripper, fabric scissors, measuring tape, and fabric clips. This will facilitate a smooth workflow, allowing you to focus on your sewing.
- Set Up the Work Area: Create a comfortable and organized work area with adequate lighting. Arrange your materials, patterns, and other supplies in a way that promotes efficiency and minimizes potential distractions.
By following these steps, you’ll ensure that your coverstitch machine is in optimal condition and ready to handle the demands of sewing activewear. Proper preparation sets the foundation for a successful sewing experience and helps you achieve professional-level results.
Once you’ve prepared your coverstitch machine, the next step is threading it correctly. In the following section, we’ll guide you through the threading process for a seamless sewing experience.
Threading the Coverstitch Machine
Threading a coverstitch machine may seem intimidating at first, but with a little practice and patience, you’ll become an expert in no time. Follow these step-by-step instructions to thread your coverstitch machine correctly:
- Start by raising the presser foot and raising the needles to their highest position.
- Thread the upper looper first. Follow the threading diagram provided in your machine’s manual, which will guide you through the specific thread path. Typically, you’ll need to pass the thread through a series of thread guides, tension disks, and the upper looper eye.
- After threading the upper looper, move on to threading the lower looper. Again, consult the threading diagram in your manual for specific instructions. As with the upper looper, you’ll need to pass the thread through various guides and tension disks.
- Next, thread the needles. Depending on your machine, you may have two or three needles. Follow the threading diagram for your machine, ensuring that each needle is threaded correctly.
- Once all the threads are in place, it’s crucial to correctly position and secure them. Hold onto the threads with one hand while slowly turning the handwheel towards you with the other hand. This will help the loopers catch the needles’ threads and form stitches.
- Continue turning the handwheel until a few inches of thread tail emerge from the needle plate. You’re now ready to start sewing!
Threading a coverstitch machine can be a bit challenging, especially if you’re new to sewing. Take your time, reference the manual when necessary, and don’t hesitate to seek help if needed. With practice, threading will become second nature.
Remember to always thread the machine with the presser foot up, as this releases the tension disks and enables the threads to properly engage with the loopers.
Threading is a critical step for achieving balanced stitches and preventing thread breakage. If you encounter any issues, double-check that the threads are inserted correctly and that the tensions are properly adjusted.
Now that you have successfully threaded your coverstitch machine, let’s move on to the next section, where we’ll discuss essential stitch settings for sewing activewear garments.
Adjusting Stitch Settings
When it comes to sewing activewear with a coverstitch machine, understanding and adjusting the stitch settings is crucial to achieve the desired results. Here are the key stitch settings to consider:
- Stitch Length: The stitch length determines the distance between each stitch. For most activewear projects, a stitch length of 2.5mm to 3.5mm works well. Experiment with different stitch lengths on scrap fabric to find the one that provides the desired stretch and durability.
- Needle Placement: The coverstitch machine allows you to adjust the needle placement. You can choose to sew with two or three needles. For basic stitching, using two needles is sufficient, while three needles create a more decorative effect. Refer to your machine’s manual for instructions on adjusting the needle placement.
- Tension: Proper tension is crucial to achieve well-balanced stitches. Adjust the tension settings according to the fabric and thread you’re using. As a general guideline, a higher tension setting may be required for thicker or stretchier fabrics, while lighter or less stretchy fabrics may require a lower tension setting. Test on scrap fabric and make adjustments as needed.
- Differential Feed: The differential feed is a feature that controls the rate at which fabric is fed under the presser foot. It helps to prevent stretching or gathering of the fabric. For most activewear fabrics, setting the differential feed to a neutral (N) position is recommended. However, you may need to adjust it based on the fabric’s stretch and the desired effect you want to achieve.
It’s important to note that the recommended stitch settings can vary depending on the specific fabric and design of your activewear garment. Always test the stitch settings on a scrap piece of fabric before sewing on your actual project. This will allow you to make any necessary adjustments and ensure that the stitches are secure and the fabric stretches comfortably.
As you gain more experience with your coverstitch machine, don’t be afraid to experiment with different stitch settings and creative combinations. This will allow you to personalize your activewear garments and add unique touches to your sewing projects.
Now that we’ve covered the essential stitch settings, let’s move on to the next section, where we’ll explore sewing techniques specifically tailored for activewear.
Sewing Techniques for Activewear
When sewing activewear garments with a coverstitch machine, there are several techniques that can help you achieve professional-looking results. Here are some key sewing techniques to consider:
- Seam Finishing: Use the coverstitch machine to finish the raw edges of your activewear seams. This helps to prevent fraying and adds a clean and professional look to the inside of your garment. Simply run the seam along the edge of the fabric using the appropriate stitch setting.
- Hemming: The coverstitch machine is perfect for hemming activewear garments. It creates a stretchy and durable hem that can withstand the movements and stretching associated with physical activities. Fold the fabric edge twice and align it with the desired hemline. Stitch along the fold, ensuring that the coverstitch forms on the outside of the garment.
- Elastic Application: When adding elastic to your activewear, the coverstitch machine is the ideal tool to secure it in place. Place the elastic on the edge of the fabric, stretch it slightly, and stitch it down using a straight coverstitch. This creates a comfortable and secure waistband or neckline that moves with your body.
- Decorative Stitching: Get creative by using the coverstitch machine to add decorative stitching to your activewear garments. Experiment with different thread colors and stitch widths to create unique and eye-catching designs. From topstitching to contrast stitching, let your creativity shine through.
- Inserting Zippers or Pockets: The coverstitch machine can also be used to insert zippers or attach pockets to your activewear garments. Secure the edges of the zipper or pocket with the coverstitch, ensuring that it is neatly and securely attached to the fabric.
As with any sewing technique, practice is key. Take the time to familiarize yourself with your coverstitch machine and test these techniques on scrap fabric before sewing them on your actual project. This will help you gain confidence and refine your skills.
Remember to adhere to proper sewing practices, such as backstitching at the beginning and end of each seam, and using fabric clips or pins to secure fabrics in place. Take your time and sew at a steady pace to ensure accurate stitches and a professional finish.
Now that we’ve explored various sewing techniques for activewear, let’s move on to the next section, where we’ll address common issues you may encounter and provide troubleshooting tips.
Troubleshooting Common Issues
While using a coverstitch machine for activewear sewing can be a rewarding experience, you may occasionally encounter some common issues. Here are a few troubleshooting tips to overcome these challenges:
- Uneven Stitching: If you notice uneven stitches, it may be due to incorrect tension settings. Check that the machine is threaded correctly, and adjust the tension accordingly. Additionally, make sure the fabric is feeding smoothly and evenly under the presser foot.
- Skipped Stitches: Skipped stitches can occur when the fabric is not properly fed or when the needles are dull. Ensure that the fabric is flat and taut as you sew, and replace the needles if necessary.
- Thread Breakage: Thread breakage can be caused by various factors, such as improper thread tension, using the wrong type of thread, or a dull needle. Check the tension settings, switch to a higher-quality thread, and replace the needles if needed.
- Jammed Machine: If the machine gets jammed, first, make sure to remove the fabric and turn off the machine. Gently remove any tangled threads or fabric scraps from the feed dogs, tension discs, and needle plate. Once cleared, rethread the machine and resume sewing.
- Skipped Stitches on Thick Seams: When sewing over thick seams, the coverstitch machine may skip stitches. To prevent this, try reducing the presser foot pressure, sewing slowly, or using a hump jumper to help the machine glide smoothly over the thick areas.
Remember, troubleshooting can be an iterative process. If you encounter an issue, try one solution at a time and test your machine on scrap fabric before continuing with your project. This will help you identify and resolve the problem effectively.
If you find that you’re consistently experiencing issues with your coverstitch machine, don’t hesitate to consult the machine’s manual or seek guidance from manufacturer support or sewing communities. They can provide specific solutions tailored to your machine’s model and address any unique challenges you may face.
Now that we’ve covered troubleshooting common issues, let’s move on to the next section, where we’ll share some valuable tips and tricks to enhance your experience with a coverstitch machine for activewear sewing.
Tips and Tricks for Using a Coverstitch Machine
As you become more comfortable with using a coverstitch machine for activewear sewing, there are several tips and tricks that can help you streamline your process and achieve even better results. Here are some valuable tips to enhance your coverstitch machine experience:
- Practice on Scrap Fabric: Before sewing on your actual project, spend some time practicing on scrap fabric. This allows you to familiarize yourself with the machine’s settings, test different stitches and techniques, and make any necessary adjustments before working on your final garment.
- Use Quality Needles: Invest in high-quality needles specifically designed for knits and stretch fabrics. These needles will provide smoother stitching and reduce the likelihood of skipped stitches or fabric damage.
- Streamline Thread Changes: To save time and thread, consider using cones or spools with larger thread capacity. This reduces the frequency of thread changes during your sewing sessions, allowing you to work more efficiently.
- Keep Your Machine Clean: Regularly clean your coverstitch machine to prevent dust, lint, and debris from affecting its performance. Use a small brush or compressed air to remove any buildup from the bobbin area, needle plate, and thread guides.
- Experiment with Thread Tension: Don’t be afraid to experiment with different thread tensions to achieve the desired stitch quality. Make small adjustments and refer to your machine’s manual for guidance on tension settings for specific fabrics and stitch techniques.
- Use Seam Guides: Seam guides, such as magnetic or adhesive guides, can help you maintain a consistent seam allowance and stitch alignment. Place them on your machine’s needle plate or presser foot to guide your fabric for accurate stitching.
- Invest in Extra Presser Feet: Consider investing in additional presser feet that are designed for specific tasks, such as binding, elastic application, or flatlocking. These specialized feet can expand your sewing capabilities and make certain techniques easier to accomplish.
- Take Breaks and Rest: Sewing can be a repetitive activity, especially when working on larger projects. Remember to take regular breaks and rest your hands and eyes. This helps to prevent fatigue and maintain focus while ensuring enjoyable and injury-free sewing sessions.
Using a coverstitch machine for activewear sewing requires practice and patience. With time, you’ll develop a deep understanding of your machine’s capabilities and be able to create professional-quality garments.
Remember to enjoy the process and have fun with your sewing projects. Embrace creativity, explore new techniques, and let your coverstitch machine become a tool for expressing your unique style.
Now that we’ve explored various tips and tricks, we’re ready to conclude our journey with a recap of what we’ve learned.
Conclusion
Congratulations! You’ve now gained a wealth of knowledge on using a coverstitch machine for sewing activewear garments. From understanding the components of the machine to threading it correctly, adjusting stitch settings, and utilizing various sewing techniques, you’re well-equipped to create high-quality activewear.
Remember that practice is key. Take the time to experiment with different fabrics, threads, and stitch settings to find what works best for your projects. Don’t be discouraged by any challenges you may face along the way. Sewing is a skill that improves with time and experience.
Continue exploring and expanding your sewing horizons. As you refine your skills, consider exploring advanced techniques such as flatlocking, attaching bindings, or adding unique embellishments to your activewear garments.
Always refer to your machine’s manual for specific instructions and guidance. Additionally, don’t hesitate to reach out to manufacturer support or sewing communities if you have any questions or encounter difficulties that you can’t resolve on your own.
Remember, sewing is an art form that allows you to express your creativity and create garments tailored to your personal style. Embrace the journey, challenge yourself, and most importantly, enjoy the process.
Now, it’s time to grab your activewear fabric, thread your coverstitch machine, and let your creativity soar as you sew stylish and functional activewear garments with confidence!