Featured
Why Does My Treadmill Shake When I Run
Modified: January 2, 2024
"Get rid of treadmill shakes with our featured products. Enjoy a stable and smooth running experience every time."
Introduction
A shaking treadmill can be a frustrating experience for anyone trying to get a good workout. Not only does it disrupt the rhythm and stability of your running or walking, but it can also be a safety hazard. If you’ve ever experienced your treadmill shaking while you run, you’re not alone. Many treadmill users have encountered this issue at some point, and understanding the possible reasons behind it is crucial in finding a solution.
There can be various factors contributing to the shaking of a treadmill, including an uneven surface, loose bolts or screws, improper belt tension, worn-out motor mounts, faulty shock absorption system, or even the user’s running form. Each of these factors can have a significant impact on the stability and performance of your treadmill.
In this article, we will delve into the possible reasons behind a shaking treadmill, discuss how to diagnose the cause of the shaking, and explore potential solutions to fix the issue. By understanding the underlying causes and implementing the necessary measures, you can restore your treadmill to its optimal state and enjoy smooth and safe workouts.
Possible Reasons for the Treadmill Shaking
When your treadmill shakes while you’re using it, it can make your workout experience less enjoyable and potentially dangerous. Understanding the potential reasons for the shaking can help you identify the problem and find an appropriate solution. Here are some common factors that can cause a treadmill to shake:
-
Uneven Surface: One possible reason for your treadmill to shake is an uneven surface. If the floor beneath your treadmill is not level, it can create imbalance and instability during your workout.
-
Loose Bolts or Screws: Another culprit for the shaking could be loose bolts or screws. Over time, the vibrations from regular use may cause the fasteners to become loose, compromising the stability of the treadmill.
-
Improper Belt Tension: The tension of the treadmill belt is essential to maintain proper functioning. If the belt is too loose or too tight, it can result in excessive movement and shaking while you’re running or walking.
-
Worn Out Motor Mounts: The motor mounts on a treadmill help to absorb vibrations and keep the machine stable. If these mounts become worn out or damaged, they can no longer effectively reduce the shaking, leading to an uncomfortable workout experience.
-
Faulty Shock Absorption System: Treadmills are equipped with shock absorption systems to minimize impact and provide a cushioned feel while running. If this system is faulty or deteriorated, it can contribute to the shaking sensation.
-
User’s Running Form: Sometimes, the reason for the treadmill shaking may not be due to the machine itself, but rather the user’s running form. Poor running technique, such as overstriding or landing heavily on the treadmill, can cause excessive vibrations that transfer to the entire machine.
By considering these potential reasons for the shaking, you can narrow down the issue and take appropriate steps to resolve it. In the following sections, we will discuss how to diagnose the cause of the shaking and explore possible solutions to fix the problem.
Uneven Surface
An uneven surface can be one of the primary causes of a shaking treadmill. If the floor beneath the treadmill is not level, it can create an imbalance that leads to vibrations and instability during your workout. This unevenness can result from an uneven carpet, a sloping or bumpy floor, or an incorrect placement of the treadmill on the floor.
To determine if an uneven surface is causing the shaking, start by checking the floor beneath the treadmill. Use a bubble level or a smartphone level app to assess the levelness. If you notice that the treadmill is not sitting on a level surface, you will need to take measures to correct it.
One solution is to adjust the treadmill’s position on the floor. Move it to an area where the floor is more level or use shims to compensate for any unevenness. Shims are small pieces of material, like wood or rubber, that can be placed underneath the feet of the treadmill to level it out. Adjust each foot until the treadmill is stable and there is no noticeable shaking.
If the unevenness is due to a carpet, you may need to consider placing a sturdy plywood board or a treadmill mat underneath the machine. These materials can help provide a more stable and level surface for your treadmill.
In some cases, you may need to consult a professional to address more significant floor irregularities. They can provide guidance on the best solutions, such as installing a subfloor or using self-leveling compound to create a level surface for your treadmill.
Ensuring a level surface for your treadmill is crucial not only for stability but also for safety. It can help prevent accidents and injuries that may arise from a shaking and wobbling machine. By addressing the issue of an uneven surface, you can minimize vibrations and enjoy a more comfortable workout experience on your treadmill.
Loose Bolts or Screws
Another potential reason for a shaking treadmill is loose bolts or screws. Over time, the vibrations caused by the movement of the machine during workouts can gradually loosen the fasteners that hold different parts of the treadmill together. This can lead to instability and noticeable shaking during use.
To check if loose bolts or screws are the cause of the shaking, start by examining the visible parts of the treadmill, such as the frame, handrails, console, and motor cover. Look for any bolts or screws that appear loose or out of place. Use a wrench or screwdriver to tighten them if necessary. Be sure to follow the manufacturer’s guidelines for tightening to avoid over-tightening or damaging the treadmill.
Keep in mind that there may be hidden bolts or screws within the treadmill’s structure. Consult the user manual or contact the manufacturer for guidance on how to access these hidden components. It’s important to inspect and tighten all fasteners to ensure the stability and safety of the machine.
In addition to tightening loose bolts and screws, it’s also a good idea to perform regular maintenance on your treadmill. Periodically check and tighten the bolts and screws, even if there are no signs of shaking. This proactive approach can help prevent the issue from occurring and ensure that the treadmill remains stable during your workouts.
If you find that the shaking persists even after tightening all visible bolts and screws, it’s possible that there may be internal fasteners that require attention. In such cases, it is advisable to contact the manufacturer or a professional technician who can inspect and repair the treadmill for you.
By regularly inspecting and tightening loose bolts and screws, you can minimize the shaking and instability of your treadmill. This maintenance practice not only improves the overall performance of the machine but also promotes a safe and enjoyable workout experience.
Improper Belt Tension
The tension of the treadmill belt plays a crucial role in its performance and stability. If the belt is too loose or too tight, it can cause the treadmill to shake during use. Improper belt tension can happen over time due to regular wear and tear or incorrect adjustments during maintenance.
To determine if improper belt tension is the cause of the shaking, start by observing the behavior of the belt while the treadmill is in use. A loose belt may slip or move excessively from side to side, while a tight belt may cause the motor to strain and produce unusual noises.
To correct the belt tension, refer to your treadmill’s user manual for specific instructions. Most treadmills have a belt tension adjustment mechanism, such as a tension knob or a bolt, located at the rear of the machine near the motor. Use the appropriate tool, typically an Allen wrench, to make the necessary adjustments.
If the belt is too loose, turn the tension knob or bolt clockwise to tighten it. Be careful not to over tighten, as this can cause excess friction and strain on the motor. If the belt is too tight, turn the tension knob or bolt counterclockwise to loosen it. Aim for a tension that allows the belt to move smoothly without slipping, but not so tight that it restricts the movement of the belt or strains the motor.
It’s important to note that different treadmill models may have specific belt tensioning requirements, so it’s essential to follow the manufacturer’s guidelines. If you’re unsure about adjusting the belt tension on your own, consider seeking assistance from a professional technician who can ensure proper adjustments and alignment.
Regularly check the belt tension and make adjustments as needed to maintain optimal performance and reduce the likelihood of a shaking treadmill. By properly tensioning the belt, you can enhance the stability and comfort of your workouts, allowing for a more enjoyable and effective exercise experience.
Worn Out Motor Mounts
Motor mounts are essential components of a treadmill as they help absorb vibrations and keep the machine stable during use. Over time, constant movement and regular wear can cause the motor mounts to deteriorate or become worn out. When the motor mounts are compromised, it can lead to a shaking or wobbling treadmill.
To determine if worn out motor mounts are causing the shaking, carefully inspect the motor mounts for any visible signs of damage or wear. Look for cracks, excessive movement, or any irregularities in their appearance. If you suspect that the motor mounts are the issue, it is advisable to contact the manufacturer or consult a professional technician for further inspection and possible replacement.
Replacing motor mounts typically involves accessing the motor compartment of the treadmill, which may require removing the motor cover or other components. It is crucial to follow the manufacturer’s instructions or seek professional assistance to ensure the motor mounts are replaced correctly.
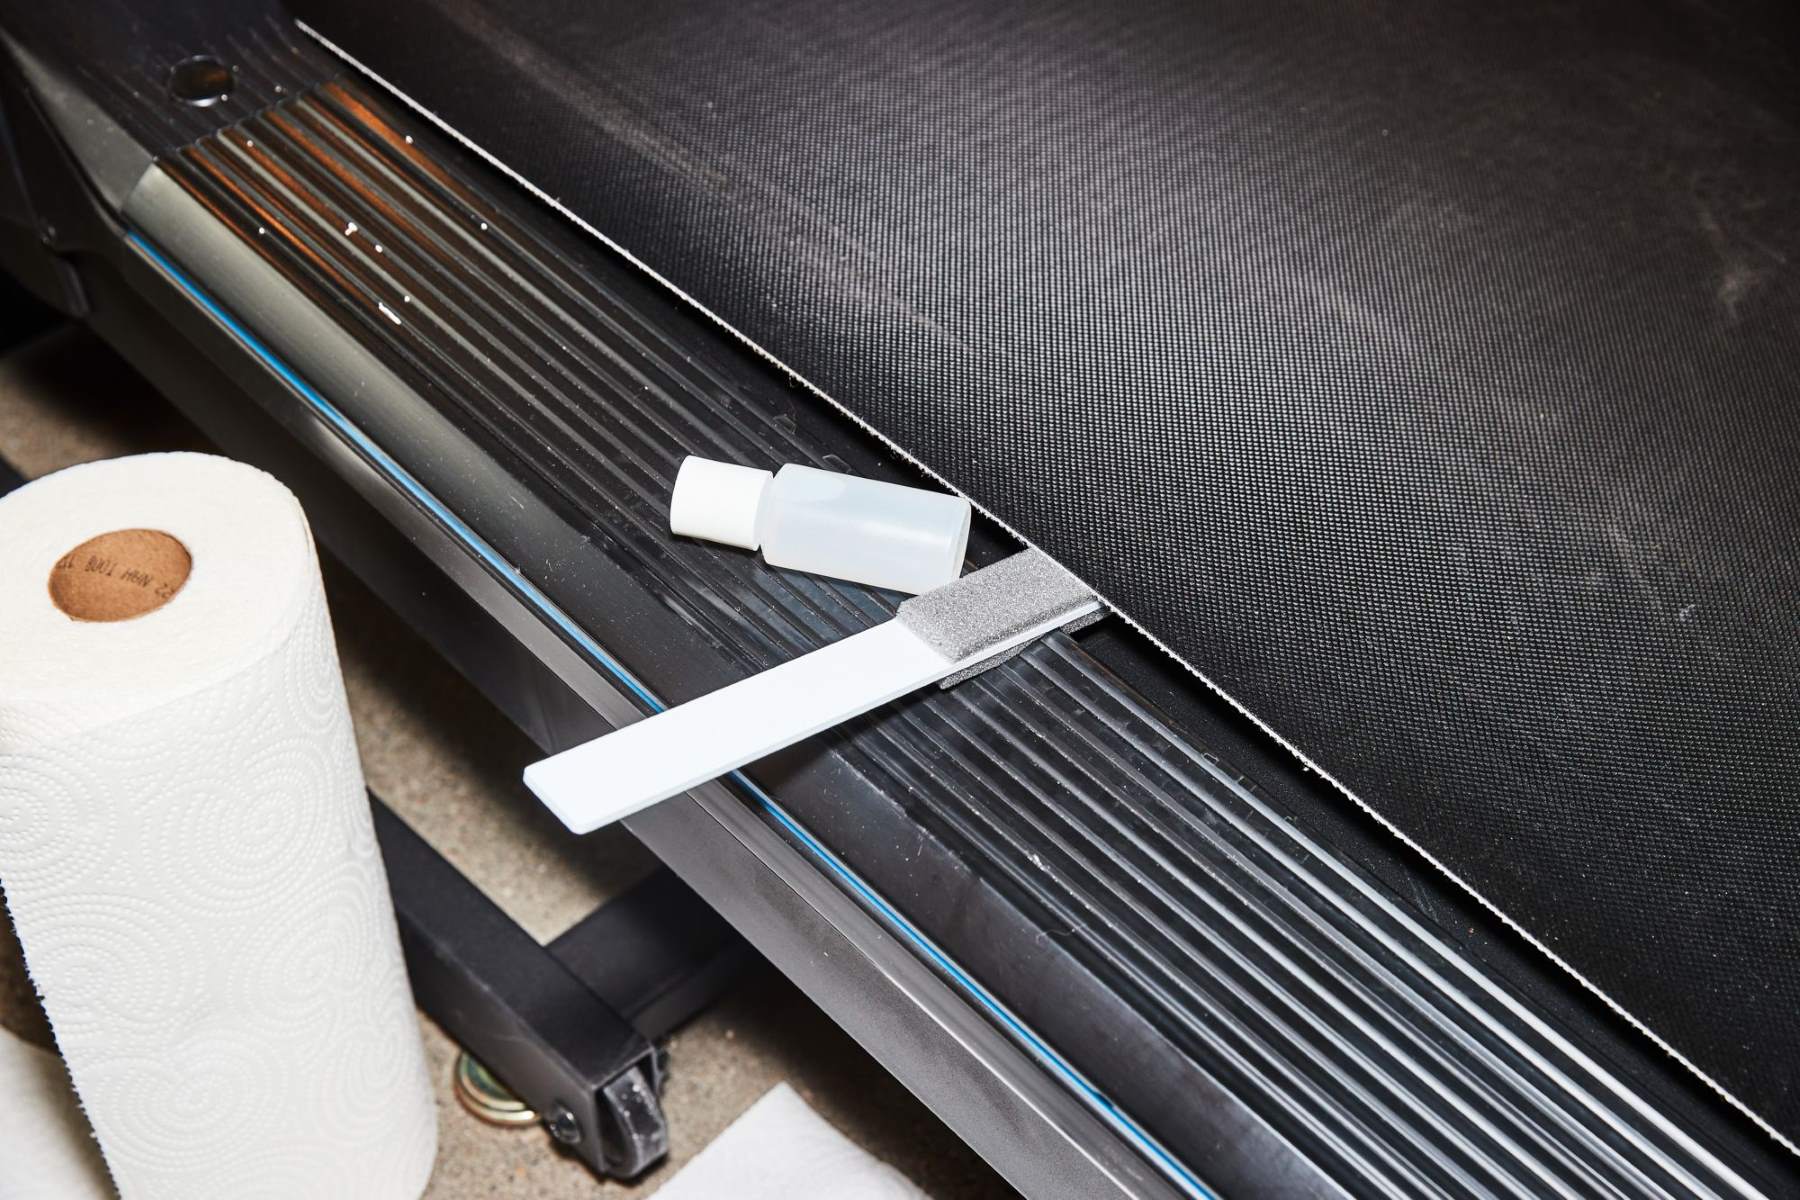
Regular maintenance and care can help extend the lifespan of motor mounts. Keep the treadmill clean, lubricate the belt as directed, and avoid excessive dust and debris buildup around the motor area. These practices can help minimize wear and tear on the motor mounts, reducing the likelihood of a shaking treadmill.
If the motor mounts are indeed damaged or worn out, replacing them will restore the stability and reduce any shaking or wobbling during use. Taking prompt action in addressing worn out motor mounts ensures the longevity and smooth operation of your treadmill, providing you with a safe and enjoyable exercise experience.
Faulty Shock Absorption System
A treadmill’s shock absorption system is designed to reduce the impact on your joints and provide a comfortable running or walking experience. However, if the shock absorption system is faulty or worn out, it can contribute to the shaking or instability of the treadmill.
To determine if the shock absorption system is causing the shaking, carefully inspect the treadmill’s deck and cushions. Look for any signs of damage or excessive wear, such as cracks, tears, or sagging. Additionally, pay attention to any unusual noises or a lack of cushioning during use.
If you suspect that the shock absorption system is faulty, it may be necessary to contact the manufacturer or a professional technician for further inspection and repair. They can properly assess the condition of the system and advise on the necessary steps to fix or replace it.
In some cases, the shock absorption system can be repaired by replacing the damaged components, such as the deck or cushioning pads. However, if the system is severely compromised, it may require a complete replacement. The manufacturer or technician will be able to provide guidance on the best course of action.
To prevent future issues with the shock absorption system, it’s essential to properly maintain your treadmill. Regularly clean the deck and lubricate it as recommended by the manufacturer. Avoid excessive dirt or dust buildup that could affect the system’s performance. Additionally, be mindful of the weight capacity of your treadmill and avoid using it beyond its recommended limit, as this can put additional strain on the shock absorption system.
By ensuring that the shock absorption system is functioning correctly, you can minimize the shaking and improve the overall stability of your treadmill. A well-maintained and reliable shock absorption system will provide a more comfortable workout experience, reducing the impact on your joints and allowing you to focus on achieving your fitness goals.
User’s Running Form
While it may seem counterintuitive, the user’s running form can sometimes be a contributing factor to a shaking treadmill. Poor running technique, such as overstriding or landing heavily on the treadmill, can generate excessive vibrations that transfer to the entire machine.
To evaluate if the user’s running form is causing the shaking, consider recording a video of yourself running on the treadmill. Analyze the footage to identify any irregularities or inefficient running mechanics. Look for signs of overstriding, where your feet land too far in front of your body, or excessive bouncing, which indicates a heavy impact with each step.
To improve your running form and reduce treadmill shaking, focus on the following key elements:
- Footstrike: Aim for a midfoot or forefoot strike, where your foot lands directly below your center of gravity. This reduces the impact on the treadmill and minimizes vibrations.
- Stride Length: Avoid overstriding by maintaining a moderately short and controlled stride. This helps reduce braking forces that can contribute to shaking.
- Posture: Keep your torso upright, shoulders relaxed, and core engaged. Good posture distributes your weight evenly and promotes a more stable and efficient stride.
- Arm Swing: Maintain a natural and relaxed arm swing, allowing your arms to move in sync with your legs. Avoid excessive swinging or crossing your arms across your body.
- Gradual Progression: If you’re new to running or using a treadmill, gradually increase your speed and intensity. Sudden increases can lead to instability and excessive vibrations.
It may also be beneficial to seek guidance from a running coach or physical therapist who can analyze your running form and provide personalized recommendations for improvement. They can help identify any specific issues or imbalances that may be contributing to the shaking and provide exercises or drills to address them.
By focusing on improving your running form, you can reduce the shaking and instability of the treadmill. Not only will this help create a smoother workout experience, but it will also enhance your overall running efficiency and decrease the risk of potential injuries.
Diagnosing the Cause of the Shaking Treadmill
When faced with a shaking treadmill, it is essential to diagnose the specific cause before attempting any repairs or adjustments. By identifying the underlying issue, you can implement the appropriate solution and restore the stability and performance of your treadmill. Here are some steps to help diagnose the cause of the shaking:
-
Observe the Shaking: Pay close attention to the shaking and observe its characteristics. Note the intensity, frequency, and specific areas where the shaking seems to originate from. This information will help guide your diagnosis.
-
Inspect Visible Components: Carefully examine the treadmill for any visible signs of damage, loose parts, or worn-out components. Check the bolts, screws, belt, motor mounts, and shock absorption system. Look for any irregularities or abnormalities that could be contributing to the shaking.
-
Perform Functional Tests: Operate the treadmill at different speeds and incline levels to see if the shaking worsens or remains consistent. Pay attention to how the machine behaves during various scenarios, such as walking, jogging, or running.
-
Make Adjustments: Based on your observations and initial inspection, try making adjustments to potential problem areas. This can include tightening loose bolts, adjusting belt tension, or realigning components. Take note of any changes in the shaking to narrow down the cause.
-
Seek Professional Help: If you are unable to identify the cause of the shaking or if the shaking persists despite your adjustments, it may be necessary to seek professional assistance. Contact the manufacturer or a qualified technician who can perform a thorough inspection and provide expert guidance.
Remember that diagnosing the cause of a shaking treadmill might require trial and error. It is important to approach the process systematically and be patient in your troubleshooting efforts. By carefully evaluating the shaking and conducting the necessary tests, you can pinpoint the source of the problem and take appropriate steps towards resolving it.
Understanding the cause of the shaking is vital to ensure effective solutions and prevent further damage. By diagnosing the issue correctly, you can address the underlying problem and restore your treadmill to optimal performance, providing you with a smooth and stable workout experience.
Checking the Surface
One of the first steps in diagnosing the cause of a shaking treadmill is to check the surface on which it is placed. An uneven or unstable surface can contribute to the treadmill’s instability and cause it to shake during use.
Start by examining the floor beneath the treadmill. Look for any visible signs of unevenness, such as bumps or sloping areas. If the floor is not level, it can create an imbalance that transfers to the treadmill, leading to shaking and wobbling.
To test the surface’s levelness, you can use a bubble level or a smartphone level app. Place the level on different areas of the treadmill’s base or frame to see if it indicates any significant variations. Make sure to check both the front-to-back and side-to-side orientations, as the surface may be uneven in different directions.
If you find that the surface is indeed uneven, there are a few options to address it. The simplest solution is to move the treadmill to a different location where the floor is more level. Alternatively, you can try rearranging furniture or using shims to compensate for the unevenness.
Shims are small pieces of material, such as wood or rubber, that can be placed underneath the feet of the treadmill to level it out. Start by determining the areas where the treadmill is unsteady, and then carefully insert the shims underneath the corresponding feet until the treadmill is stable and no longer shakes.
In some cases, the unevenness of the surface may be caused by the presence of carpeting. If this is the case, consider placing a sturdy plywood board or a treadmill mat underneath the machine to provide a more stable and level surface.
If the uneven surface is due to more significant floor irregularities, it may be necessary to consult a professional. They can assess the situation and provide recommendations for addressing the issue, such as installing a subfloor or using self-leveling compound to create a level surface for the treadmill.
Ensuring a level surface is crucial for the stability and safety of your treadmill. By checking and addressing any unevenness in the surface, you can minimize vibrations and shaking, creating a more enjoyable and safer workout experience.
Examining the Bolts and Screws
Loose bolts and screws can be a common culprit behind a shaking treadmill. Over time, the vibrations from regular use can cause these fasteners to become loose, compromising the stability of the machine. Thus, it is important to examine the bolts and screws to see if they are securely fastened.
Start by visually inspecting the treadmill for any visible signs of loose bolts or screws. Make sure to check the frame, handrails, console, motor cover, and any other visible areas where fasteners may be present.
Using a wrench or a screwdriver, gently attempt to tighten any bolts or screws that appear loose. Take care not to overtighten them, as this could lead to stripping or damaging the fasteners or their corresponding holes. Refer to the user manual or manufacturer’s guidelines for the appropriate tightening torque if available.
It’s important to note that some bolts or screws may be located in hidden areas or require specialized tools for adjustment. Consult the user manual or contact the manufacturer for guidance on accessing and tightening these fasteners if needed.
In addition to visually inspecting and tightening the bolts and screws, it is recommended to perform regular maintenance on the treadmill. This includes periodically checking and tightening all visible bolts and screws, even if there are no signs of shaking. This proactive approach can help prevent the issue from occurring and ensure the treadmill remains stable during use.
In the event that the shaking persists despite tightening all visible bolts and screws, it is possible that there may be internal fasteners that require attention. If this is the case, it is advisable to contact the manufacturer or a professional technician who can inspect and repair the treadmill for you.
By examining and tightening loose bolts and screws, you can minimize shaking and instability in your treadmill. Regular maintenance and care not only improve the overall performance of the machine but also promote a safe and enjoyable workout experience.
Adjusting the Belt Tension
The tension of the treadmill belt plays a crucial role in its performance and stability. If the belt is too loose or too tight, it can cause the treadmill to shake during use. Therefore, properly adjusting the belt tension is essential to ensure a smooth and stable workout experience.
To adjust the belt tension, start by referring to the user manual or the manufacturer’s guidelines for your specific treadmill model. Different treadmills may have different mechanisms for adjusting the belt tension, such as a tension knob, a tension bolt, or an adjustment screw.
First, make sure the treadmill is unplugged for safety. Then, locate the tension adjustment mechanism. It is typically located at the rear of the machine, near the motor or the belt roller. For treadmills with a tension knob, turn it counterclockwise to loosen the belt or clockwise to tighten it. For treadmills with a tension bolt or an adjustment screw, use an appropriate tool, such as an Allen wrench, to make the necessary adjustments.
To determine the appropriate tension, aim for a middle ground – not too loose and not too tight. The belt should be tight enough that it doesn’t slip or lose traction during use, but not so tight that it restricts the movement of the belt or strains the motor.
To check the tension, start by walking or jogging lightly on the treadmill. Observe the behavior of the belt. If it feels loose, slips, or moves excessively from side to side, it indicates the need for tightening. Conversely, if the belt is too tight, it may cause excessive friction and strain on the motor.
Make small adjustments at a time and test the tension after each adjustment. Take note of any changes in the shaking or stability of the treadmill. This allows you to fine-tune the tension until it is at an optimal level.
It’s important to note that different treadmill models may have specific belt tensioning requirements, so it’s crucial to follow the manufacturer’s guidelines. If you are uncertain about adjusting the belt tension on your own, consider seeking assistance from a professional technician who can ensure proper adjustments and alignment.
By properly adjusting the belt tension, you can minimize shaking and maintain the stability and performance of your treadmill. Regularly check the tension and make adjustments as needed to ensure a comfortable and safe workout experience.
Inspecting the Motor Mounts
Motor mounts are critical components of a treadmill as they help absorb vibrations and keep the machine stable during use. Over time, these motor mounts can become worn out or damaged, which can contribute to a shaking treadmill. Therefore, inspecting the motor mounts is an important step in diagnosing and resolving the issue.
To begin the inspection, locate the motor mounts on your treadmill. They are typically situated near the motor and connected to the frame or base of the machine. Carefully examine the motor mounts for any visible signs of damage, such as cracks, tears, or excessive wear. Take note of any irregularities or abnormalities that could affect the stability of the treadmill.
If you notice any apparent damage or wear, it is advisable to contact the manufacturer or consult a professional technician for a more thorough inspection. They will have the expertise to determine if the motor mounts need to be repaired or replaced.
Replacing motor mounts might require accessing the motor compartment of the treadmill, which typically involves removing the motor cover or other components. It is essential to follow the manufacturer’s instructions or seek professional assistance to ensure proper replacement of the motor mounts.
To prevent future issues with the motor mounts, it is crucial to practice regular maintenance on your treadmill. Keep the machine clean, lubricate the belt as recommended, and avoid excessive dust and debris buildup around the motor area. These practices can help minimize wear and tear on the motor mounts, reducing the likelihood of a shaking treadmill.
If the motor mounts are indeed damaged or worn out, replacing them will help restore stability and reduce any shaking or wobbling during use. Taking prompt action in addressing worn-out motor mounts ensures the longevity and smooth operation of your treadmill, providing you with a safe and enjoyable exercise experience.
Inspecting the motor mounts is an important step in diagnosing the cause of a shaking treadmill. By identifying any damage or wear, you can take necessary steps to repair or replace the motor mounts, restoring stability and ensuring a more comfortable workout experience.
Testing the Shock Absorption System
The shock absorption system of a treadmill is designed to reduce the impact on your joints and provide a comfortable running or walking experience. If the shock absorption system is faulty or worn out, it can contribute to shaking or instability during use. To determine if the shock absorption system is the cause of the shaking, you can perform a series of tests to evaluate its effectiveness.
First, inspect the treadmill’s deck and cushioning system. Look for any visible signs of damage, such as cracks, tears, or sagging. Pay attention to any unusual noises or a lack of cushioning when walking or running on the treadmill.
Next, perform a test run on the treadmill at a moderate pace. Pay close attention to how the machine feels as you walk or run. Note any excessive impact or discomfort in your joints. If you experience a harsh impact or feel like there is inadequate cushioning, it may indicate a problem with the shock absorption system.
You can further test the shock absorption system by varying the speed and incline levels. Gradually increase the speed and incline and observe how the treadmill responds. If the shaking or instability intensifies at higher speed or incline settings, it may be a sign of a faulty shock absorption system.
If you suspect that the shock absorption system is not functioning as it should, it is advisable to contact the manufacturer or a professional technician for further evaluation. They can perform a thorough inspection of the system and provide recommendations for repair or replacement if necessary.
In the case of minor issues with the shock absorption system, such as worn-out cushioning pads, they may be replaceable. Depending on the treadmill model, you may be able to order replacement parts and follow the manufacturer’s guidelines to install them.
Regular maintenance of the shock absorption system is essential to preserve its effectiveness. Keep the treadmill’s deck clean and free from debris, and follow the manufacturer’s recommendations for lubricating the belt. These maintenance practices can help extend the lifespan of the shock absorption system and ensure a comfortable and stable workout experience.
By testing the shock absorption system, you can identify any deficiencies that may be causing the treadmill to shake. Proper maintenance and, if needed, repair or replacement can restore the system’s functionality, reduce shaking, and provide a more enjoyable and low-impact workout on your treadmill.
Analyzing the User’s Running Form
The user’s running form can have a significant impact on the stability of a treadmill. Poor running technique, characterized by overstriding or heavy footfalls, can generate excessive vibrations that transfer to the entire machine, resulting in shaking. Analyzing and improving the user’s running form can help minimize these vibrations and ensure a smoother workout experience.
To analyze the user’s running form on the treadmill, start by observing yourself in a mirror or recording a video of your workout. Pay attention to the following aspects of your form:
- Footstrike: Observe where and how your feet land on the treadmill. Aim for a midfoot or forefoot strike, ensuring that your feet land directly underneath your body. Avoid overstriding, where your foot lands too far in front of your body.
- Stride Length: Analyze the length of your stride. A moderately short and controlled stride can help reduce braking forces and minimize vibrations. Avoid taking long, exaggerated steps that can contribute to instability.
- Upper Body Stability: Assess the stability of your upper body, including your posture and arm movement. Maintain an upright posture, with your torso aligned and your shoulders relaxed. Avoid excessive swinging or crossing of the arms as these can disrupt your balance.
- Core Engagement: Check if you’re engaging your core muscles. A strong core helps provide stability and support to your entire body, reducing the likelihood of unnecessary vibrations.
Analyzing your running form on the treadmill can be challenging. Consider seeking guidance from a running coach or a specialized trainer who can provide expert advice. They can identify specific areas for improvement and provide exercises or drills to help you refine your form.
Aside from analyzing your form, it’s essential to focus on gradual progression when using the treadmill. Sudden increases in speed or intensity can lead to instability and augment vibrations. Instead, build up your pace and distance gradually, allowing your body to adapt to the demands of running on the treadmill.
By putting effort into analyzing and improving your running technique, you can reduce shaking and minimize the impact on the treadmill. Better running form not only enhances the stability of the machine but also promotes overall efficiency and helps decrease the risk of potential injuries.
Possible Solutions to Fix the Shaking Treadmill
Experiencing a shaking treadmill can be frustrating and disrupt your workout routine. Fortunately, there are several potential solutions that can help address and fix the issue. Below are some possible solutions to consider:
-
Leveling the Surface: If the treadmill is placed on an uneven surface, leveling it out can significantly reduce shaking. Use a bubble level or smartphone app to assess the levelness of the floor beneath the treadmill. Shims or a treadmill mat can be used to compensate for any unevenness.
-
Tightening Loose Bolts and Screws: Loose bolts or screws are a common cause of treadmill shaking. Carefully inspect the visible areas of the treadmill, such as the frame, handrails, console, and motor cover, for any loose fasteners. Using the appropriate tool, tighten any loose bolts or screws to ensure stability.
-
Adjusting the Belt Tension: An improperly tensioned belt can lead to shaking. Consult your treadmill’s user manual for instructions on how to adjust the belt tension. Follow the recommended guidelines to ensure the belt is neither too loose nor too tight.
-
Replacing Worn Out Motor Mounts: Worn-out or damaged motor mounts can cause instability and shaking. If you notice signs of damage during inspection, contacting the manufacturer or a professional technician for replacement is advisable. Properly functioning motor mounts help absorb vibrations and restore stability.
-
Repairing or Replacing Faulty Shock Absorption System: If the shock absorption system is faulty or worn out, it can contribute to a shaking treadmill. Inspect the deck and cushioning system for any visible damage. Minor issues may require replacing cushioning pads, following the manufacturer’s instructions. Contact the manufacturer or a technician for a thorough evaluation and possible repairs or replacement.
-
Improving Running Form: Analyzing and correcting your running form can help minimize vibrations and reduce shaking. Focus on proper foot placement, stride length, upper body stability, and core engagement. Consider seeking guidance from a running coach or trainer who can provide expert advice and exercises to enhance your running technique.
By implementing these possible solutions, you can effectively address the shaking issue with your treadmill. Depending on the specific cause, you may need to combine different solutions or seek professional assistance. Regular maintenance and care, along with proper usage techniques, are essential in preventing future shake-related problems and ensuring a stable and enjoyable workout experience on your treadmill.
Leveling the Surface
A common reason for a shaking treadmill is an uneven surface on which it is placed. If the floor underneath the treadmill is not level, it can lead to imbalance and instability during your workouts. Leveling the surface is an essential step to address this issue and restore the stability of your treadmill.
To level the surface, start by inspecting the floor beneath the treadmill. Look for any noticeable irregularities such as bumps, slopes, or dips. Use a bubble level or a smartphone level app to accurately assess the levelness of the floor.
If the floor is found to be uneven, there are several methods you can use to level it. First, try repositioning the treadmill to a different area where the floor is more level. This simple adjustment may align the treadmill properly and reduce shaking.
If repositioning doesn’t solve the issue, you can use shims to compensate for any unevenness. Shims are small pieces of material, such as wood or rubber, that can be inserted underneath the feet of your treadmill to level it out. Carefully place the shims under the appropriate feet until the treadmill sits evenly on the floor.
Additionally, if the unevenness is caused by a carpet, you may need to consider placing a sturdy plywood board or a treadmill mat underneath the machine. These materials provide a more stable and level surface for your treadmill to rest on.
In some cases, the uneven surface may be due to structural issues with the floor itself. If this is the case, seeking professional assistance from a contractor or a flooring specialist may be necessary. They can assess the situation and provide recommendations for leveling the floor or correcting any underlying issues.
Ensuring a level surface is crucial not only for the stability of your treadmill but also for your safety. A shaking treadmill can pose a risk of falls or injuries. By leveling the surface, you can minimize vibrations and create a stable foundation for your treadmill, allowing you to enjoy your workouts with confidence and peace of mind.
Tightening Loose Bolts and Screws
Loose bolts and screws are a common cause of a shaking treadmill. Over time, the constant vibrations and movement during workouts can cause these fasteners to become loose, compromising the stability of the machine. Tightening loose bolts and screws is an important step in solving the shaking issue and ensuring a safe workout experience.
To begin, visually inspect the visible areas of the treadmill, such as the frame, handrails, console, motor cover, and any other components where bolts and screws are present. Look for any signs of looseness, such as visible gaps or parts that appear wobbly.
Using the appropriate tools, such as a wrench or screwdriver, gently tighten any loose bolts or screws that you find. Be careful not to overtighten, as this can strip the threads or damage the fasteners. It’s important to follow the manufacturer’s guidelines for tightening torque to ensure the proper tightness.
Keep in mind that some bolts or screws may be in hidden or hard-to-reach areas. In such cases, consult the treadmill’s user manual or contact the manufacturer for guidance on accessing and tightening these fasteners.
Regular maintenance is key to preventing loose bolts and screws. Make it a habit to check and tighten all visible bolts and screws periodically, even if you don’t notice any shaking or instability. This proactive approach helps ensure the stability of your treadmill and reduces the risk of future issues.
If you find that the shaking persists, despite tightening all visible bolts and screws, it’s possible that there may be internal fasteners that require attention. In this case, it is recommended to contact the manufacturer or a professional technician for further inspection and repair.
By diligently inspecting and tightening loose bolts and screws, you can significantly reduce shaking and improve the stability of your treadmill. Regular maintenance of these fasteners not only enhances the performance of the machine but also ensures a safer and more enjoyable workout environment.
Adjusting the Belt Tension
The tension of the treadmill belt plays a crucial role in its performance and stability. If the belt is too loose or too tight, it can contribute to the shaking of the treadmill during use. Properly adjusting the belt tension is essential to ensure a smooth and stable workout experience.
To adjust the belt tension, refer to your treadmill’s user manual for specific instructions. Different treadmill models may have different mechanisms for adjusting the belt tension, such as a tension knob, a tension bolt, or an adjustment screw.
Start by ensuring that the treadmill is turned off and unplugged for safety. Locate the tension adjustment mechanism, typically found at the rear of the treadmill near the motor or belt roller.
To loosen the belt tension, turn the tension knob counterclockwise or loosen the tension bolt or screw. Gradually make adjustments, testing the tension after each turn. The goal is to achieve a tension that allows the belt to move smoothly without slipping during use.
To tighten the belt tension, turn the tension knob clockwise or tighten the tension bolt or screw. Again, make small adjustments and test the tension until the belt is taut but not overly tight. This will ensure proper traction without straining the motor or causing excessive vibrations.
As you make adjustments, observe the behavior of the belt during a test run. A properly tensioned belt should neither sag nor be too tight. It should move smoothly and remain centered without slipping to either side.
Keep in mind that belt tension may need periodic readjustment over time due to regular wear and tear. It’s a good practice to check and adjust the belt tension periodically as part of your treadmill maintenance routine.
If you are unsure about adjusting the belt tension yourself, consult the user manual or contact the manufacturer for guidance. Alternatively, you can seek assistance from a professional technician who can ensure proper adjustments and belt alignment.
By correctly adjusting the belt tension, you can minimize shaking and ensure the stability of your treadmill. Regular maintenance and attention to the belt tension will not only enhance the performance and longevity of the machine but also provide a more comfortable and enjoyable workout experience.
Replacing Worn Out Motor Mounts
Motor mounts are vital components of a treadmill as they help absorb vibrations and maintain stability during workouts. Over time, the constant movement and regular wear can cause motor mounts to become worn out or damaged, contributing to shaking and instability. When motor mounts are compromised, it is necessary to replace them to restore the stability of the treadmill.
To determine if the motor mounts are worn out or damaged, inspect them visually for any visible signs of wear, such as cracks, tears, or deterioration. Pay attention to irregularities in appearance or excessive movement of the motor when the treadmill is in operation.
If you suspect that the motor mounts are the cause of the shaking, it is advisable to contact the manufacturer or consult a professional technician for further inspection and replacement. They will have the knowledge and expertise to assess the condition of the motor mounts and provide guidance on the correct replacement process.
Replacing motor mounts typically involves accessing the motor compartment, which may require removing the motor cover or other components of the treadmill. It is crucial to follow the manufacturer’s instructions or seek professional assistance to ensure proper installation and alignment of the new motor mounts.
To prevent premature wear or damage to motor mounts, it is important to practice regular maintenance on your treadmill. Keep the machine clean and free from dust and debris, and perform routine lubrication of the belt as recommended by the manufacturer. These maintenance practices can help minimize the strain on the motor mounts and prolong their lifespan.
By promptly replacing worn out motor mounts, you can restore the stability and minimize shaking in your treadmill. Properly functioning motor mounts help absorb vibrations and provide stability during workouts. Regular maintenance, along with timely replacement of motor mounts, ensures a safe and comfortable workout experience on your treadmill.
Repairing or Replacing Faulty Shock Absorption System
The shock absorption system in a treadmill is designed to minimize impact and provide a cushioned feel while running or walking. However, if the shock absorption system becomes faulty or worn out, it can contribute to shaking and discomfort during your workouts. Repairing or replacing the faulty components of the shock absorption system is essential to restore stability and improve your overall exercise experience.
To identify if the shock absorption system is the cause of the shaking, visually inspect the deck and cushioning components for any visible damage or signs of wear. Look for cracks, tears, or sagging areas in the cushions. Additionally, pay attention to any unusual noises or a lack of cushioning while running or walking on the treadmill.
Minor issues with the shock absorption system, such as worn-out cushioning pads, can sometimes be repaired by replacing the damaged components. Check the user manual or contact the manufacturer to find compatible replacement parts and follow the provided instructions for installation.
For more significant issues or if the shock absorption system is severely compromised, it may be necessary to replace the entire system. Contact the manufacturer or a professional technician to assess the situation and determine the best course of action for replacement.
Regular maintenance is important to prevent premature wear and damage to the shock absorption system. Keep the deck clean and free from debris, and follow the manufacturer’s recommendations for belt lubrication. These maintenance practices can help extend the longevity of the shock absorption system and minimize the risk of shaking and discomfort.
It’s worth noting that advanced treadmill models may have adjustable shock absorption settings. Check if your treadmill allows for customization of the shock absorption level. Adjusting the settings to your preference can further enhance the comfort and stability of your workouts.
By repairing or replacing the faulty components of the shock absorption system, you can reduce shaking, minimize impact, and enhance your overall exercise experience. Regular maintenance and proper care play a crucial role in preserving the functionality of the shock absorption system, ensuring a comfortable and safe workout on your treadmill.
Improving Running Form
One often overlooked factor that can contribute to a shaking treadmill is the user’s running form. Poor running technique, such as overstriding or a heavy footfall, can generate excessive vibrations that transfer to the entire machine. Therefore, focusing on improving your running form can help minimize these vibrations and create a more stable workout experience on the treadmill.
Start by analyzing your running form. Pay attention to your footstrike – aim for a midfoot or forefoot strike, where your feet land directly beneath your body. Avoid overstriding, where your feet land too far in front of you, as it can increase the impact on the treadmill and lead to instability.
Focus on your stride length. Take shorter, controlled strides to reduce braking forces and minimize vibrations. Avoid taking long steps that can contribute to instability and shaking.
Maintain proper posture while running. Keep your torso upright and align your shoulders with your hips. Engage your core muscles to create stability throughout your body. Avoid excessive swinging of your arms or crossing them in front of your body, as it can disrupt your balance and contribute to vibrations.
Take time to gradually progress your running on the treadmill. Sudden increases in speed or intensity can lead to instability and exacerbate vibrations. Instead, gradually increase your pace and intensity over time, allowing your body to adapt to the demands of running on the treadmill.
Consider seeking guidance from a running coach or trainer who can provide expert advice and help you fine-tune your running technique. They can provide personalized recommendations and exercises to improve your form and reduce shaking on the treadmill.
Remember to practice patience and consistency when working on improving your running form. It takes time and practice to develop new habits. By focusing on proper foot placement, stride length, posture, and gradual progression, you can minimize vibrations, increase stability, and create a smoother workout experience on your treadmill.
Developing good running form not only improves your treadmill experience but also promotes overall running efficiency and decreases the risk of potential injuries. Embrace the opportunity to fine-tune your form and enjoy more comfortable and effective workouts on your treadmill.
Conclusion
Experiencing a shaking treadmill can be frustrating and disrupt your workout routine. Fortunately, by understanding the possible causes and implementing the appropriate solutions, you can restore stability to your treadmill and enjoy a smooth and comfortable exercise experience.
Possible causes of a shaking treadmill include an uneven surface, loose bolts or screws, improper belt tension, worn-out motor mounts, faulty shock absorption system, or poor running form. By diagnosing the specific cause, you can address the underlying issue and take appropriate steps to fix it.
To fix a shaking treadmill, you can level the surface on which it sits to ensure stability. Tightening loose bolts and screws is essential to secure the various components of the treadmill. Adjusting the belt tension to the proper level ensures a smooth and stable movement. If the motor mounts are worn out, they should be replaced to restore stability. Faulty shock absorption systems can be repaired or replaced to minimize vibrations. Lastly, improving your running form can reduce excessive vibrations caused by poor technique.
Regular maintenance plays a crucial role in preventing shaking and ensuring the longevity of your treadmill. Keep the machine clean, follow lubrication guidelines, and address any issues promptly to avoid further damage.
Remember, it’s always helpful to consult the user manual, contact the manufacturer, or seek professional assistance when needed. They can provide specific guidance based on your treadmill model and address any specific concerns or issues.
By applying these solutions and maintaining a proactive approach to treadmill care, you can enjoy a stable and comfortable workout session, free from the frustration of a shaking treadmill. Stay consistent, focus on proper maintenance, and embrace good running technique to maximize your treadmill experience and achieve your fitness goals.