Home>Misc>Featured>How To Put Bindings On Cross Country Skis
Featured
How To Put Bindings On Cross Country Skis
Modified: August 18, 2023
Learn how to properly put bindings on cross country skis with our featured guide. Step-by-step instructions and tips included to ensure a secure fit.
Introduction
When it comes to cross country skiing, having the right equipment is essential for a successful and enjoyable experience. One crucial component of cross country skis is the bindings. Bindings are what connect your ski boots to the skis, providing control and stability while gliding along the snowy trails.
Learning how to put bindings on cross country skis is an important skill for any skier, whether you’re a beginner or a seasoned pro. By properly installing the bindings, you can ensure a secure connection between your boots and skis, allowing for efficient skiing and reducing the risk of injury.
In this article, we will guide you through the steps of putting bindings on cross country skis. We will cover the necessary equipment, different types of bindings, and the techniques to properly attach and adjust the bindings to your skis. By following these steps, you’ll be ready to hit the trails in no time!
Before we dive into the details, it’s important to note that putting bindings on cross country skis requires some basic knowledge of ski equipment and familiarity with ski maintenance. If you’re new to skiing or uncertain about any step, it may be helpful to consult with a ski technician or experienced skier.
Now, let’s get started with an overview of what bindings are and why they are crucial for a successful cross country skiing experience.
What are bindings?
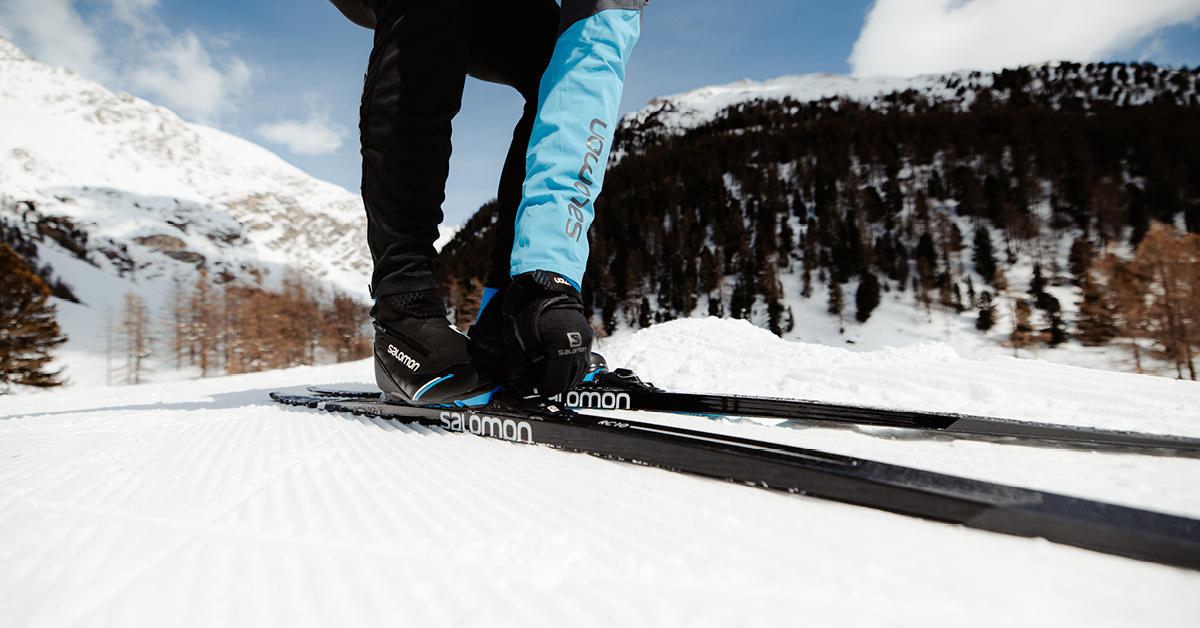
Bindings are the mechanical interface between your ski boots and the cross country skis. They play a vital role in providing control, stability, and power transfer while skiing. Bindings are designed to securely hold your boots to the skis, allowing you to maneuver and glide effectively on various terrains.
Bindings consist of several components, including a toe piece, heel piece, and an adjustable plate that connects to the ski. The toe piece has a clamp or lever mechanism that holds the front of your boot in place, while the heel piece provides support and stability at the back.
The primary function of bindings is to ensure that your boots remain attached to the skis while skiing, yet they allow for natural movement and flexibility. They provide the necessary connection to transfer power from your body to the skis, allowing you to propel yourself forward efficiently.
Bindings also play a crucial role in safety. In the event of a fall, properly adjusted bindings can release your boots from the skis to prevent knee or ankle injuries. This release mechanism is designed to release the boots when a certain amount of force is applied, such as during a sudden impact or when the skis encounter an obstacle.
There are several factors to consider when choosing bindings for cross country skiing. These include your skiing style, skill level, body weight, and the type of terrain you plan to ski on. Different bindings offer varying levels of performance and features, so it’s essential to select the ones that best suit your needs.
Now that you understand what bindings are and their importance in cross country skiing, let’s move on to exploring the different types of bindings available in the market and how to choose the right ones for your skiing adventures.
Types of bindings
When it comes to cross country skiing, there are various types of bindings available to suit different skiing styles and preferences. Understanding the different types of bindings can help you choose the right ones for your needs and enhance your skiing experience.
1. NNN (New Nordic Norm): NNN bindings are a popular choice for cross country skiing. They are characterized by a low-profile design and a double-pin binding system. NNN bindings provide excellent stability, control, and power transfer, making them suitable for both classic and skating techniques.
2. SNS (Salomon Nordic System): SNS bindings are widely used by skiers around the world. They feature a single lock-in mechanism that connects the boot to the ski. SNS bindings offer a secure and reliable connection, providing excellent stability and control.
3. NIS (Nordic Integrated System): NIS bindings are a unique type of binding that combines the binding plate and ski in a single integrated system. NIS bindings offer adjustable binding positions, allowing skiers to fine-tune their performance and adapt to different snow conditions.
4. 75mm Nordic Norm: 75mm Nordic Norm bindings, also known as 3-pin bindings, are primarily used for classic skiing. They feature a three-pin configuration that provides a secure connection between the boot and the ski. These bindings are durable and reliable, making them a popular choice for traditional-style cross country skiing.
5. Prolink: Prolink bindings are compatible with both NNN and Turnamic boot soles. They offer a lightweight design, easy step-in, and excellent power transfer, making them a versatile choice for skiers who want the flexibility to use different boot models.
Choosing the right bindings depends on your skiing style, skill level, and personal preferences. Additionally, it’s important to ensure compatibility between bindings and boots, as different binding systems have specific boot requirements.
Consulting with a knowledgeable ski shop or experienced skiers can help you make the right choice. It’s also beneficial to test different binding types to find the one that offers optimal performance and comfort for your skiing adventures.
Now that you know about the different types of bindings available, let’s move on to the step-by-step process of putting bindings on cross country skis.
Step 1: Gather the necessary equipment
Before you start putting bindings on your cross country skis, make sure you have all the necessary equipment and tools. Having everything ready beforehand will ensure a smooth and efficient installation process. Here’s a list of the essential items you’ll need:
- Cross country skis: Make sure you have the skis that you plan to install the bindings on. Ensure they are clean and free from any debris or wax.
- Bindings: Choose the appropriate bindings based on your skiing style, skill level, and compatibility with your boots. Refer to the manufacturer’s instructions or consult with a professional if you are unsure.
- Screwdriver: You’ll need a screwdriver that matches the size of the screws used to attach the bindings to the skis. It’s recommended to use a screwdriver with a handle for better grip and control.
- Mounting template: Some bindings come with a mounting template to help you align the bindings correctly on the skis. If your bindings include a template, make sure to have it on hand.
- Measuring tape: A measuring tape can be useful for precise measurements when aligning the bindings and adjusting their position on the skis.
- Marker: A marker can be handy for marking the screw hole positions on the skis before attaching the bindings. This will help ensure accurate placement of the screws.
- Wax crayon or pencil: A wax crayon or pencil can be used to mark any existing holes on the skis if you are replacing old bindings. This will help you avoid confusion during the installation process.
- Cleaning supplies: It’s a good idea to have some cleaning supplies, such as a brush, cloth, and a mild detergent, to clean the ski surface before attaching the bindings. This will help ensure a secure and clean bond.
Make sure you have all these items gathered and readily accessible before you begin putting the bindings on your cross country skis. Having everything on hand will save you time and avoid unnecessary delays during the installation process.
With the necessary equipment in place, you’re now ready to move on to the next step: preparing the skis for binding installation.
Step 2: Prepare the skis
Before you can install the bindings on your cross country skis, it’s important to properly prepare the ski surface. This step involves cleaning the skis and ensuring they are in good condition for the binding installation. Here’s how to prepare the skis:
- Clean the ski surface: Use a brush or cloth to remove any dirt, debris, or old wax from the ski surface. Make sure to clean both the toe and heel areas where the bindings will be attached. Cleaning the ski surface ensures a better bond between the skis and the bindings.
- Inspect the ski surface: Take a close look at the ski surface to check for any visible damage or defects. Look for cracks, delamination, or signs of wear and tear. It’s important to address any issues before proceeding with the binding installation. If you notice any significant damage, it’s recommended to consult with a professional ski technician for repairs.
- Check existing holes: If you are replacing old bindings or have used the skis before, check for any existing holes from previous bindings. Use a wax crayon or pencil to mark these holes so that you don’t accidentally drill new holes in the same spot. Avoid drilling new holes too close to existing ones, as this can weaken the ski structure.
- Align the skis: Before attaching the bindings, ensure that both skis are aligned properly. Place them next to each other and check that the bases are flat against the surface. This will ensure that the bindings will be mounted evenly on both skis.
By properly preparing the skis, you create a clean and secure surface for the binding installation. Cleaning the ski surface removes any impurities that may hinder the binding’s grip, while inspecting for damage ensures the overall integrity of the skis. Checking for existing holes and aligning the skis properly are essential for a successful and balanced mounting process.
Now that you’ve prepared the skis, you can proceed to the next step: lining up the bindings on the ski surface.
Step 3: Line up the bindings
Once you have prepared the skis, the next step in installing cross country ski bindings is to line them up properly on the ski surface. Proper alignment is crucial for optimal performance and stability while skiing. Here’s how to line up the bindings:
- Refer to the manufacturer’s instructions: Each binding brand may have specific guidelines for aligning their bindings on the ski surface. Refer to the manufacturer’s instructions or mounting template, if provided, to ensure accurate alignment.
- Measure and mark: Use a measuring tape to find the correct positioning for the bindings on the skis. Measure from the ski tip to determine the desired distance, often indicated in the manufacturer’s instructions. Mark this point with a marker or pencil on the ski surface.
- Find the midpoint: Use the measuring tape to locate the midpoint between the tip and tail of the ski. Mark this point on the ski surface as well. This will serve as a reference for centering the bindings.
- Align the bindings: Place the bindings on the ski surface, making sure to center them between the marked points. The toe piece should be aligned with the mark indicating the desired distance from the ski tip, while the heel piece should be centered between the marked midpoint.
- Check for symmetry: Once the bindings are in position, visually inspect them to ensure they are symmetrically aligned on both skis. This will help maintain balance and prevent any performance issues while skiing.
Properly lining up the bindings is essential for achieving the desired performance and comfort while skiing. Following the manufacturer’s instructions, measuring and marking the correct positioning, and ensuring symmetry will help ensure that the bindings are aligned correctly on the ski surface.
With the bindings lined up on the skis, you’re now ready to move on to the next step: adjusting the bindings to fit your boots and skiing style.
Step 4: Adjust the bindings
After lining up the bindings on your cross country skis, the next step is to adjust them to fit your boots and skiing style. Properly adjusting the bindings ensures a comfortable and secure fit, maximizing your control and performance while skiing. Here’s how to adjust the bindings:
- Refer to the manufacturer’s guidelines: Check the manufacturer’s instructions or website for specific recommendations on adjusting the bindings. Different binding models may have unique adjustment mechanisms.
- Determine your skiing style: Consider your preferred skiing technique, whether it’s classic or skate skiing. The bindings can be adjusted to optimize performance based on your skiing style.
- Set the binding position: Use the provided adjustment mechanism to select the appropriate binding position. The position can be modified to enhance stability or performance, based on personal preference.
- Boot size adjustment: Adjust the binding mechanism to reflect your boot size. Most bindings have an adjustable feature that allows you to fine-tune the fit for your specific boot size.
- Consult a professional: If you’re unsure about the optimal adjustment settings or need assistance, consider consulting with a professional ski technician or an experienced skier. They can provide guidance based on their expertise and experience.
Adjusting the bindings is crucial for achieving the right fit and performance on the snow. It allows for better control, stability, and power transfer while skiing. By considering factors such as skiing style and boot size, you can customize the bindings to suit your specific needs.
Once you have adjusted the bindings according to your preferences, you’re ready to move on to the next step: securing the bindings to the skis.
Step 5: Secure the bindings
After adjusting the bindings to fit your boots and skiing style, the next step is to securely attach them to the cross country skis. Properly securing the bindings ensures a strong and reliable connection between your boots and the skis, allowing for efficient skiing and minimizing the risk of accidental detachment. Here’s how to secure the bindings:
- Prepare the screws: Ensure that you have the correct screws for your bindings. Check the manufacturer’s instructions to determine the appropriate screw size and type. It’s important to use the specified screws to ensure a secure attachment.
- Align the holes: Position the bindings over the marked holes on the ski surface. Double-check that the holes in the bindings are aligned with the holes on the skis. This ensures that the screws will thread through both surfaces correctly.
- Start screwing: Using a screwdriver, carefully screw in the first screw through the hole in the binding and into the ski. Be sure to apply even pressure and avoid overtightening. Repeat this process for the remaining screws.
- Cross-tighten the screws: Once all the screws are partially threaded, go back and tighten them fully, using a crisscross pattern. This ensures even pressure distribution and a secure fit.
- Check the alignment: After securing the bindings, verify that they are still aligned properly on the ski surface using the markings made earlier. Adjust if necessary to ensure symmetry and balance.
Securing the bindings is a critical step in preparing your cross country skis for use. Taking the time to align the holes correctly, using the appropriate screws, and tightening them evenly helps maintain a strong connection between the bindings and the skis.
With the bindings securely attached to the skis, you’re almost ready to hit the trails. The final step is to test the bindings to ensure they are functioning as intended, which we will cover in the next step.
Step 6: Test the bindings
After securing the bindings on your cross country skis, the final step is to properly test them to ensure they are functioning correctly. Testing the bindings is essential for your safety and to ensure that they release appropriately in case of a fall or excessive force. Here’s how to test the bindings:
- Boot fit: Put on your ski boots and ensure they fit snugly into the bindings. Check that the boots are securely held in place and don’t have any excessive play or movement. Proper boot fit is crucial for optimal control and power transfer.
- Visual inspection: Examine the bindings for any signs of improper installation, such as misalignment or loose screws. Ensure that all the components are in place and functioning correctly.
- Release test: Find a flat, stable surface and step onto one ski at a time. Apply downward force on the ski and check if the bindings release smoothly and correctly. Repeat the process for both skis. Note any unexpected resistance or difficulty in release.
- Spot check: While skiing on gentle terrain, pay attention to how the bindings feel. Ensure that you have the desired control, stability, and power transfer. If anything feels off or unusual, stop and inspect the bindings for any issues.
- Professional evaluation: If you have any concerns about the performance or safety of the bindings, it’s advisable to have them evaluated by a professional ski technician. They can conduct a comprehensive assessment and make any necessary adjustments.
Testing the bindings is crucial to ensure their proper function and your safety while skiing. By verifying the boot fit, visually inspecting the bindings, conducting release tests, and spot checking during actual skiing, you can be confident in the performance and reliability of your bindings.
Once you’ve completed the testing process and are satisfied with the performance of the bindings, you’re all set to enjoy your cross country skiing adventures!
Conclusion
Putting bindings on cross country skis is a fundamental skill for any skier, whether you’re a beginner or an experienced enthusiast. By following the steps outlined in this article, you can confidently install and adjust your bindings, ensuring a secure and comfortable fit while out on the trails.
Remember, proper preparation is key. Gather all the necessary equipment, clean and inspect the skis, and align the bindings accurately on the ski surface. Adjust the bindings according to your skiing style and boot size, ensuring a customized fit. Secure the bindings firmly using the appropriate screws and test them thoroughly for reliable performance.
Always remember to consult the manufacturer’s instructions and seek guidance from professionals if needed. Safety is paramount, so ensure your bindings release properly and maintain a secure connection between your boots and skis. Regularly check and maintain your bindings to ensure they remain in good working condition.
With your bindings properly installed, you’re ready to embark on your cross country skiing adventures with confidence. Enjoy the freedom of gliding over snowy landscapes, exploring nature, and experiencing the thrill of this exhilarating sport.
Embrace the joy of cross country skiing, knowing that your bindings are securely attached and optimized to enhance your performance on the trails. Stay safe, have fun, and make lasting memories in the beautiful winter wonderland of cross country skiing!