How To Put My Boot In My Cross Country Ski
Introduction
Welcome to the world of cross country skiing! With its picturesque landscapes and exhilarating trails, cross country skiing offers a unique and invigorating outdoor experience. One essential aspect of this sport is ensuring that your boots are properly secured and comfortable throughout your journey. In this article, we will guide you through the process of putting on your cross country ski boots with ease and precision.
Understanding the correct procedure for boot placement not only helps to prevent discomfort and potential injury, but it also maximizes your performance and enjoyment on the slopes. Whether you are a seasoned skier or a beginner, it’s important to master the art of putting on your boots correctly.
In the following sections, we will delve into the various considerations and techniques for positioning your boots to ensure a perfect fit. From choosing the right boot size to troubleshooting common boot issues, we have got you covered. So grab your ski boots and let’s get started on this exciting journey!
Understanding Cross Country Ski Boots
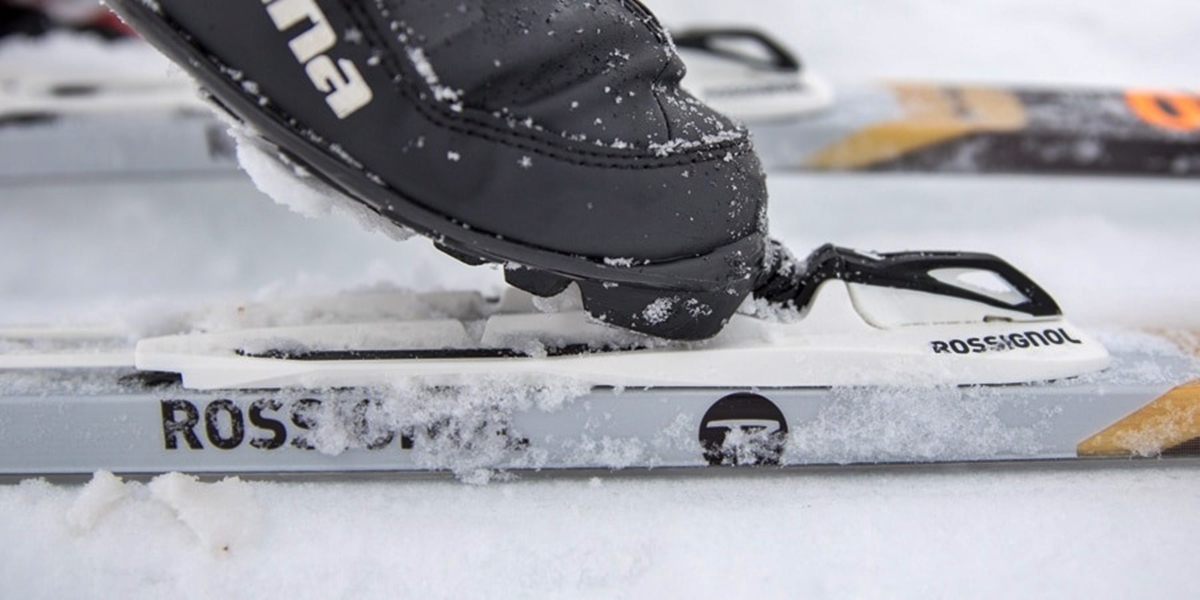
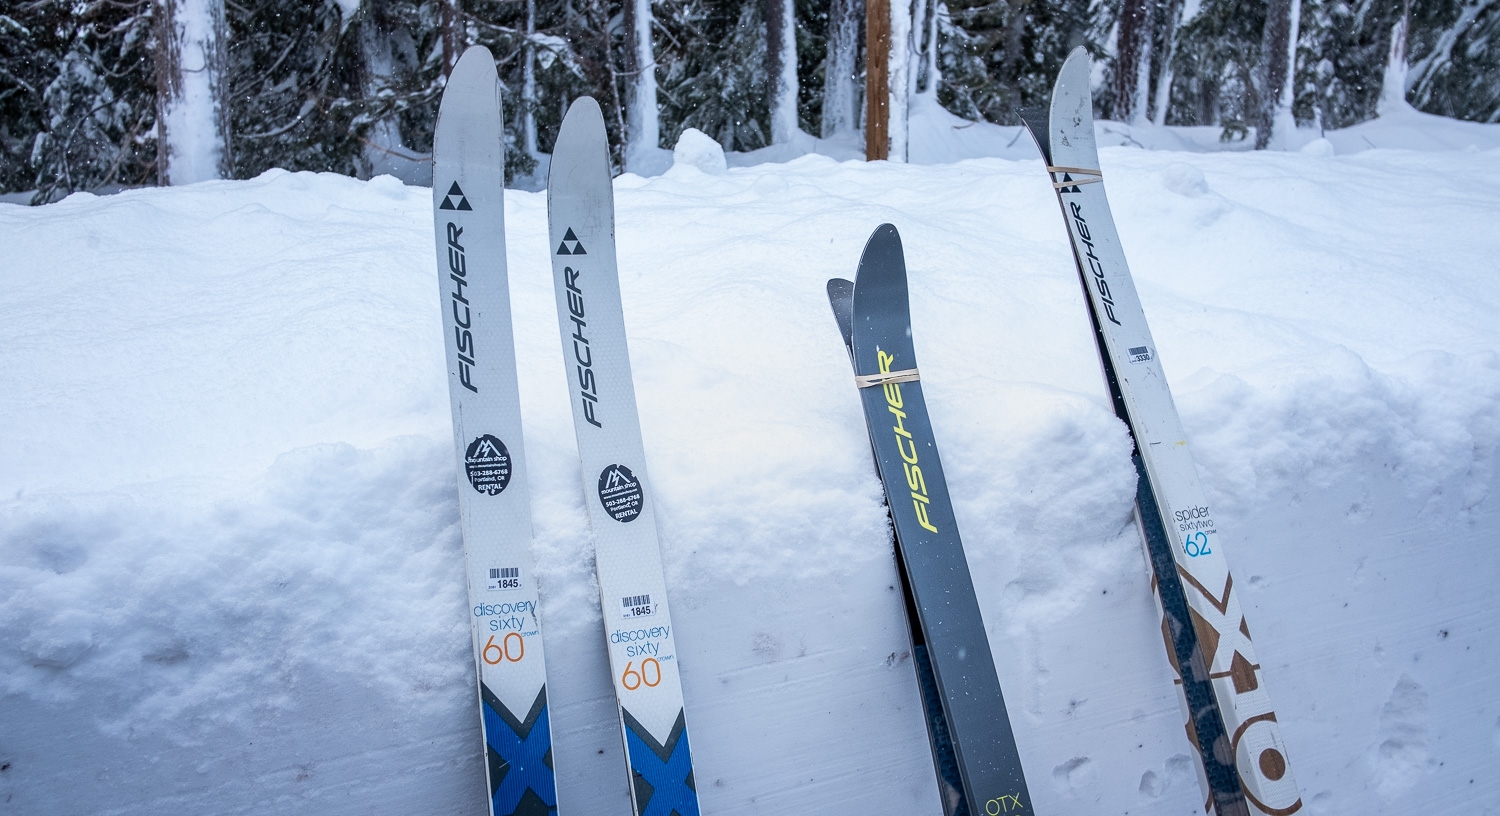
Cross country ski boots are specifically designed to provide support, warmth, and flexibility for your feet during your cross country adventures. Unlike downhill ski boots, which are rigid and provide maximum stability, cross country ski boots are lighter and offer more freedom of movement. They are designed to work in harmony with the cross country ski bindings, allowing for efficient transfer of power from your legs to the skis.
When choosing cross country ski boots, there are a few key factors to consider. First and foremost, you need to determine whether you prefer a classic style or skate style boot. Classic boots are designed for diagonal striding, while skate boots offer a stiffer sole for optimal lateral movement.
Additionally, you should consider the boot’s insulation and breathability. Since cross country skiing can be a physically demanding activity, it’s important to choose boots that provide proper insulation to keep your feet warm. However, excessive insulation can cause your feet to overheat, so finding a balance between warmth and breathability is crucial.
The fit of your boots is another critical aspect to consider. Cross country ski boots should fit snugly but not be overly tight. This ensures optimal control and prevents blisters and discomfort. It’s recommended to try on boots in person and walk around in them to get a feel for the fit before making a purchase.
Lastly, pay attention to the construction and materials of the boots. High-quality materials such as leather or synthetic fabrics provide durability and water resistance, ensuring that your boots can withstand various weather conditions.
By understanding the design and features of cross country ski boots, you can make an informed decision when purchasing the right pair for your needs. The next step is ensuring the correct boot size, which we will discuss in the following section.
Choosing the Right Boot Size
Choosing the correct boot size is crucial for both comfort and performance on the cross country trails. Ill-fitting boots can lead to blisters, discomfort, and even injury. Here are some tips to help you find the perfect boot size:
1. Measure your foot: Start by measuring the length and width of your foot. Use a tape measure or ruler to measure from the back of your heel to the tip of your longest toe. Then measure the widest part of your foot. This measurement will serve as a guide when selecting the appropriate boot size.
2. Consider your sock thickness: Keep in mind the type of socks you will be wearing while skiing. If you plan on wearing thick, thermal socks, you may need to size up to accommodate the extra bulk. It’s important to choose a size that allows for comfortable movement without being too tight.
3. Try on multiple sizes: Different brands and models may have slight variations in sizing. Trying on multiple sizes will give you a better sense of which size feels the most comfortable and secure. Make sure to try on both boots and walk around in them to evaluate the fit.
4. Pay attention to width: In addition to length, consider the width of the boot. Some brands offer different width options to accommodate a variety of foot shapes. If you have wider feet, look for boots with a wider last for a more comfortable fit.
5. Seek professional advice: If you are unsure about the right boot size for you, don’t hesitate to seek advice from a professional. Ski shops often have knowledgeable staff who can guide you in finding the best fit based on your measurements and specific needs.
Remember, finding the right boot size is a personal process, and what works for someone else may not necessarily work for you. It’s important to prioritize your comfort and ensure that your boots provide a snug fit without causing any pain or discomfort. With the right boot size, you’ll be ready to hit the trails with confidence and enjoy your cross country skiing adventure to the fullest.
Preparing Your Boot for Use
Before putting on your cross country ski boots, it’s important to take a few simple steps to ensure they are ready for use. Proper preparation will not only enhance your comfort but also extend the lifespan of your boots. Here are some key tips to prepare your boots for your cross country skiing adventures:
1. Clean and inspect: Start by wiping down your boots with a damp cloth to remove any dirt or debris. Pay special attention to the soles and zippers. Inspect the boots for any signs of damage, such as loose stitching or worn-out soles. If you notice any issues, it’s best to address them before hitting the trails.
2. Waterproofing: Depending on the material of your boots, it may be beneficial to apply a waterproofing treatment. This will help protect your boots from moisture and ensure your feet stay dry throughout your ski sessions. Check the manufacturer’s guidelines for the appropriate waterproofing products for your specific boot material.
3. Lubricate zippers and buckles: If your boots have zippers or buckles, apply a small amount of lubricant to ensure they operate smoothly. This will make it easier to put on and take off your boots, as well as prevent any potential damage to the fastening mechanisms.
4. Insulate your boots: If you’re skiing in extremely cold temperatures, consider adding insulation to your boots. Boot insulation can help retain heat and keep your feet warm during long hours on the trails. Look for insulating insoles or specialty boot liners designed for cold weather conditions.
5. Store properly: When you’re not using your boots, it’s important to store them appropriately to maintain their shape and condition. Clean them thoroughly to remove any moisture or dirt before storing in a cool, dry place. Avoid storing them near direct heat sources, which can damage the materials. Consider using boot trees or stuffing them with newspaper to help retain their shape.
By following these simple steps, you can ensure that your cross country ski boots are in optimal condition for your next adventure. Taking the time to prepare your boots will not only enhance your comfort but also extend the lifespan of your gear, allowing you to enjoy many memorable skiing experiences.
Putting on Your Cross Country Ski Boots
Putting on cross country ski boots may seem simple, but there is a technique to ensure a proper fit and maximum comfort. Here is a step-by-step guide on how to put on your cross country ski boots:
1. Loosen the laces: If your boots have laces, start by loosening them all the way to the bottom. This will make it easier to slide your foot into the boot and ensure a secure fit once laced up.
2. Open the boot cuff: Some cross country ski boots have a Velcro or buckle closure at the cuff. Open it fully to allow for easy entry of your foot. If the boots have a zipper, make sure it’s fully open.
3. Position your foot: Place your foot into the boot, making sure your heel is snug against the back of the boot. Your toes should have some wiggle room, but your foot should feel secure and not slide around inside the boot.
4. Start lacing: Begin lacing up from the bottom, gradually pulling the laces to tighten the boot around your foot. Make sure the tension is even on both sides of the boot to ensure a comfortable and secure fit. Avoid overtightening, as this can restrict circulation and cause discomfort.
5. Fasten the cuff: If your boots have a cuff closure system, fasten it securely. Ensure that it provides support to your ankle without restricting movement.
6. Adjust the fit: Once you have laced up the boots, stand up and flex your ankles forward and backward. This will allow you to adjust the fit and ensure that your foot is securely locked into the boot. If necessary, tighten or loosen the laces for a more comfortable fit.
7. Repeat the process with the other boot: Once you have properly secured one boot, repeat the same steps with the other foot. Make sure both boots feel equally comfortable and secure.
By following these steps, you can put on your cross country ski boots with ease and ensure a secure and comfortable fit. Remember, the right fit is crucial for optimal performance and enjoyment on the trails, so take the time to adjust and fine-tune the fit before hitting the slopes.
Adjusting the Boot Fit
Once you have put on your cross country ski boots, it’s important to make any necessary adjustments to ensure a proper fit. A well-fitted boot will provide comfort, stability, and enhance your performance on the trails. Here are some tips for adjusting the fit of your boots:
1. Check for pressure points: Take a moment to assess your boots for any areas of discomfort or pressure points. If you feel any specific areas that are causing discomfort, try loosening or tightening the laces in that specific region. This will help alleviate any pressure and ensure a more comfortable fit.
2. Fine-tune the lacing: Pay attention to the tension of the laces throughout the boot. It’s essential to achieve a balance between a snug fit and avoiding excessive tightness. While the boot should feel secure, there should be enough room for your foot to move and flex comfortably. Adjust the laces as necessary to achieve the desired fit.
3. Evaluate the ankle support: The ankle plays a crucial role in cross country skiing, providing stability and control. Ensure that the boot provides adequate ankle support without being overly restrictive. If you find that the boots are too tight around the ankle, try adjusting the laces or straps to provide a better fit and range of motion.
4. Check for heel slip: Heel slip can be a common issue when wearing ski boots. If you notice that your heels are slipping inside the boot as you walk or ski, you may need to adjust the fit. Start by tightening the laces around the ankle and heel area to help secure the foot in place. If the heel slip persists, consider using heel pads or inserts for a more secure fit.
5. Test the flex of the boot: Cross country ski boots have different levels of flexibility, depending on the style and model. It’s important to find a boot with a flex that suits your skiing technique and preferences. Test the flex by leaning forward and flexing your ankles. The boot should provide enough support and range of motion to perform the desired movements comfortably.
Remember, everyone’s feet are unique, and what works for one person may not work for another. Take the time to experiment with different adjustments in order to find the optimal fit for your individual foot shape and skiing style. By fine-tuning the fit of your cross country ski boots, you are ensuring a comfortable and enjoyable experience on the trails.
Securing the Boot Properly
Securing your cross country ski boots properly is essential for a comfortable and secure fit, allowing you to perform at your best on the trails. Here are some key steps to ensure that your boots are properly secured:
1. Adjust the laces: Start by rechecking the tightness of the laces. Make sure they are securely fastened but not overly tight. The laces should provide a snug fit, keeping your foot in place without restricting circulation or causing discomfort. Pay extra attention to the middle section of the boot, as this is where most of the support and stability comes from.
2. Fasten any additional closures: Depending on the design of your ski boots, you may have additional closures, such as straps, buckles, or Velcro. Ensure that these closures are properly fastened to provide further support and stability. Check that they are secure and snug, but not too tight that they restrict movement or cause discomfort.
3. Evaluate the snugness: Stand up and walk around in your boots to assess the snugness of the fit. Your boots should feel secure and stable on your feet, without any excessive movement or slippage. If you feel any looseness or discomfort, adjust the laces or closures accordingly until you achieve a more secure fit.
4. Check for mobility: While it’s important to secure your boots, it’s equally important to ensure that they do not restrict your range of motion. Flex your ankles and knees to ensure that you have the freedom to move comfortably and efficiently. If you feel any restrictions, revisit the lacing or closures and make necessary adjustments to allow for proper mobility.
5. Test the fit with movement: To further evaluate the effectiveness of the boot’s securement, simulate skiing movements. Bend your knees, shift your weight from side to side, and practice the skating or striding motion. This will help you determine if your boots are securely fastened and adequately providing the necessary support and stability during ski movements.
By following these steps, you can ensure that your cross country ski boots are properly secured for optimal performance and enjoyment during your skiing adventures. Remember, everyone’s feet are different, so it may take some trial and error to find the perfect fit for you. Take the time to adjust and fine-tune the securement of your boots to achieve a comfortable and secure fit.
Tips for Proper Boot Positioning
Proper boot positioning is crucial for optimizing your performance and comfort while cross country skiing. When your boots are positioned correctly, you can achieve better control, balance, and power transfer. Here are some tips to ensure proper boot positioning:
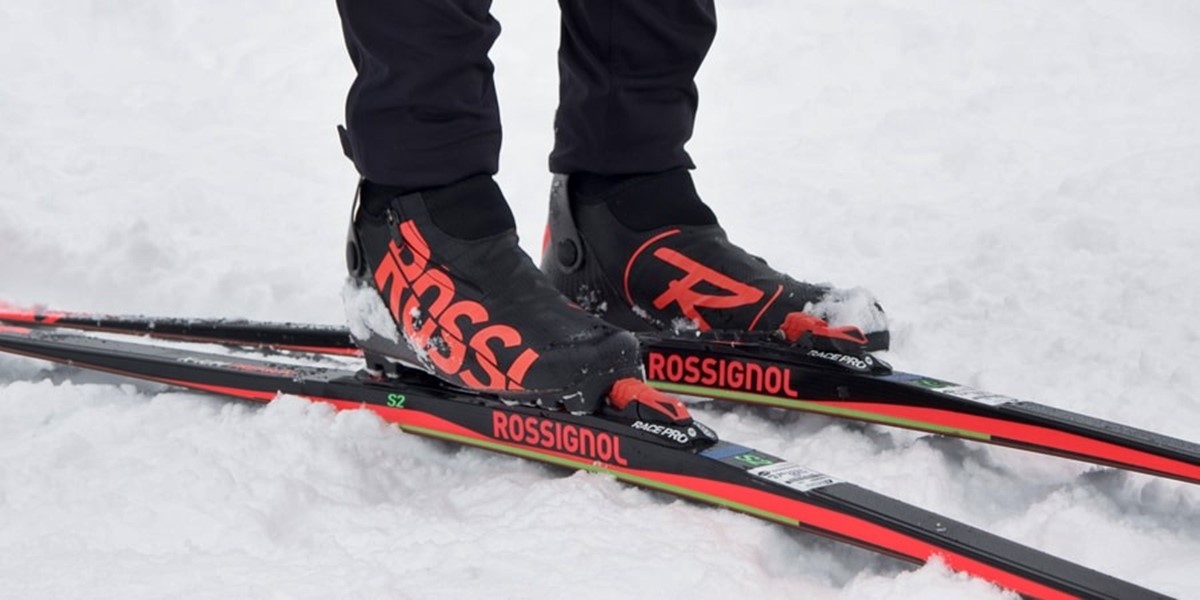
1. Align your feet: When putting on your boots, make sure your feet are aligned with the ski bindings. Position your feet so that they are centered on the skis, with the boots parallel to each other. This will help distribute your weight evenly and improve your balance and control.
2. Position your ankles: Cross country skiing relies heavily on ankle flexion for efficient propulsion. Make sure your ankles are in a relatively neutral, comfortable position, with a slight forward lean. This will allow you to engage your calf muscles and maximize your power transfer to the skis.
3. Check your knee positioning: Your knees should be positioned in line with your toes and should not be collapsing inward or bowing outward. Proper knee alignment helps maintain stability and prevents unnecessary strain on your joints. Be mindful of your knee positioning as you ski and make adjustments as needed.
4. Find your balance point: Achieving a balanced stance is essential for effective skiing. Aim to find the sweet spot where your body weight is distributed evenly over both skis. This will allow for more controlled movements and better maneuverability.
5. Engage your core muscles: Your core muscles play a significant role in maintaining proper boot position. Keep your core engaged and your posture upright, avoiding excessive leaning forward or backward. A strong and engaged core will provide stability and allow for more efficient skiing technique.
6. Experiment with binding adjustments: Binding position adjustment can have a significant impact on your skiing experience. Depending on your skiing style and terrain, you may want to experiment with different binding positions to find the optimal balance between control and glide. Consult the manufacturer’s guidelines or seek advice from a professional if you’re unsure about making binding adjustments.
7. Listen to your body: Ultimately, the best boot positioning will depend on your individual body mechanics and skiing style. Pay attention to how your body feels while you ski. If something doesn’t feel right or comfortable, make small adjustments to your boot position and observe the impact on your skiing technique and overall comfort.
By considering these tips and paying attention to your body’s feedback, you can achieve proper boot positioning that enhances your skiing performance and enjoyment. Don’t be afraid to experiment and make minor adjustments to find the perfect boot position that works for you.
Troubleshooting Common Boot Issues
While cross country ski boots are designed to provide comfort and support, occasionally, you may encounter some common boot issues that can affect your skiing experience. Luckily, many of these issues can be easily resolved with a few troubleshooting techniques. Here are some common boot issues and how to address them:
1. Pressure points and discomfort: If you experience pressure points or discomfort in specific areas of your feet, try loosening the laces or adjusting the Velcro straps around the affected areas. You can also use additional padding or inserts to alleviate pressure and provide extra cushioning where needed.
2. Heel slippage: Heel slippage can be a common problem, especially for those with narrower feet. To address this, try tightening the laces around the ankle area to secure your heel in place. Alternatively, using heel pads or inserts can also help stabilize your foot and reduce heel slippage.
3. Cold feet: If your feet get cold while skiing, it could be due to insufficient insulation or poor circulation. Consider adding thicker or thermal socks to provide more insulation. Additionally, ensure that your boots are properly waterproofed to keep moisture out and use warmers or boot covers to enhance warmth.
4. Boot too tight or too loose: If you find that your boots are either too tight or too loose overall, try adjusting the laces or closures accordingly. Make gradual adjustments, tightening or loosening as needed, until you achieve a comfortable and secure fit. It’s important to find the right balance between a snug fit and maintaining proper circulation.
5. Inadequate ankle support: Insufficient ankle support can compromise stability and control. If you feel that your boots lack ankle support, consider using additional ankle braces or inserts to provide extra reinforcement. These accessories can help stabilize your ankles and enhance your skiing technique.
6. Boot alignment issues: Improper boot alignment can lead to balance and control problems while skiing. If you notice that your boots are misaligned, either inward or outward, you may need to adjust the bindings. Consult the manufacturer’s guidelines or seek professional assistance to ensure correct alignment for optimal performance.
7. Foot numbness: Numbness or tingling in the feet can be caused by excessive pressure or restricted blood flow. Check the tightness of your laces and adjust them to relieve pressure points. Additionally, make sure your boots are not too tight, as this can impede circulation. Wiggle your toes periodically while skiing to encourage blood flow to the feet.
By troubleshooting and addressing these common boot issues, you can enhance your comfort, performance, and overall enjoyment while cross country skiing. Remember, proper boot fit and adjustments play a significant role in optimizing your skiing experience, so don’t hesitate to make minor modifications or seek professional advice when needed.
Conclusion
Putting on and securing your cross country ski boots properly is essential for a comfortable and successful skiing experience. By following the steps outlined in this guide, you can ensure a proper boot fit, enhance your performance, and avoid common boot-related issues.
Understanding the design and features of cross country ski boots, choosing the right boot size, and preparing your boots for use are crucial steps in achieving a comfortable fit. Putting on your boots correctly and making necessary adjustments to secure them properly ensures stability, control, and efficient power transfer. Troubleshooting common boot issues and addressing them promptly will improve your comfort and overall skiing experience.
Remember, everyone’s feet are unique, so it may take some trial and error to find the perfect fit and adjustment for you. Take the time to listen to your body, make small modifications as needed, and seek professional advice if necessary.
Now that you have learned the ins and outs of putting on and securing your cross country ski boots, it’s time to hit the trails and enjoy the exhilarating experience that cross country skiing offers. So, lace up those boots, feel the snow beneath your skis, and embrace the beauty of winter as you glide through the winter wonderland!
Stay warm, stay safe, and have a fantastic time exploring the magical world of cross country skiing.