Home>Misc>Featured>How To Use Fischer Cross Country Ski Bindings
Featured
How To Use Fischer Cross Country Ski Bindings
Modified: January 2, 2024
Learn how to use featured Fischer cross country ski bindings with our step-by-step guide. Master the technique and enhance your skiing experience.
Introduction
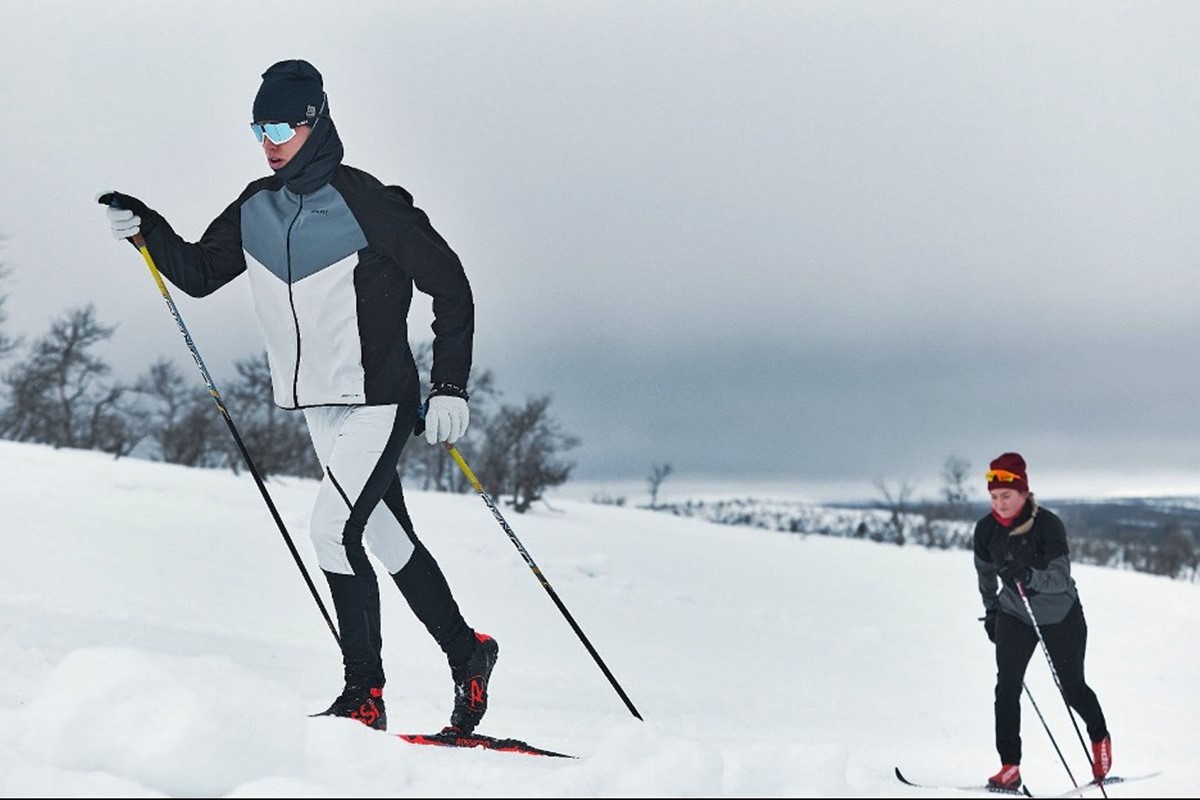
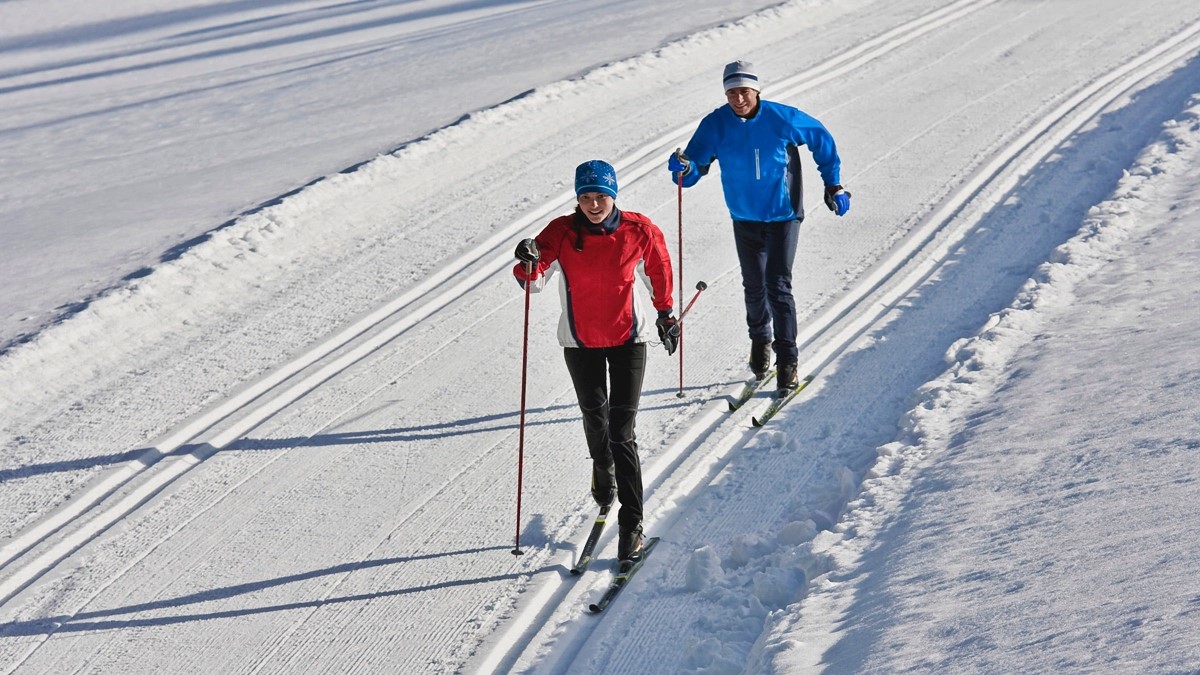
Welcome to the world of cross country skiing! As you embark on this exhilarating winter sport, it’s important to familiarize yourself with the equipment you’ll need, including ski bindings. Fischer, a renowned brand in the skiing world, offers a range of high-quality cross country ski bindings that ensure stability, control, and optimal performance on the snow-covered trails.
In this guide, we will walk you through the process of using Fischer cross country ski bindings, from understanding their components to adjusting them to your boots, mounting them on your skis, and properly maintaining them. Whether you’re a beginner or an experienced skier, this article aims to provide you with the knowledge and skills to make the most out of your Fischer bindings.
Before we dive into the details, it’s worth mentioning that cross country skiing is not only a fantastic way to stay fit and enjoy the winter outdoors, but it also allows you to immerse yourself in the stunning beauty of nature. From gliding through serene snowy landscapes to challenging yourself on steep hills, cross country skiing offers a unique and rewarding experience that is both physical and meditative.
Now, let’s get started on familiarizing ourselves with the components of Fischer cross country ski bindings so that we can confidently hit the trails and embark on an adventure filled with excitement and serenity.
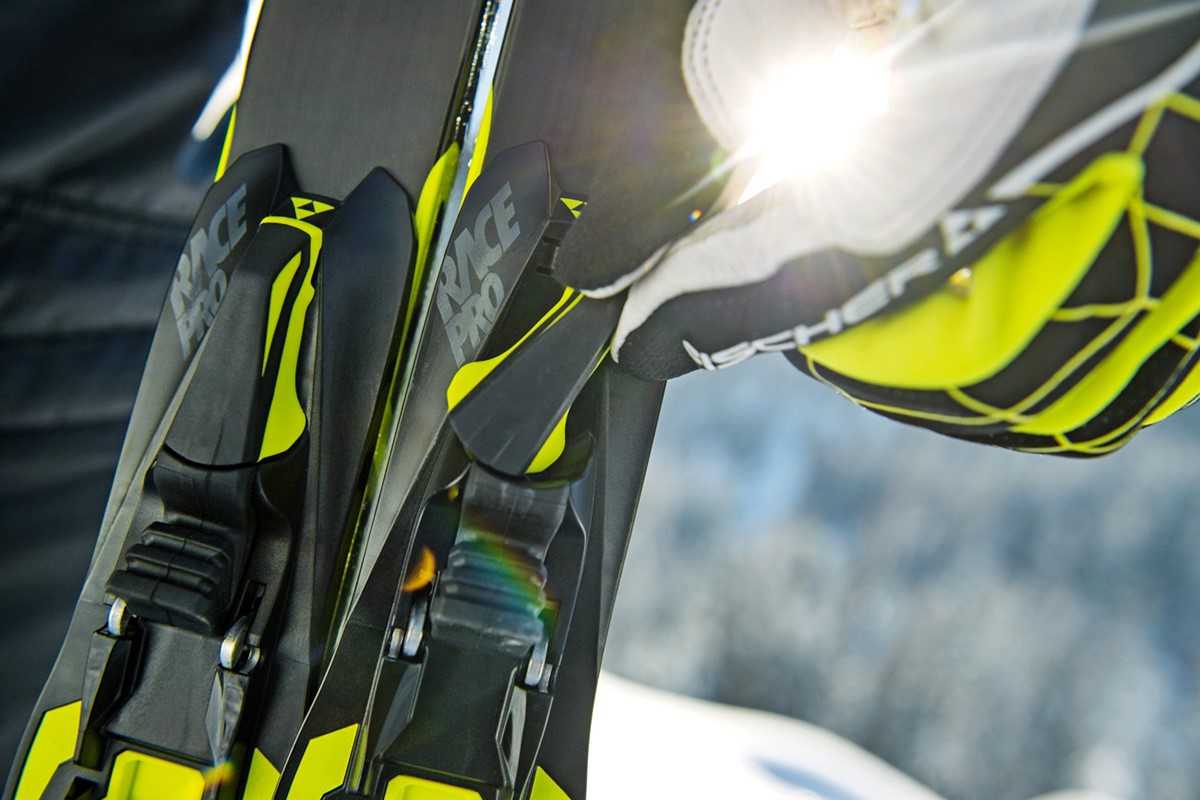
Understanding Fischer Cross Country Ski Bindings
Fischer cross country ski bindings are designed to connect your boots to the skis, providing stability and control as you glide across the snow. These bindings are essential for a secure and efficient skiing experience, allowing you to transfer power from your legs to the skis while establishing a connection that ensures proper ski maneuverability.
There are several key components of Fischer cross country ski bindings that you should become familiar with:
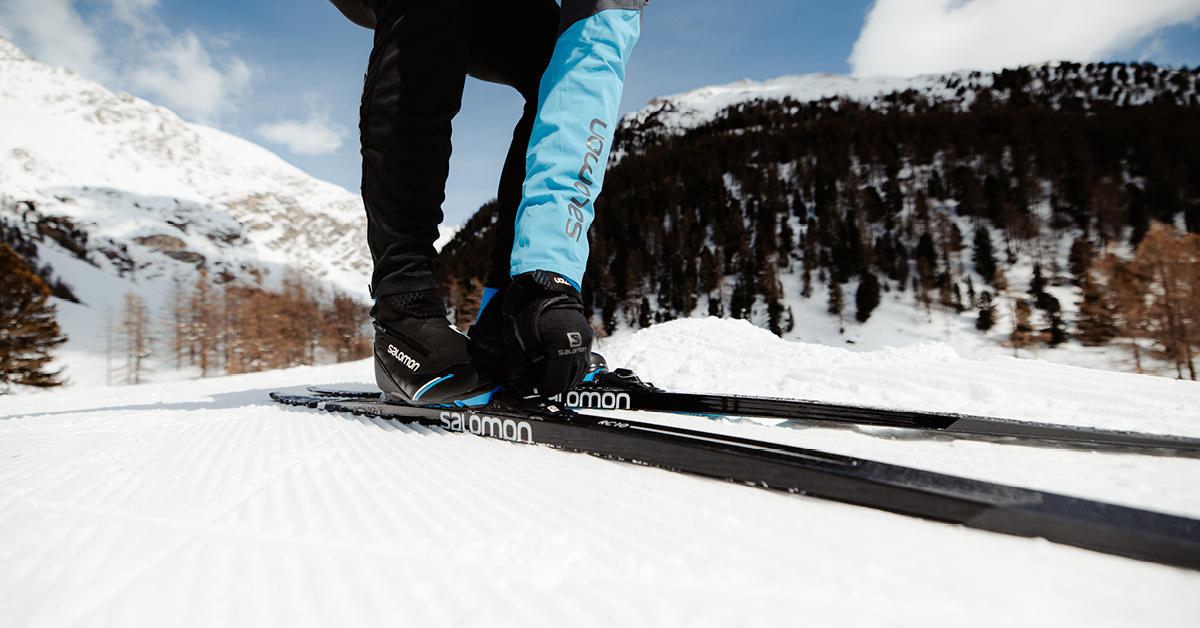
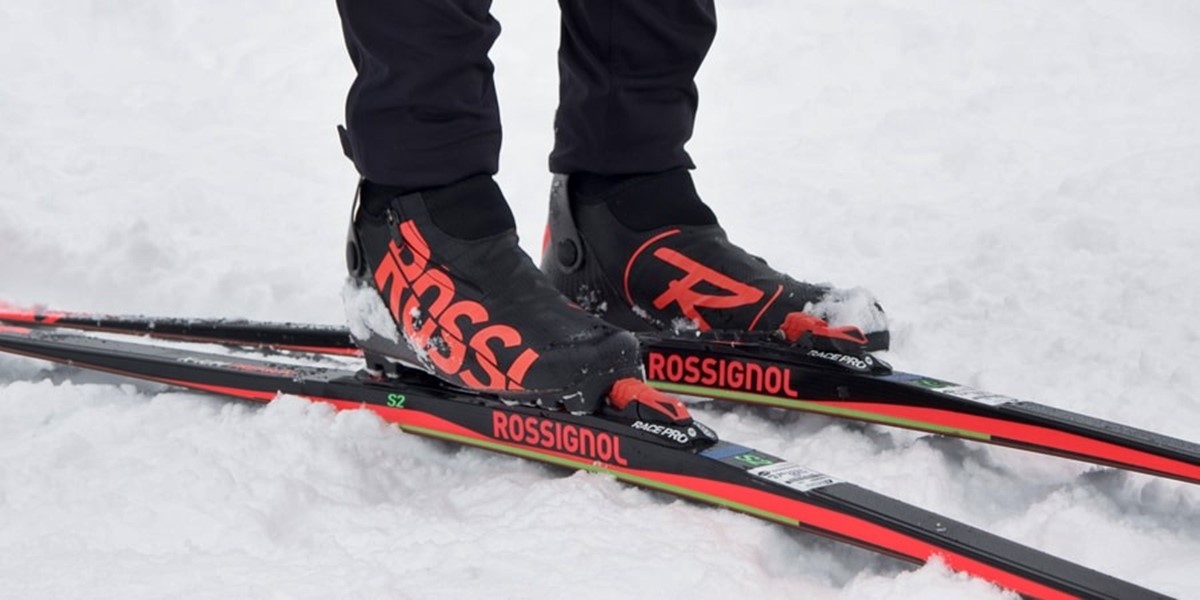
1. Toe Piece: The toe piece is located at the front of the binding and is responsible for securing the front of your boot. It typically features a lever mechanism that engages with the boot’s toe, ensuring a tight and secure fit.
2. Heel Piece: The heel piece is positioned at the back of the binding and is responsible for securing the heel of your boot. It often features an adjustable sliding plate that accommodates different boot sizes, allowing for a customized fit.
3. Binding Plate: The binding plate serves as the connection point between the ski and the binding. It is usually made of sturdy materials such as metal or reinforced plastic to ensure durability and stability.
4. Binding Flex: Binding flex refers to the flexibility of the binding in relation to the ski. This aspect is crucial in determining how the skis react to your movements and weight shifts. It’s essential to choose a binding flex that matches your skiing style and skill level for optimal performance.
Now that you have a basic understanding of the components of Fischer cross country ski bindings, let’s move on to the next step: adjusting the bindings to your boots. This step is essential for achieving a comfortable and secure fit, providing you with the confidence and control you need to fully enjoy your skiing experience.
Step 1: Familiarizing Yourself with the Parts of Fischer Cross Country Ski Bindings
Before you can start using Fischer cross country ski bindings, it’s important to familiarize yourself with the different parts and components. Understanding how each element works and interacts with your boots and skis will ensure a smooth and enjoyable skiing experience.
Here are the key parts you need to become acquainted with:
1. Toe Piece: The toe piece is located at the front of the binding and is responsible for securing the front of your boot. It often features a lever mechanism that you need to lift to open the binding and insert your boot. Make sure the toe of your boot aligns with the grooves or pins in the toe piece for proper fit and alignment.
2. Heel Piece: The heel piece is positioned at the back of the binding and is responsible for securing the heel of your boot. It typically features an adjustable sliding plate that accommodates different boot sizes. To adjust the heel piece, loosen the screw or lever and slide it to the appropriate position, aligning with the size of your boot.
3. Binding Plate: The binding plate serves as the connection point between the ski and the binding. It is designed to be durable and strong to withstand the forces exerted during skiing. Look for any signs of wear or damage on the binding plate before use, and ensure it is securely fastened to your ski.
4. Binding Flex: The binding flex refers to the flexibility of the binding in relation to the ski. It plays a crucial role in how the ski reacts to your movements and weight shifts. Some bindings have adjustable stiffness to cater to different skiing styles and skill levels. Choose a binding flex that suits your preferences and level of experience.
5. Release Mechanism: Many Fischer cross country ski bindings offer a release mechanism that allows your boot to detach from the ski in certain situations, reducing the risk of injury. Familiarize yourself with how this mechanism works and the different release settings available. Understanding and adjusting the release settings correctly will help ensure your safety on the slopes.
By understanding the various parts and components of Fischer cross country ski bindings, you’ll be better prepared to adjust, maintain, and use them effectively. In the next step, we’ll discuss how to adjust the bindings to your boots, creating a customized fit that promotes comfort and control.
Step 2: Adjusting Fischer Cross Country Ski Bindings for Your Boots
Properly adjusting your Fischer cross country ski bindings to fit your boots is crucial for comfort, control, and overall skiing performance. Here’s a step-by-step guide to help you achieve the optimal fit:
1. Determine Boot Size: Before adjusting the bindings, ensure that you know your boot size. This information is usually indicated on the sole of your boot or on the tag inside the tongue. It’s important to have accurate boot size measurements to set the bindings correctly.
2. Boot Length Adjustment: On the heel piece of the binding, you’ll find a sliding plate that allows you to adjust the length setting. Loosen the screw or lever and slide the plate to match your boot size. Ensure that the boot is centered on the plate for equal length adjustment on both sides.
3. Boot Width Adjustment: Some Fischer bindings also have a width adjustable feature. Look for a lever or screw on the toe piece that allows you to adjust the width setting. Loosen it and adjust the width to fit the width of your boot.
4. Test the Fit: Once you’ve made the necessary adjustments, step into the bindings with your boots and check the fit. Ensure that the toe of your boot is securely in place in the toe piece, and the heel is snugly secured in the heel piece. Wiggle your foot to confirm that there is no excess movement or slippage.
5. Consult a Professional: If you are unsure about adjusting the bindings yourself or want to double-check the settings, it’s recommended to seek assistance from a professional or experienced skier. They can help you ensure that the bindings are properly adjusted for your boots.
Remember, the correct adjustment of the Fischer cross country ski bindings to your boots is essential for both your comfort and safety on the trails. It allows for efficient power transfer, prevents heel lift, and reduces the risk of accidents or injuries. Once you’re confident in the fit of your boots in the bindings, you can move on to the next step: mounting the bindings on your skis.
Step 3: Properly Mounting Fischer Cross Country Ski Bindings on Your Skis
Mounting Fischer cross country ski bindings onto your skis is a critical step to ensure stability, control, and safety while skiing. Properly mounting the bindings will allow for efficient power transfer and enable you to maneuver the skis effectively. Here’s a step-by-step guide to help you with the process:
1. Locate the Mounting Point: Each pair of Fischer skis has a recommended mounting point for the bindings indicated by a mark or a measurement on the ski. It’s crucial to identify this mark before proceeding with the mounting process.
2. Align the Binding: Place the Fischer cross country ski binding on the ski, aligning it with the mounting point mark. Ensure that the toe piece is positioned towards the front of the ski, and the heel piece is towards the back.
3. Mark the Screw Holes: Once the binding is aligned, use a pencil or a marker to mark the screw holes on the ski through the holes on the binding. This will serve as a guide for drilling the screw holes accurately.
4. Drill the Screw Holes: Using an appropriately sized drill bit, carefully drill the screw holes where you made the markings. Ensure that the depth of the holes matches the length of the screws provided with the bindings.
5. Attach the Bindings: With the screw holes drilled, align the binding once again with the mounting point and place the binding onto the ski. Insert the screws through the holes on the binding into the pre-drilled holes on the ski.
6. Tighten the Screws: Using a ski binding screwdriver, tighten the screws securely, but be careful not to overtighten and strip the holes. It’s essential to achieve a firm and secure attachment while maintaining the integrity of the screw holes.
7. Perform a Final Check: Once all the screws are tightened, double-check that the binding is securely mounted by giving it a gentle tug and ensuring that it remains firmly in place. Confirm that the binding is aligned with the ski and there is no noticeable movement or shifting.
By following these steps, you can properly mount your Fischer cross country ski bindings onto your skis, ensuring a solid connection and a secure skiing experience. With the bindings securely mounted, you are now ready to move on to the next step: adjusting the release settings for your skill level and the skiing conditions.
Step 4: Adjusting the Binding Release Settings for Your Skill Level and Conditions
Adjusting the binding release settings of your Fischer cross country ski bindings is essential for your safety and comfort on the slopes. These settings determine how easily the boots release from the bindings in the event of a fall or excessive force, reducing the risk of injuries. Here’s a step-by-step guide to help you adjust the release settings:
1. Locate the Release Mechanism: Look for the release mechanism on the heel piece of the binding. It is typically a small dial or lever that allows you to adjust the release tension.
2. Consult the DIN Chart: The DIN chart is a standardized chart that provides release settings based on your weight, age, skiing ability, and skiing style. Consult this chart to find the recommended release settings for your specific criteria.
3. Adjust the Release Tension: Use the release mechanism on the binding to adjust the tension based on the DIN chart recommendations. Higher settings provide a stronger hold and are suitable for more experienced skiers or aggressive skiing styles, while lower settings offer easier release and are better for beginners or skiers with lower intensity skiing.
4. Test the Release: To ensure the release settings are appropriate, perform a release test. Standing on flat ground with one ski on, apply pressure to the boot in various directions, simulating different forces that may occur during skiing. The boot should release smoothly and easily when the pressure exceeds the set release tension.
5. Make Adjustments as Needed: If the release tension feels too loose or too tight during the test, readjust the settings accordingly. It’s essential to find the right balance that allows for both safety and performance on the slopes.
6. Consider the Conditions: Take into account the skiing conditions when adjusting the release settings. Icy conditions may require higher tension settings to prevent inadvertent releases, while soft or deep snow conditions might warrant slightly lower tension settings for easier release.
Remember, the purpose of adjusting the release settings is to minimize the risk of injury during falls or sudden forces while skiing. It’s crucial to find the appropriate settings that align with your skill level, body weight, and skiing style. With the release settings properly adjusted, you can fully enjoy your skiing experience with confidence and peace of mind.
Step 5: Getting On and Off Fischer Cross Country Ski Bindings Safely
Knowing how to get on and off your Fischer cross country ski bindings safely is crucial for a smooth and hassle-free skiing experience. Follow these steps to ensure you can easily secure your boots in the bindings and release them when needed:
To Get On Fischer Cross Country Ski Bindings:
1. Find a Clear Area: Look for a flat and open area, free from obstacles, where you can comfortably put on your skis.
2. Position Your Skis: Lay your skis in a parallel position, with the bindings facing upwards.
3. Step Into the Bindings: Stand in front of your skis and carefully slide the toe of your boot into the toe piece of the binding. Make sure your boot is fully engaged with the toe piece, and the binding closes securely.
4. Secure the Heel: Lift your heel and insert it into the heel piece of the binding, ensuring it aligns properly. The binding should hold your boot securely in place.
5. Check the Fit: Flex your foot and leg to ensure that your boot is securely held in the binding. Wiggle your foot slightly to confirm that there is no excess movement or slippage.
To Get Off Fischer Cross Country Ski Bindings:
1. Find a Stopping Point: Locate a safe area where you can comfortably stop and remove your skis.
2. Prevent Unintentional Release: Before removing your skis, make sure to release the pressure exerted on the bindings. To do this, shift your weight to your non-skiing leg.
3. Release the Heel: Lift the lever or press the release mechanism that allows you to disengage the heel piece of the binding. This will release the connection between your boot and the ski.
4. Slide Your Foot Out: Carefully slide your foot out of the binding, starting with the heel and then lifting your toe.
5. Secure Your Skis: Once you have removed your boots from the bindings, secure your skis by bringing them together and using the ski straps or other means of attachment.
By following these steps, you can safely and easily get on and off your Fischer cross country ski bindings. This will ensure that you start and end your skiing adventures with confidence and convenience. Now, let’s move on to the final step: maintaining and caring for your Fischer cross country ski bindings to ensure their longevity and optimal performance.
Step 6: Maintaining and Caring for Fischer Cross Country Ski Bindings
Maintaining and caring for your Fischer cross country ski bindings is essential to ensure their longevity and optimal performance. Proper upkeep will not only extend the lifespan of the bindings but also contribute to your safety and enjoyment on the slopes. Follow these guidelines to keep your bindings in excellent condition:
1. Clean After Each Use: After every skiing session, remove any dirt, snow, or ice from the bindings. Use a soft cloth or brush to gently wipe down the binding components, ensuring that all debris is removed.
2. Inspect for Damage: Regularly inspect your bindings for any signs of wear, cracks, or damage. Pay attention to the toe piece, heel piece, and release mechanism. If you notice any issues, consult a professional or contact Fischer for guidance.
3. Lubricate Moving Parts: Apply a small amount of silicone-based lubricant to the moving parts of the bindings, such as the release mechanism and adjustment screws. This will help maintain smooth operation and prevent rust or corrosion.
4. Store Properly: When not in use, store your skis with the bindings in a cool, dry place away from direct sunlight. Keep them in a ski bag or rack to protect them from dust, dirt, and accidental damage.
5. Regular Maintenance: Periodically check and adjust the release tension settings according to changes in your skiing ability or weight. Follow the instructions provided by Fischer to ensure correct adjustment.
6. Professional Servicing: Consider having your bindings serviced by a professional technician every season or if you notice any significant issues. They can perform a thorough inspection, lubricate parts, and make any necessary adjustments or repairs.
Remember, caring for your Fischer cross country ski bindings is just as important as caring for your skis. By maintaining them properly, you ensure their functionality, reliability, and longevity. Regular inspections and attention to detail will help you identify any potential issues before they become major problems. By following these maintenance practices, you can enjoy many seasons of safe and enjoyable cross country skiing.
Conclusion
Congratulations! You are now equipped with the knowledge and skills to effectively use and maintain Fischer cross country ski bindings. By familiarizing yourself with the different parts of the bindings, adjusting them to your boots, properly mounting them on your skis, and adjusting the release settings, you can ensure a safe and enjoyable skiing experience.
Remember the importance of familiarizing yourself with the components of Fischer cross country ski bindings. Understanding how each part works and interacts will give you a better understanding of their function and allow you to use them more effectively.
Properly adjusting the bindings to your boots is crucial for comfort and control on the slopes. Take the time to ensure the bindings are securely and correctly mounted on your skis, allowing for optimal power transfer and maneuverability.
Adjusting the release settings based on your skill level and skiing conditions is essential for safety. Finding the right tension settings will prevent unintentional releases while ensuring easy release when needed.
Knowing how to safely get on and off the bindings is important to avoid injuries. By following the steps outlined, you can confidently attach and detach your boots without any issues.
Lastly, maintaining and caring for your Fischer cross country ski bindings will prolong their lifespan and ensure their optimal performance. Regular cleaning, inspection, lubrication, and proper storage will help keep them in excellent condition for many seasons of enjoyable skiing.
Now, it’s time to hit the trails and experience the thrilling adventure of cross country skiing with your Fischer bindings. Stay safe, have fun, and embrace the beauty of nature as you glide effortlessly through snowy landscapes. Happy skiing!