Brands
How To Use Life Fitness Treadmill
Modified: January 2, 2024
Learn how to effectively use Life Fitness treadmills, one of the top treadmill brands in the market. Maximize your fitness routine with their advanced features and technology.
Introduction
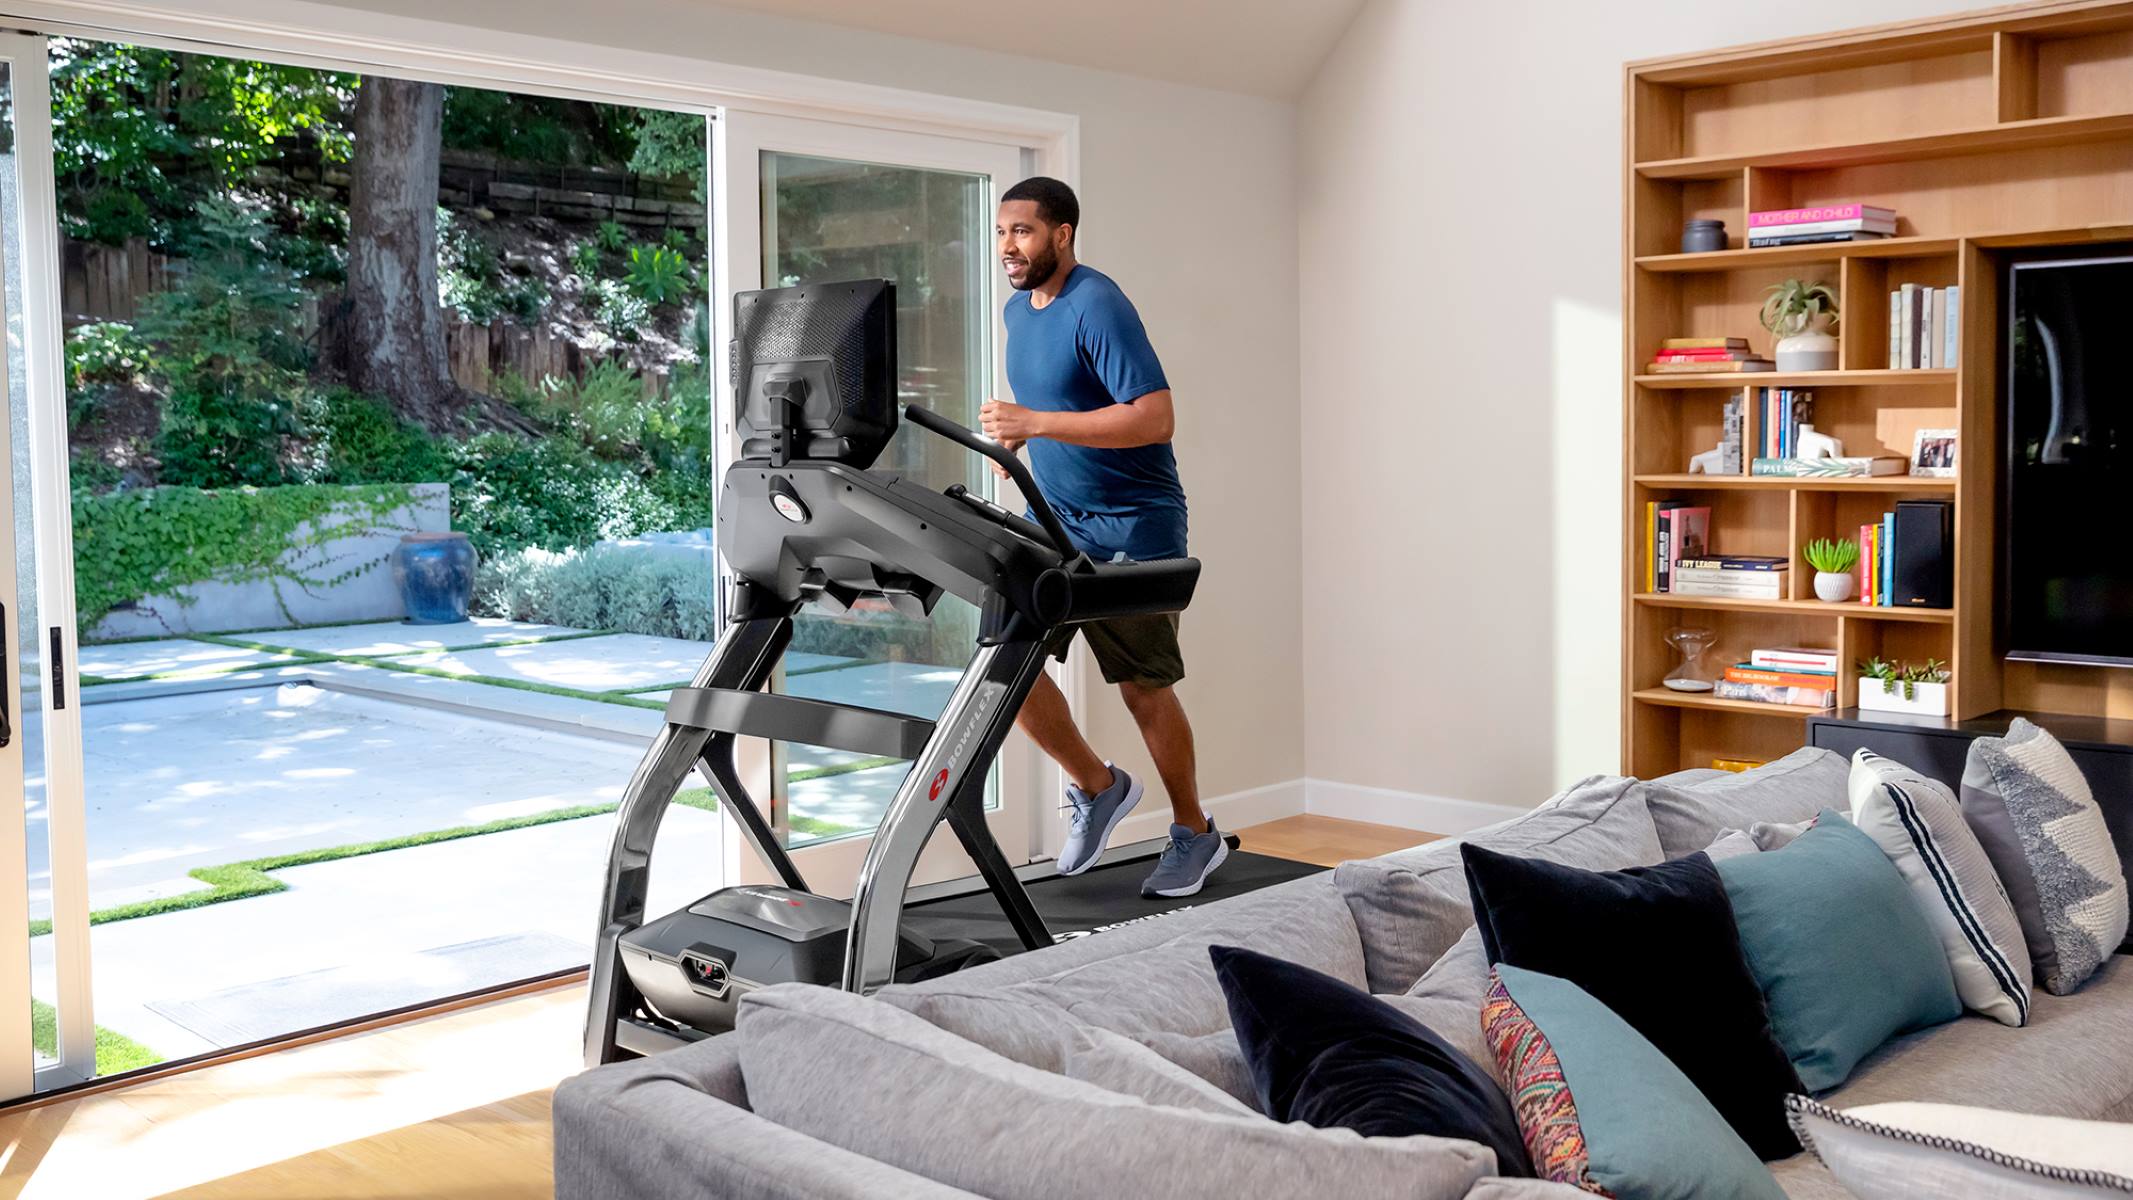
Welcome to the world of fitness and wellness, where the Life Fitness Treadmill is your companion on the journey to a healthier lifestyle. Whether you are a beginner or an experienced runner, this cutting-edge piece of fitness equipment offers a range of features and programs to help you achieve your fitness goals.
With its sleek design and advanced technology, the Life Fitness Treadmill is a perfect addition to your home gym or commercial fitness center. It provides a comfortable and efficient workout experience, allowing you to burn calories, improve cardiovascular health, and boost your overall fitness.
Designed with safety and convenience in mind, the Life Fitness Treadmill offers various options to customize your workout. From adjustable speed and incline levels to a wide range of workout programs, you can tailor your exercise routine to your specific needs and preferences.
In this comprehensive guide, we will walk you through the step-by-step process of using the Life Fitness Treadmill effectively and safely. Whether you are a beginner or an experienced user, this guide will provide you with valuable information on assembly, setup, control panel functions, workout programs, and maintenance.
Before we dive into the details, it’s important to note that safety should always be a top priority when using any fitness equipment, including the Life Fitness Treadmill. Make sure to read and follow the safety guidelines provided by the manufacturer to prevent accidents or injuries.
Now, let’s get started on our journey to discover how to fully utilize the capabilities of the Life Fitness Treadmill and maximize your fitness potential!
Safety Guidelines
Before using the Life Fitness Treadmill, it’s important to familiarize yourself with the safety guidelines to ensure a safe and injury-free workout experience. Here are some essential safety tips to keep in mind:
- Read the User Manual: Start by thoroughly reading the user manual provided by the manufacturer. It contains important information about the proper use and maintenance of the treadmill. Understanding all the features and functions will help you use the treadmill safely.
- Clear the Area: Ensure that the area around the treadmill is free from any obstacles. This includes removing loose items such as clothing, water bottles, or towels that could get caught in the moving parts of the treadmill.
- Wear Appropriate Attire: Dress in comfortable workout clothing and wear proper athletic shoes with good support. Avoid loose or baggy clothing that could get tangled in the treadmill. Secure long hair and remove any jewelry that may interfere with your workout.
- Warm Up: Before starting your workout, it’s essential to perform a warm-up routine to prepare your muscles for exercise. Spend a few minutes performing dynamic stretches, such as leg swings and arm circles, to increase blood flow and flexibility.
- Start Slowly: If you’re new to using a treadmill or haven’t exercised for an extended period, begin with a moderate pace and gradually increase speed and intensity. This gradual progression will help prevent muscle strains or other injuries.
- Maintain Proper Form: Pay attention to your posture and maintain proper form while using the treadmill. Keep your head up, shoulders relaxed, and core engaged. Avoid holding onto the handrails unless necessary for balance or safety.
- Stay Hydrated: Proper hydration is essential during any workout. Have a water bottle nearby and take regular sips to stay hydrated throughout your exercise session.
- Take Breaks: Listen to your body and take breaks when needed. If you’re feeling fatigued or experiencing any discomfort, slow down or stop your workout. Pushing too hard without proper rest can lead to injury.
- Cool Down: After completing your workout, spend a few minutes performing a cooldown routine to gradually lower your heart rate and stretch your muscles. This promotes recovery and reduces the risk of post-workout muscle soreness.
- Maintenance and Inspection: Regularly inspect the treadmill for any signs of wear or damage. Follow the manufacturer’s guidelines for cleaning and maintenance to ensure optimal performance and safety.
By following these safety guidelines, you can enjoy a safe and effective workout on the Life Fitness Treadmill. Remember, your well-being is of utmost importance, so prioritize safety at all times!
Step 1: Assembly and Setup
Before you can start using your Life Fitness Treadmill, you’ll need to assemble and set it up properly. Here’s a step-by-step guide to help you through the process:
- Read the Instruction Manual: Begin by carefully reading the instruction manual provided by the manufacturer. It will provide specific guidelines and instructions for assembling your treadmill.
- Prepare the Workspace: Choose a suitable location for your treadmill. Ensure that there is ample space around the treadmill for easy access and ventilation. Clear the area of any objects or clutter.
- Unpack and Organize: Unpack all the components of the treadmill and organize them according to the instructions. This will make the assembly process smoother and more efficient.
- Attach the Base: Start by attaching the base of the treadmill to the frame. Follow the instructions carefully to ensure proper alignment and secure attachment.
- Attach the Console: Once the base is securely attached, proceed with attaching the console to the frame. Make sure all the cables and wires are neatly connected as per the instructions.
- Attach the Handrails and Controls: Depending on the model of your treadmill, you may need to attach handrails and control panels. Follow the instructions provided to attach these components correctly.
- Secure the Screws and Bolts: Once all the components are in place, go through the treadmill and ensure that all the screws and bolts are securely tightened. This will provide stability and safety during your workouts.
- Double-Check: Before using your treadmill, take a moment to double-check all the connections, attachments, and fastenings. Ensure that everything is in place and functioning properly.
- Power Up: Plug your treadmill into a power source and switch it on. Most treadmills have a power button or switch located near the console. Refer to the instruction manual for specific details related to powering on your treadmill.
- Start Exploring: Once your treadmill is assembled and powered on, take some time to familiarize yourself with the control panel, buttons, and features. This will enable you to navigate through the various options and programs more effectively.
By following these steps, you’ll be able to assemble and set up your Life Fitness Treadmill with ease. Remember to take your time and refer to the instruction manual whenever you have any doubts or questions. Once your treadmill is set up, you’ll be one step closer to enjoying a rewarding and effective workout experience!
Step 2: Powering On the Treadmill
Now that you have successfully assembled your Life Fitness Treadmill, it’s time to power it on and get ready for your workout. Follow these steps to ensure a smooth and hassle-free process:
- Locate the Power Source: Before powering on the treadmill, make sure it is plugged into a suitable power source. The power cord is typically located at the rear of the treadmill. Connect it to a wall outlet or a surge protector.
- Check the Safety Key: Most Life Fitness Treadmills come equipped with a safety key. This key is a crucial safety feature that should be inserted into the designated slot before starting the treadmill. It ensures that the treadmill will stop immediately in case of an emergency or if the key is removed.
- Position Yourself Correctly: Stand on one side of the treadmill, facing the control panel. Ensure that you are in a stable and secure position, with a firm grip on the handrails if necessary.
- Locate the Power Button: Look for the power button or switch on the control panel. It is typically labeled as ‘Power’ or may have a symbol indicating power. Refer to the user manual if you are unsure about the location of the power button on your specific model.
- Power On: Once you have located the power button, press it to power on the treadmill. The console should light up, indicating that the treadmill is now powered on and ready for use.
- Wait for Initialization: After turning on the treadmill, it may take a few seconds for the console to initialize and display the home or main screen. Be patient and wait for the treadmill to complete its startup process.
- Adjust Display Settings: Once the home or main screen is displayed, take a moment to adjust the display settings if necessary. This includes options such as brightness, language preference, and units of measurement (e.g., miles or kilometers).
- Check for Updates: If your Life Fitness Treadmill has a software update feature, navigate to the settings menu and check for any available updates. Keeping your treadmill’s software up to date ensures optimal performance and access to the latest features.
By following these steps, you’ll be able to power on your Life Fitness Treadmill and prepare for an energizing workout. Remember to always follow the safety guidelines and use the safety key to ensure your well-being while using the treadmill. Now that your treadmill is powered on, it’s time to familiarize yourself with the control panel and explore the various workout options available to you!
Step 3: Familiarizing Yourself with the Control Panel
Now that your Life Fitness Treadmill is powered on, it’s important to take some time to familiarize yourself with the control panel. Understanding the functions and features of the control panel will allow you to navigate through the various options and programs more effectively. Here’s a guide to help you get started:
- Display Screen: The display screen is the central part of the control panel. It provides real-time feedback on your workout, including speed, distance, time, calories burned, and other relevant information. Take a moment to glance at the screen and understand how the information is presented.
- Quick Start Button: The Quick Start button is usually located prominently on the control panel. Pressing this button will automatically start the treadmill at a default speed and incline level. It is a convenient option for quick and easy workouts.
- Speed and Incline Controls: Look for the speed and incline controls on the control panel. These buttons or knobs allow you to adjust the speed and incline levels of the treadmill during your workout. Familiarize yourself with these controls, as they are essential for customizing your workout.
- Workout Programs: Many Life Fitness Treadmills come preloaded with a variety of workout programs. These programs are designed to simulate different types of workouts, such as hill climbs or interval training. Explore the control panel to locate the workout program options and understand how to select and adjust them.
- Heart Rate Monitoring: Some Life Fitness Treadmills have built-in heart rate monitoring capabilities. This allows you to track your heart rate during your workout, giving you valuable feedback on your cardiovascular performance. If your treadmill has this feature, familiarize yourself with how to monitor and interpret your heart rate.
- Entertainment Features: Advanced Life Fitness Treadmill models may include entertainment options such as built-in speakers, MP3 connectivity, or a media shelf. Explore the control panel to see if these features are available and how to utilize them to enhance your workout experience.
- User Profiles: If your treadmill supports multiple user profiles, find out how to set up and manage these profiles. User profiles allow different individuals to track their workouts separately and personalize their settings.
- Pause and Stop Functions: On the control panel, locate the buttons or options for pausing and stopping your workout. Understanding how to pause or stop the treadmill is essential for safety and convenience during your exercise session.
By familiarizing yourself with the control panel of your Life Fitness Treadmill, you can easily navigate through the various options and programs, making your workouts more enjoyable and tailored to your needs. It may take some practice, but soon enough, you’ll feel confident using the control panel to enhance your fitness journey. Next, we’ll explore how to choose and adjust the workout program to optimize your workout experience!
Step 4: Choosing and Adjusting the Workout Program
Now that you are familiar with the control panel of your Life Fitness Treadmill, it’s time to explore and select the workout program that best suits your fitness goals. These programs are designed to provide a variety of challenging and engaging workouts. Follow these steps to choose and adjust the workout program:
- Access the Program Menu: Locate the program menu on the control panel. It may be labeled as “Programs” or have a corresponding icon. Press the button or select the option to access the available programs.
- Browse the Programs: Take a moment to browse through the list of programs available on your treadmill. These programs may include options like manual mode, pre-programmed workouts, interval training, hill climbs, and more. Each program is designed to offer a unique exercise experience.
- Select a Program: Choose the program that aligns with your fitness goals or interests. Using the navigation buttons or touchscreen, select the program you wish to try. If you are a beginner, starting with a basic program like “Manual” or “Quick Start” is a good idea.
- Adjust the Settings: After selecting a program, you can often adjust certain settings to customize the workout. These settings usually include variables such as duration, speed, incline levels, and sometimes even target heart rate. Refer to the user manual or on-screen instructions to make these adjustments.
- Start the Program: Once you have chosen your program and adjusted the settings, you are ready to start your workout. Press the “Start” button, and the treadmill will begin running based on the selected program and settings.
- Monitor Your Progress: Keep an eye on the display screen to track your progress during the workout. The screen will typically show information such as time elapsed, distance covered, calories burned, and other relevant metrics. This feedback can help you stay motivated and achieve your fitness goals.
- Make Adjustments as Needed: During your workout, you may feel the need to make adjustments to the speed, incline, or other settings. Most treadmills allow you to do this while the workout is in progress. Use the speed and incline controls on the control panel to make these adjustments.
- Finish the Program: Once you have completed the desired duration or reached your workout goals, it’s time to finish the program. Press the “Stop” or “Finish” button on the control panel, and the treadmill will gradually come to a stop. Take a moment to cool down and stretch.
Choosing and adjusting the workout program on your Life Fitness Treadmill allows you to tailor your workouts to your fitness level and objectives. Experiment with different programs to add variety and challenge to your exercise routine. Remember to listen to your body and make adjustments as needed to ensure a safe and effective workout. Next, we’ll discuss how to set the speed and incline levels to further customize your workout experience!
Step 5: Setting the Speed and Incline Levels
Setting the speed and incline levels on your Life Fitness Treadmill is a crucial step in personalizing your workout. By adjusting these parameters, you can challenge yourself, simulate outdoor conditions, and target specific muscle groups. Follow these steps to set the speed and incline levels:
- Locate the Speed and Incline Controls: On the control panel, find the buttons or knobs that allow you to adjust the speed and incline levels of the treadmill. These controls are usually labeled or have symbol indicators.
- Understand Speed Levels: Familiarize yourself with the speed range offered by your treadmill. Typically, you can increase or decrease the speed in increments of 0.1 or 0.5 mph. Higher speeds provide a more challenging workout, while lower speeds are suitable for warm-ups or recovery periods.
- Adjust the Speed: Depending on your fitness level and workout goals, adjust the speed to a comfortable starting point. If you’re a beginner, begin with a slower speed and gradually increase it as you build endurance and confidence.
- Explore Incline Options: Take note of the available incline options on your treadmill. This feature allows you to simulate walking or running uphill, which engages different muscle groups and adds intensity to your workout.
- Adjust the Incline: Select an incline level that suits your fitness goals. You can start with a flat surface or a slight incline and gradually increase it as you progress. Higher incline levels offer a more challenging workout and simulate hill climbing.
- Consider Interval Training: Interval training involves alternating between high-intensity efforts and recovery periods. Use the speed and incline controls to switch between higher and lower intensity levels for an effective interval training workout.
- Experiment and Listen to Your Body: Each workout is unique, and the ideal speed and incline levels can vary depending on factors such as your fitness level, goals, and energy levels. Experiment with different settings and pay attention to how your body responds. Make adjustments as needed to find the optimal settings for your workout.
- Gradually Increase Intensity: As you progress in your fitness journey, challenge yourself by gradually increasing the speed and incline levels. Gradual increases will help prevent overexertion and minimize the risk of injuries.
- Use Pre-programmed Settings: Many treadmills offer pre-programmed settings that automatically adjust the speed and incline levels throughout your workout. These settings are designed to simulate different types of terrain or training styles. Explore these options and see if they align with your fitness goals.
Setting the speed and incline levels on your Life Fitness Treadmill opens up a world of possibilities for customizing your workouts. By adjusting these parameters appropriately, you can challenge yourself, target specific muscle groups, and make your workouts more effective and engaging. Remember, always listen to your body, make gradual adjustments, and consult the user manual if you have any questions about specific settings. Next, we’ll explore how to start and stop the treadmill during your workout.
Step 6: Starting and Stopping the Treadmill
Knowing how to properly start and stop your Life Fitness Treadmill is essential for a safe and seamless workout experience. Follow these steps to ensure that you can start and stop the treadmill effectively:
- Position Yourself Correctly: Before starting the treadmill, position yourself in the center of the running belt. Ensure that you have a firm grip on the handrails if necessary, and stand in a stable and balanced posture.
- Press the Start Button: Locate the start button on the control panel. It is typically labeled as “Start” or has a corresponding symbol. Once you are ready to begin your workout, press the start button to initiate the treadmill’s motion.
- Gradually Increase Speed: After starting the treadmill, gradually increase the speed to your desired level. You can use the speed controls on the control panel to make small adjustments until you reach your desired pace.
- Maintain Proper Form: As you start walking or running on the treadmill, it’s important to maintain proper form. Keep your head up, shoulders relaxed, and core engaged. Avoid holding onto the handrails unless necessary for balance or safety.
- Listen to Your Body: Pay attention to how your body feels as you begin your workout. If you experience any discomfort or if the speed feels too challenging, adjust it accordingly. It’s essential to find a pace that is comfortable and sustainable for you.
- Monitor Your Progress: Keep an eye on the display screen to track your progress during the workout. The screen will typically show information such as time elapsed, distance covered, calories burned, and other relevant metrics. This feedback can help you stay motivated and track your performance.
- Stopping in Emergencies: If an emergency arises or you need to stop the treadmill immediately, locate the emergency stop button or safety key. Press the emergency stop button or remove the safety key to halt the treadmill’s motion. This feature ensures your safety by immediately stopping the machine.
- Cooldown and Slow Down: When you are ready to finish your workout, gradually reduce the speed of the treadmill. This cooldown period allows your heart rate to gradually return to normal and helps prevent post-workout dizziness or discomfort.
- Press the Stop Button: Once you have slowed down to a walking pace, it’s time to stop the treadmill completely. Locate the stop button on the control panel and press it to bring the treadmill to a complete stop.
- Step Off with Care: After the treadmill has fully stopped, step off the running belt carefully, ensuring that you have a firm footing before leaving the treadmill area.
By following these steps, you can confidently start and stop your Life Fitness Treadmill during your workouts. Remember to maintain proper form, listen to your body, and gradually increase or decrease the speed as necessary. Taking these precautions will ensure a safe and enjoyable exercise session. Now, let’s learn about monitoring your heart rate during your treadmill workouts in the next step.
Step 7: Monitoring Your Heart Rate
Monitoring your heart rate during your treadmill workouts is an excellent way to gauge the intensity of your exercise and ensure that you are within your target heart rate zone. Here’s how you can effectively monitor your heart rate on your Life Fitness Treadmill:
- Heart Rate Sensors: Most Life Fitness Treadmills are equipped with built-in heart rate sensors on the handrails or the console. These sensors can detect your heart rate by simply placing your hands on the designated areas while exercising.
- Touch the Heart Rate Sensors: To monitor your heart rate, lightly touch the heart rate sensors with your hands or place your palms firmly on the designated handrail grips. Maintain contact with the sensors throughout your workout for accurate heart rate monitoring.
- Monitor the Display: Look at the display screen to see your heart rate reading. The screen will typically show your heart rate in beats per minute (BPM). Depending on your fitness goals, you can adjust your exercise intensity to stay within your target heart rate zone.
- Understanding Target Heart Rate: To maximize the benefits of your workout, it’s helpful to know your target heart rate zone. This zone represents the range at which your heart rate should generally be during exercise. To calculate your target heart rate, subtract your age from 220 and multiply it by the desired percentage of intensity (usually between 50% and 85%).
- Achieving Your Target Heart Rate: If your heart rate is below your target heart rate zone, increase the speed or incline of the treadmill to raise your heart rate. Conversely, if your heart rate is too high, decrease the intensity by slowing down or reducing the incline.
- Listen to Your Body: While monitoring your heart rate is helpful, it’s important to listen to your body and consider how you feel during your workout. Factors such as fatigue, breathing rate, and perceived exertion should also be taken into account to ensure a safe and effective exercise session.
- Use a Heart Rate Monitor: If your treadmill does not have built-in heart rate sensors or if you prefer more accurate and continuous heart rate monitoring, consider using an external heart rate monitor. These devices typically consist of a chest strap or wristband that wirelessly transmits your heart rate to the treadmill’s console or a connected smart device.
- Personalizing Heart Rate Zones: Some Life Fitness Treadmills allow you to set personalized heart rate zones based on your specific fitness goals and preferences. Refer to the user manual or explore the control panel options to see if this feature is available.
Monitoring your heart rate during your treadmill workouts can help you gauge your exercise intensity, track your progress, and optimize your training. By staying within your target heart rate zone, you can ensure that your workout is both effective and safe. Continue to the next step to explore the built-in workout apps that can further enhance your exercise routine!
Step 8: Using the Built-in Workout Apps
One of the great features of the Life Fitness Treadmill is the availability of built-in workout apps. These apps provide a wide range of exercise programs designed to challenge and motivate you. Follow these steps to make the most out of the built-in workout apps:
- Access the Workout App Menu: Locate the workout app menu on the control panel. It may be labeled as “Workouts,” “Apps,” or have an icon representing the available programs. Navigate to this menu to access the various workout apps.
- Browse the App Options: Take a moment to explore the different workout apps available on your Life Fitness Treadmill. These apps might include options like cardio workouts, fat-burning programs, interval training, hill climbs, and many more.
- Select an App: Choose the workout app that aligns with your fitness goals, interests, or the type of workout you’re looking for. Use the navigation buttons or touchscreen to select the app you want to try.
- Review the App Details: Once you’ve selected a workout app, review the details provided. This may include information about the duration, intensity, speed, incline levels, and any unique features or challenges specific to that workout app.
- Adjust the Settings: Depending on the app, you may have the option to adjust certain settings such as speed, incline, or workout duration. Modify these settings to customize the workout according to your fitness level and preferences.
- Start the App: After making any necessary adjustments, press the “Start” button to begin the selected workout app. The treadmill will automatically adjust the speed and incline levels based on the app’s requirements.
- Follow the App Instructions: Pay attention to any on-screen instructions or prompts provided by the workout app. These instructions may guide you through different speeds, incline changes, or intervals to ensure a challenging and effective workout.
- Monitor Your Progress: Keep an eye on the display screen to track your progress and see the metrics specific to the workout app you’re using. This feedback will help you stay motivated and monitor your performance during the workout.
- Complete the Workout: Once you have finished the workout app session, the treadmill may gradually reduce the speed and incline levels to help you cool down. Follow any cooldown instructions provided by the app, or adjust the settings manually if necessary.
- Review Your Results: After the workout, take a moment to review your results and performance. Many Life Fitness Treadmills allow you to view data such as calories burned, distance covered, and workout duration for each app session.
The built-in workout apps on your Life Fitness Treadmill provide a convenient and effective way to diversify your workouts and keep your exercise routine fresh and engaging. Experiment with different apps, challenge yourself, and discover new ways to reach your fitness goals. Now, let’s move on to the importance of cooldown and stretching exercises in Step 9.
Step 9: Cool Down and Stretching Exercises
After completing an intense workout on your Life Fitness Treadmill, it’s crucial to allow your body to gradually return to its resting state. The cool down phase and stretching exercises play a vital role in ensuring a safe and effective recovery. Follow these steps for an optimal cooldown and stretching routine:
- Reduce Speed and Incline: As you near the end of your workout, gradually decrease the speed and incline levels of the treadmill. This helps to lower your heart rate gradually and allows your body to adjust to a slower pace.
- Continue Walking or Jogging: Instead of abruptly stopping, continue walking or jogging at a slow and comfortable pace for a few minutes. This gentle movement helps promote blood flow and aids in the removal of lactic acid from the muscles.
- Perform Dynamic Stretches: After the cooldown period, incorporate dynamic stretching exercises into your routine. Dynamic stretches involve controlled movements that warm up your muscles and increase their flexibility. Examples include leg swings, arm circles, and walking lunges.
- Target Major Muscle Groups: Focus on stretching major muscle groups such as the quadriceps, hamstrings, calves, glutes, and hip flexors. Hold each stretch for about 20-30 seconds, breathing deeply and maintaining proper form throughout.
- Incorporate Balance Exercises: Include balance exercises during your cooldown and stretching routine to improve stability and joint mobility. These exercises, such as single-leg balances or heel-to-toe walks, engage the core and help enhance your overall balance.
- Pay Attention to Tight Areas: Identify any specific areas that feel particularly tight or tense. Pay extra attention to these areas during your stretching routine, holding the stretches for a slightly longer duration to promote relaxation and release tension.
- Avoid Bouncing: Remember to perform static stretches during cooldown, which involve gradually stretching a muscle and holding it in a stable position. Avoid bouncing or jerking movements, as these can lead to muscle strain or injury.
- Listen to Your Body: Respect your body’s limitations and avoid pushing yourself too hard during stretches. You should feel a gentle pull or tension in the muscle, but never any pain. If a stretch feels uncomfortable or painful, ease off or modify the stretch accordingly.
- Stay Hydrated: Drinking water during and after your workout is essential to replenish lost fluids. Keep a water bottle nearby and take small sips throughout the cooldown and stretching routine.
- Make It a Habit: Incorporate cooldown and stretching exercises as a regular part of your treadmill workouts. Consistency is key in maintaining flexibility, preventing muscle imbalances, and reducing the risk of injury.
By dedicating time to a proper cooldown and stretching routine, you allow your body to recover and gradually return to its normal state after a challenging workout on your Life Fitness Treadmill. Remember, the cooldown phase and stretching exercises are just as important as the workout itself in promoting flexibility, preventing muscle imbalances, and optimizing your overall fitness. In our final step, we’ll discuss the maintenance and cleaning of your treadmill to ensure its longevity and performance.
Step 10: Maintenance and Cleaning
Proper maintenance and regular cleaning of your Life Fitness Treadmill are essential for ensuring its longevity, optimal performance, and a hygienic workout environment. Follow these steps to keep your treadmill in top condition:
- Refer to the User Manual: Start by reviewing the user manual provided by the manufacturer. It contains important information and guidelines specific to your treadmill model regarding maintenance and cleaning.
- Inspect Regularly: Conduct routine inspections of your treadmill to identify any signs of wear, loose parts, or damage. Check the frame, handrails, console, and running belt for any issues. If you notice anything out of the ordinary, contact the manufacturer or authorized service provider for assistance.
- Keep it Dust-Free: Regularly remove dust and debris from your treadmill using a soft, dry cloth or a gentle vacuum attachment. A buildup of dust can affect the performance and lifespan of the treadmill’s internal components.
- Clean the Running Belt: The running belt is the most used part of the treadmill and can accumulate sweat, dirt, and debris. Clean it regularly using a mild detergent and a damp cloth. Avoid using harsh chemicals or abrasive cleaners that may damage the belt material.
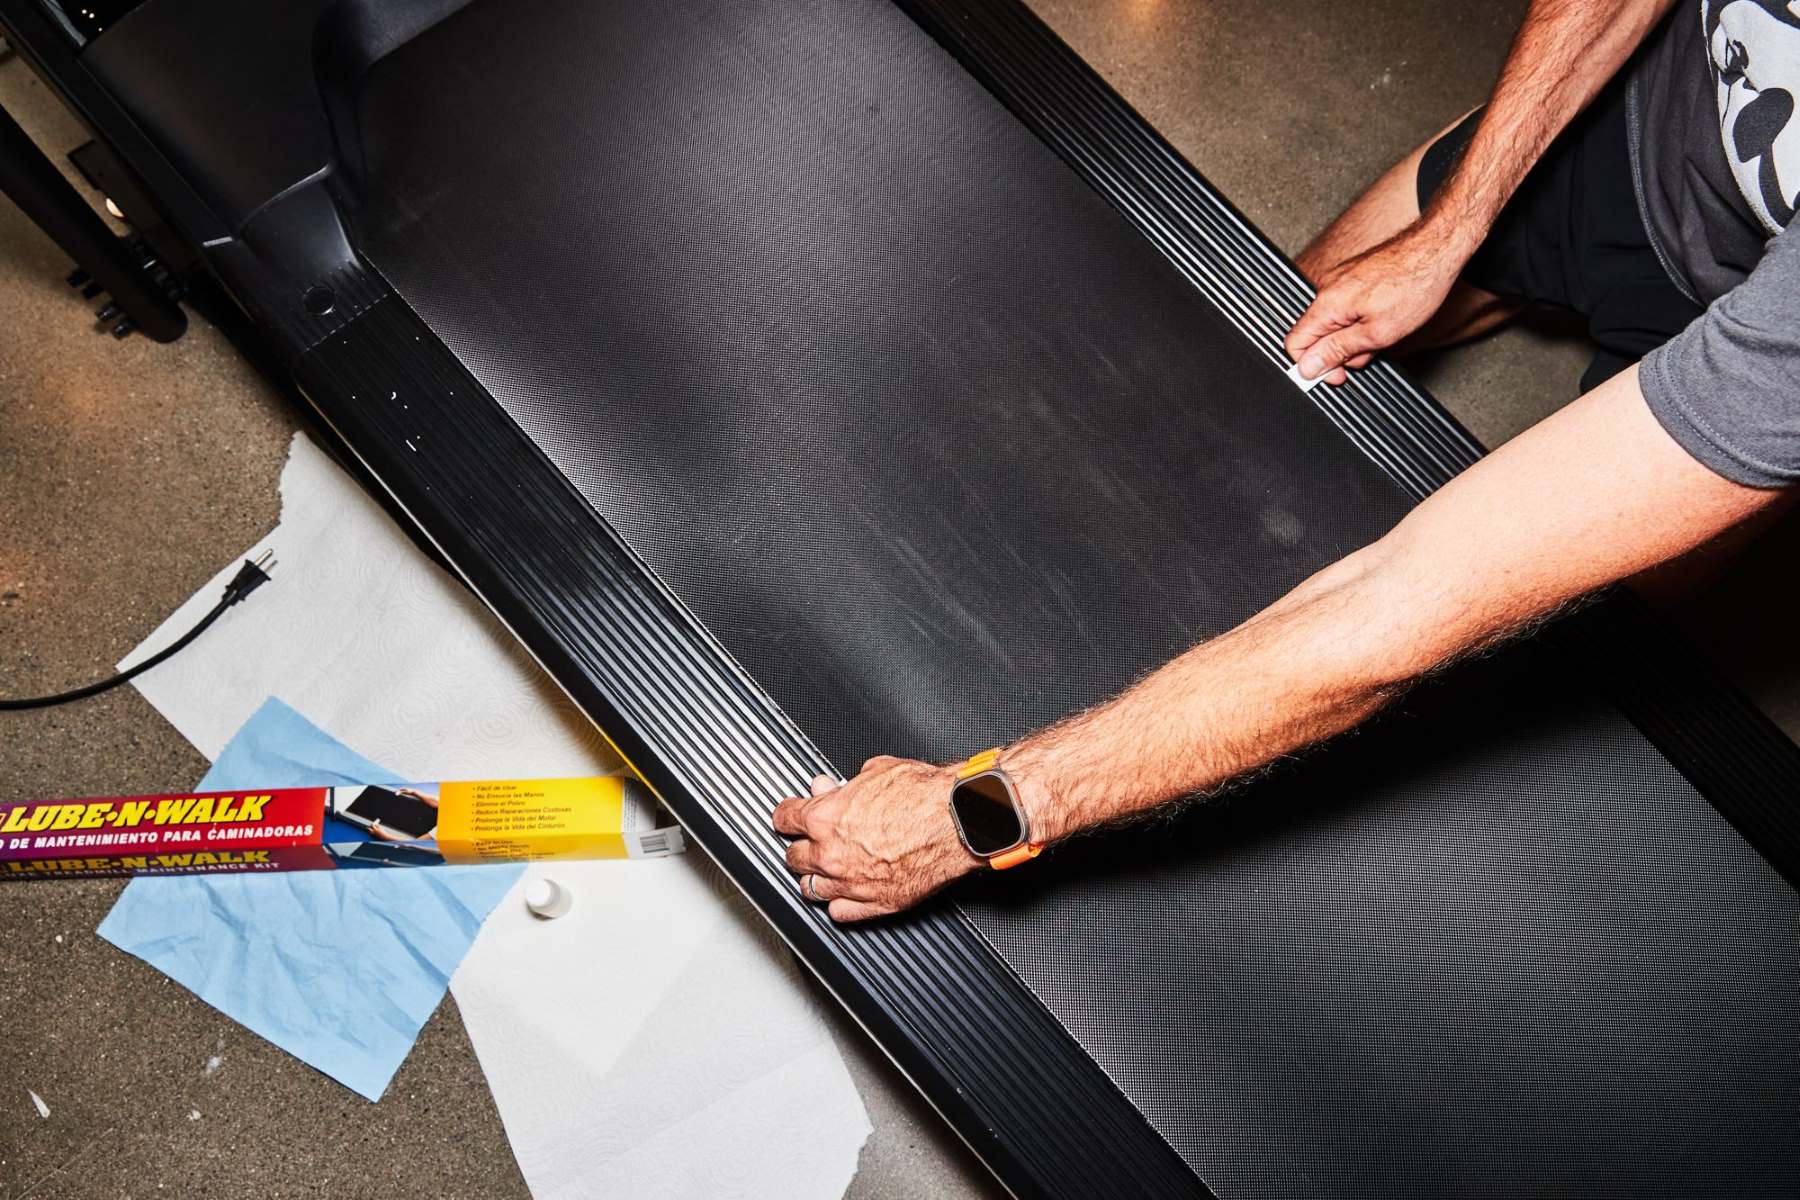
- Lubricate the Belt: Check the user manual for instructions on lubricating the treadmill belt. Proper lubrication reduces friction, minimizes wear, and ensures smooth operation. Use a silicone-based lubricant specifically designed for treadmill belts.
- Clean the Console: Wipe down the console regularly with a soft, damp cloth to remove any fingerprints or sweat residue. Use a mild, non-abrasive cleaner if necessary, but avoid excessive moisture near the control panel to prevent damage.
- Secure Loose Connections: Periodically check and tighten any loose screws or bolts on your treadmill. Loose connections can affect the stability and safety of the machine. Consult the user manual for specific instructions on tightening the hardware.
- Clean the Ventilation Areas: Ensure that the ventilation areas, usually located at the front or sides of the treadmill, are free from dust and debris. Clean these areas using a vacuum cleaner or a dry cloth to maintain proper airflow and prevent overheating.
- Protect from Moisture: Keep your treadmill away from moisture or excessive humidity, as these can damage the electronic components. Avoid placing drinks or water bottles on or near the treadmill to prevent accidental spills.
- Follow Service Schedule: Adhere to the recommended service schedule outlined in the user manual. This may include professional inspections, maintenance, or component replacements. Regular servicing ensures optimal performance and extends the lifespan of your treadmill.
By following these maintenance and cleaning steps, you can ensure that your Life Fitness Treadmill remains in excellent working condition. Regular upkeep not only prolongs its lifespan but also provides you with a safe and enjoyable workout experience. Take pride in caring for your treadmill so that it can continue to support your fitness journey for years to come!
Conclusion
Congratulations! You have now reached the end of this comprehensive guide on how to effectively use and maintain your Life Fitness Treadmill. By following the step-by-step instructions provided, you can make the most out of this versatile fitness equipment and achieve your fitness goals.
We began by introducing you to the world of the Life Fitness Treadmill and emphasizing the importance of safety guidelines. We then guided you through the assembly and setup process, ensuring that your treadmill was properly configured for use.
You learned how to power on the treadmill and familiarize yourself with the control panel, allowing you to easily navigate through the various workout program options. Adjusting the speed and incline levels effectively personalized your workout to match your fitness level and goals.
We also discussed the significance of monitoring your heart rate during your treadmill sessions. By staying within your target heart rate zone, you can optimize the effectiveness and safety of your workouts.
The built-in workout apps on your Life Fitness Treadmill provided a versatile and engaging way to diversify your exercise routine, keeping you motivated and challenged. We then emphasized the importance of cooldown and stretching exercises to facilitate proper recovery and flexibility.
Lastly, we emphasized the significance of regularly maintaining and cleaning your treadmill to ensure its proper functioning and longevity. By following the recommended maintenance routine, you can enjoy a seamless and hygienic workout experience.
Remember, consistency is key in achieving your fitness goals. Incorporate these steps into your regular treadmill workouts and make them a habit. As you progress on your fitness journey, continue exploring and experimenting with the various features and options available on your Life Fitness Treadmill.
Now, armed with this knowledge, it’s time to lace up your shoes, jump onto your Life Fitness Treadmill, and embark on a journey to better health and well-being. Enjoy your workouts and harness the full potential of your Life Fitness Treadmill!