Featured
How To Adjust Treadmill Belt
Modified: August 18, 2023
Learn how to adjust the treadmill belt with this featured guide. Avoid slipping and ensure a smooth workout experience.
Introduction
Welcome to our comprehensive guide on how to adjust the treadmill belt. Treadmills are popular exercise machines used in homes and gyms worldwide. However, with regular use, it is common for the treadmill belt to become loose, misaligned, or worn out. When this happens, it’s important to take the necessary steps to adjust and maintain the treadmill belt to ensure smooth and safe workouts.
Having a properly adjusted treadmill belt is crucial for several reasons. Firstly, it ensures that you have a comfortable and efficient workout by providing the right amount of resistance and cushioning. Secondly, it reduces the risk of injury by preventing slips or sudden jerks while running or walking. Lastly, maintaining the belt tension and alignment prolongs the lifespan of your treadmill by reducing stress on the motor and other components.
In this guide, we will take you through the step-by-step process of checking the tension, loosening, tightening, and centering the treadmill belt. Additionally, we will discuss the importance of lubricating the belt to minimize friction and keep it running smoothly. By following these instructions, you can easily adjust your treadmill belt and ensure optimal performance.
It is important to note that while adjusting the treadmill belt is a relatively simple task, it does require some patience and attention to detail. By following the instructions carefully and utilizing the right tools, you can ensure that your treadmill is in top shape for many challenging workouts to come.
So, let’s get started with the first step: checking the tension of the treadmill belt.
Checking the Tension of the Treadmill Belt
Before making any adjustments to the treadmill belt, it is important to check its tension. This will help determine if the belt requires tightening or loosening. Follow these steps to check the tension:
- Start by disconnecting the treadmill from the power source to ensure safety.
- Locate the adjustment bolts at the back of the treadmill near the belt.
- Using a wrench or Allen wrench, turn the adjustment bolts clockwise to tighten the belt or counterclockwise to loosen it.
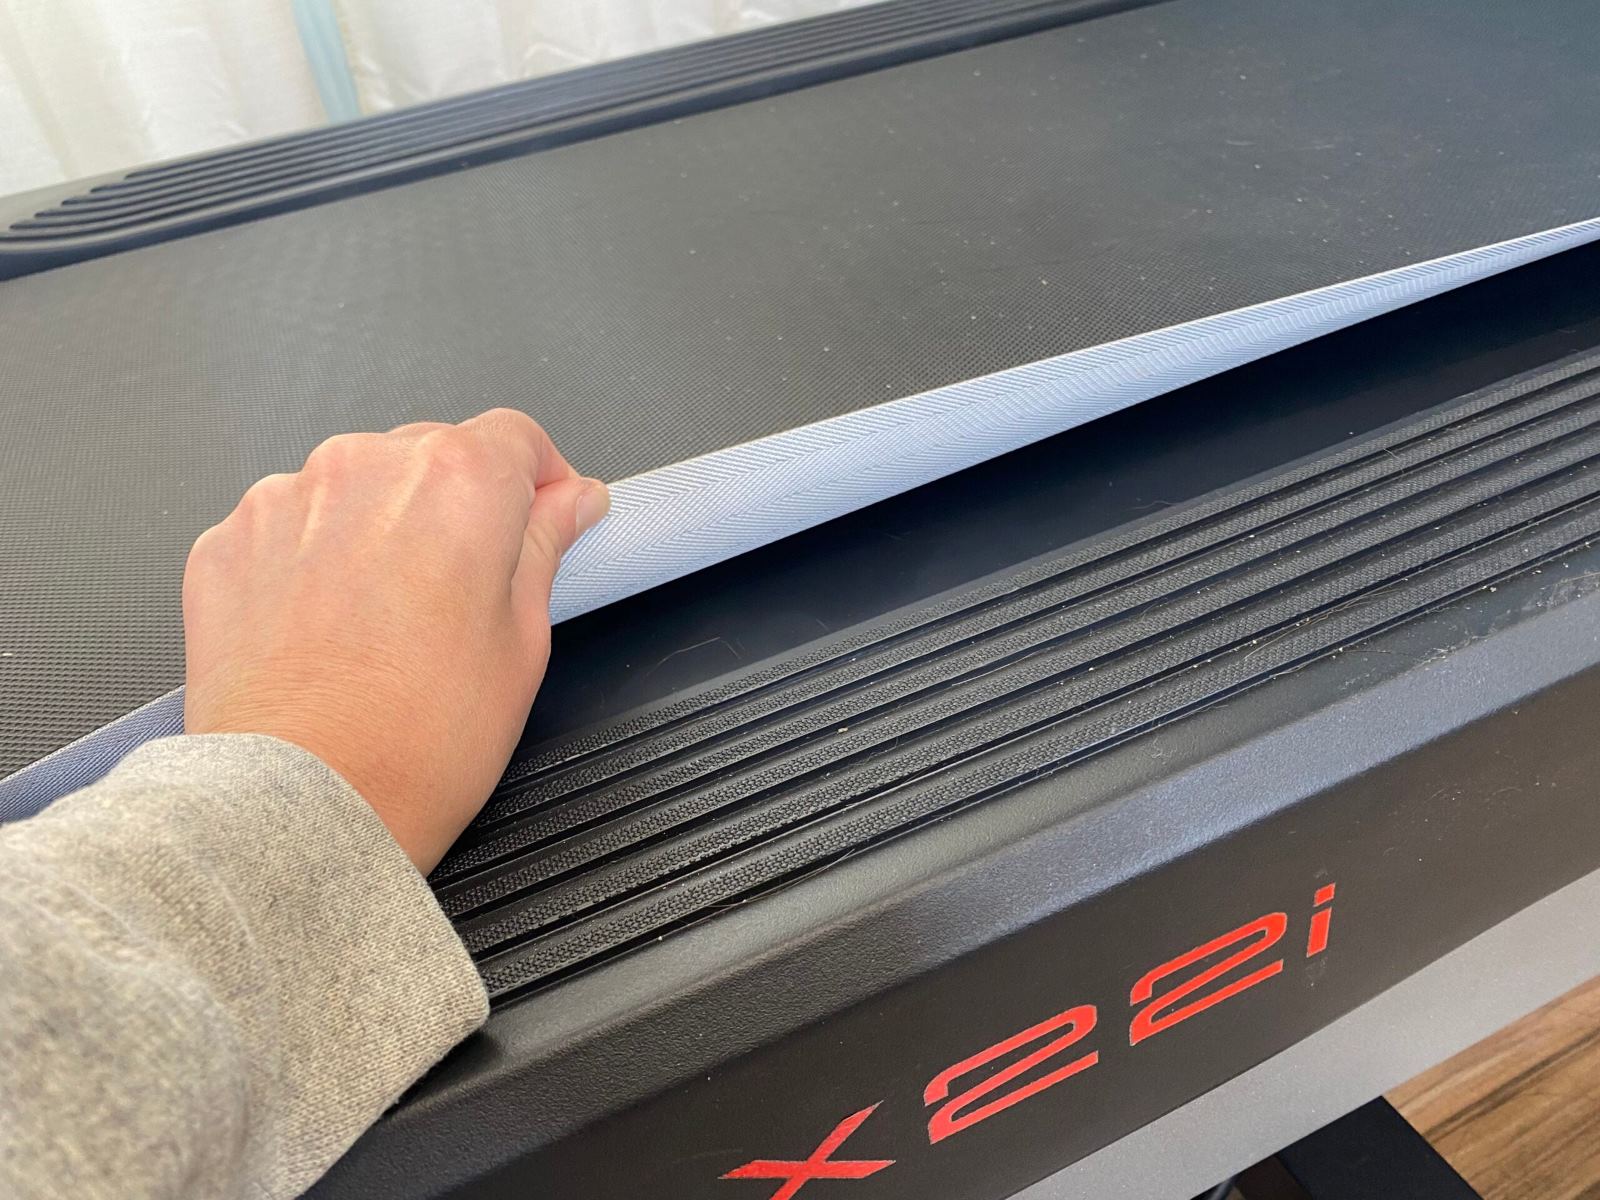
- Once you have made the necessary adjustments, attempt to lift the edge of the belt from the middle of the platform. Ideally, it should lift about 2-3 inches without excessive resistance.
- If the belt is too loose and lifts more than 3 inches, it needs tightening. Conversely, if it is too tight and barely lifts or doesn’t lift at all, it needs loosening.
- Repeat the process of adjusting the bolts until the belt tension is just right.
Checking the tension of the treadmill belt is an important step as it ensures that you have the correct amount of resistance while running or walking. A properly tensioned belt will allow for smooth movement and reduce the risk of injury.
Once you have checked the tension and made the necessary adjustments, you can move on to the next step, which is loosening the belt if required.
Loosening the Belt
If you have determined that your treadmill belt is too tight and needs loosening, here’s how you can do it:
- Start by disconnecting the treadmill from the power source for safety.
- Locate the adjustment bolts at the back of the treadmill near the belt.
- Using a wrench or Allen wrench, turn the adjustment bolts counterclockwise to loosen the belt.
- Make small adjustments at a time and check the tension after each adjustment.
- Continue loosening the belt until it reaches the desired tension. It should lift about 2-3 inches from the middle of the platform, without excessive resistance.
It’s important to be patient while loosening the belt and make incremental adjustments to avoid over-loosening it. Careful attention to the tension is key to ensuring a comfortable and safe workout experience.
Once you have successfully loosened the belt to the desired tension, you can move on to the next step, which is tightening the belt if necessary.
Tightening the Belt
If you have determined that your treadmill belt is too loose and needs tightening, follow these steps:
- Start by disconnecting the treadmill from the power source to ensure safety.
- Locate the adjustment bolts at the back of the treadmill near the belt.
- Using a wrench or Allen wrench, turn the adjustment bolts clockwise to tighten the belt.
- Make small adjustments at a time and check the tension after each adjustment.
- Continue tightening the belt until it reaches the desired tension. It should lift about 2-3 inches from the middle of the platform without excessive resistance.
Take your time while tightening the belt and ensure that you do not over-tighten it. Too much tension can cause premature wear and strain on the motor. Striking the right balance will provide a smooth and comfortable workout experience.
Once you have successfully tightened the belt to the desired tension, you can move on to the next step, which is centering the belt.
Centering the Belt
Proper alignment and centering of the treadmill belt are important to ensure that it runs smoothly and evenly. Follow these steps to center the belt:
- Start by disconnecting the treadmill from the power source.
- Inspect the belt from the front and back to check if it is aligned.
- If the belt appears to be off-center, locate the rear roller adjustment bolts on the back of the treadmill.
- Using a wrench or Allen wrench, make small adjustments to the rear roller adjustment bolts to center the belt.
- Turn the adjustment bolts equally on both sides to avoid creating an imbalance.
- Continue making adjustments and check the alignment frequently until the belt is centered.
Ensure that the belt is evenly aligned as you make adjustments. A properly centered belt will prevent unnecessary wear and tear and provide a more comfortable workout experience.
Once you have successfully centered the belt, you can move on to the final step, which is lubricating the belt to reduce friction.
Lubricating the Belt
Lubricating the treadmill belt is crucial for reducing friction and ensuring smooth operation. Follow these steps to lubricate the belt:
- Start by disconnecting the treadmill from the power source.
- Refer to the manufacturer’s instructions to determine the type of lubrication recommended for your specific treadmill model.
- Position yourself at the back of the treadmill and lift the edge of the belt slightly, revealing the surface underneath.
- Apply the lubricant evenly along the surface, following the manufacturer’s guidelines on the quantity to use.
- Once the lubricant is applied, rotate the belt manually to ensure that the lubricant spreads evenly across the entire length of the belt.
- Allow the lubricant to dry according to the manufacturer’s instructions before using the treadmill.
Regularly lubricating the treadmill belt helps to reduce wear and tear on the belt and prolong its lifespan. It also ensures a smooth and quiet operation, enhancing your overall workout experience.
It’s important to note that the frequency of lubrication may vary depending on the usage and the manufacturer’s recommendations. Some treadmills have pre-lubricated belts or self-lubricating mechanisms, while others require manual lubrication at regular intervals.
By following these steps and maintaining a proper lubrication schedule, you can keep your treadmill belt in optimal condition and enjoy a comfortable and efficient workout.
Conclusion
Congratulations! You have now successfully learned how to adjust the treadmill belt to ensure optimal performance and safety during your workouts. By regularly checking the tension, loosening or tightening the belt as needed, centering it, and lubricating it, you can maintain a smooth and comfortable exercise experience.
Remember, a properly adjusted treadmill belt not only improves your workout but also reduces the risk of injury and prolongs the lifespan of your treadmill. Taking the time to follow these steps and make necessary adjustments will ensure that you get the most out of your treadmill and enjoy many effective and enjoyable workouts.
It’s important to familiarize yourself with the specific instructions provided by the manufacturer for your particular treadmill model. Always refer to the user manual or consult with a professional if you have any doubts or concerns about adjusting the treadmill belt.
So, go ahead and put your newfound knowledge into practice. Take care of your treadmill by regularly checking and adjusting the belt tension, centering it as needed, and lubricating it to maintain its performance for years to come. Happy running!