Featured
How To Test A Treadmill Motor
Modified: August 18, 2023
Learn how to test a treadmill motor with our featured guide. Follow these step-by-step instructions to ensure your motor is functioning properly and prolong the lifespan of your treadmill.
Introduction
Welcome to our guide on how to test a treadmill motor. A treadmill is a great piece of exercise equipment, but like any machinery, it can experience issues over time. One common problem that treadmill owners may encounter is a faulty motor. The motor is the heart of a treadmill, and if it’s not functioning properly, it can affect the overall performance and usability of the machine.
Testing a treadmill motor can help diagnose any problems and determine if a repair or replacement is necessary. While it may seem daunting, with a few simple steps, you can assess the health of your treadmill motor and make an informed decision on what steps to take next.
In this guide, we will provide you with a step-by-step process to test your treadmill motor. By following these instructions, you can gain valuable insight into the motor’s condition and potentially save time and money on repairs or replacements.
Before we begin, it’s essential to note that safety should always be a top priority when working with electrical components. Make sure to unplug your treadmill from the power source before conducting any tests and avoid touching any exposed wires while performing the motor tests.
Now, let’s dive into the steps to effectively test your treadmill motor, ensuring that you can get your treadmill back up and running smoothly.
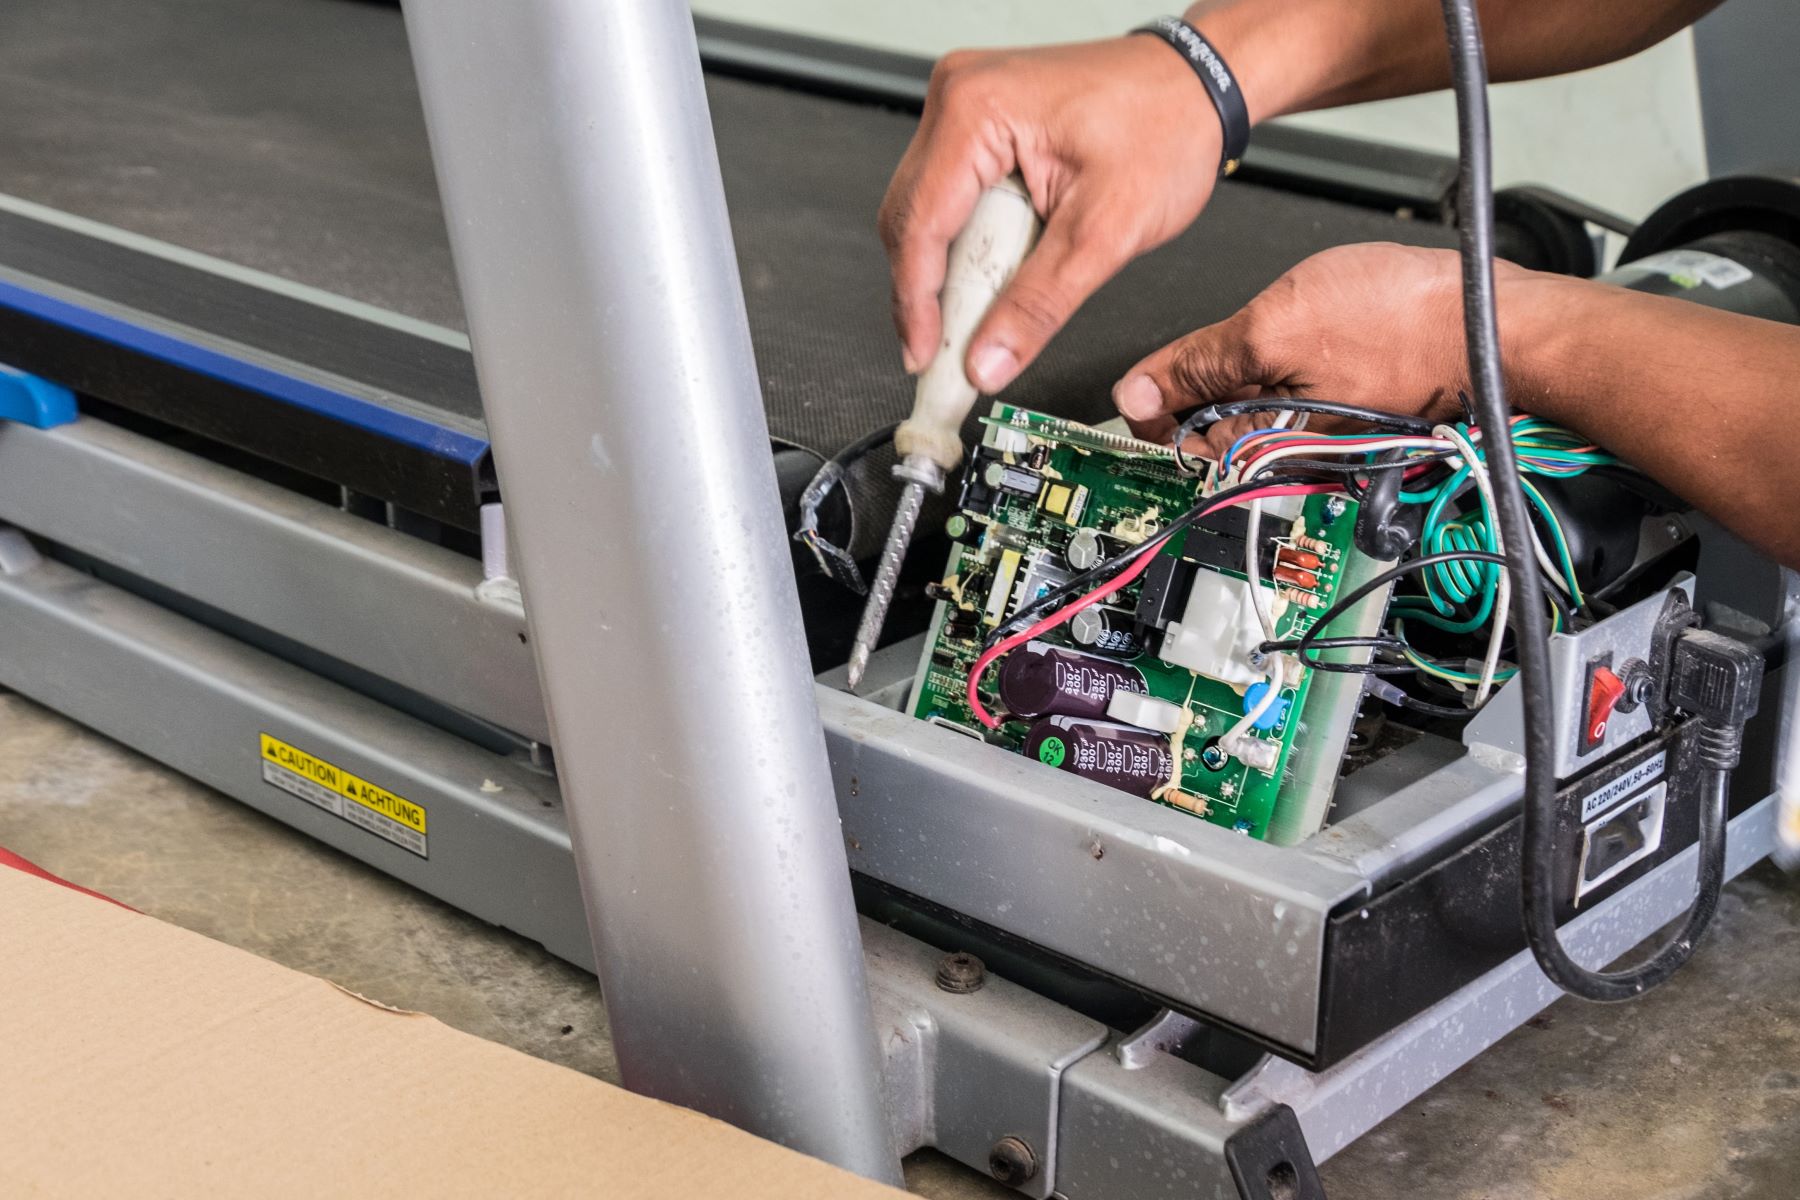
Step 1: Inspecting the Motor
The first step in testing a treadmill motor is to visually inspect it for any obvious signs of damage or wear. This initial examination can help identify any visible issues that may be affecting the motor’s performance.
Start by removing the motor cover, which is typically located at the front or back of the treadmill. Use a screwdriver or the appropriate tool to carefully unscrew and remove the cover, exposing the motor.
Once the motor is visible, look for any loose wires, frayed cables, or burnt components. Check for any signs of overheating, such as discolored or melted parts. Inspect the motor brushes, located on either side of the motor, and make sure they are intact and properly aligned.
If you notice any obvious damage, it is likely that the motor needs repair or replacement. In this case, it is recommended to consult a professional technician who specializes in treadmill motor repairs.
However, if you do not find any visible issues, proceed to the next step to perform electrical tests to further assess the motor’s functionality.
Step 2: Testing Connectivity
After inspecting the motor for visible damage, the next step is to test its connectivity. This will help determine if there are any issues with the electrical connections within the motor.
To test connectivity, you will need a multimeter, which is a device used to measure electrical voltage, current, and resistance. Set the multimeter to the resistance mode, commonly denoted by the Ω symbol.
Start by disconnecting the motor from the treadmill’s power source and ensuring that it is completely unplugged. Then, locate the motor’s power terminals. These are typically labeled “+”, “-“, or “P”, and “N”.
Using the multimeter’s probes, place one probe on the positive terminal and the other probe on the negative terminal. The multimeter should display a measurement of resistance. If the reading is zero or very low, it indicates a closed circuit, meaning the connectivity is intact.
On the other hand, if the resistance reading is very high or infinity, it indicates an open circuit, suggesting a problem with the motor’s connectivity. This could be due to loose wires, disconnected terminals, or other electrical issues.
If you encounter connectivity issues, it is recommended to call a professional technician who can help diagnose and repair the problem. They have the knowledge and expertise to handle electrical components safely and effectively.
However, if the connectivity test shows that the motor has proper electrical connections, proceed to the next step to test the voltage input.
Step 3: Testing Voltage Input
Once you have confirmed proper connectivity within the motor, the next step is to test the voltage input. This will help determine if the motor is receiving the correct amount of power from the treadmill’s power source.
Start by reconnecting the motor to the power source and ensure that the treadmill is plugged in. Set the multimeter to the AC voltage mode, typically denoted by the V~ symbol.
Locate the motor’s power terminals and identify the input terminals. These are usually labeled or colored differently from the output terminals. Place the multimeter probes on the input terminals, ensuring that the positive probe is connected to the positive terminal and the negative probe to the negative terminal.
Turn on the treadmill and observe the multimeter reading. It should display the voltage value of the power input. Refer to your treadmill’s manual or specifications to determine the expected voltage range for the motor.
If the voltage reading matches the expected range, it indicates that the motor is receiving the proper power input. However, if the reading is significantly different or shows zero voltage, there may be a problem with the power supply or the wiring connecting the motor to the power source.
In such cases, it is recommended to consult a professional technician who can accurately diagnose and resolve any electrical issues affecting the motor’s voltage input.
If the voltage input test is successful, proceed to the next step to test the motor for voltage output.
Step 4: Testing for Voltage Output
After checking the voltage input, the next step is to test the motor for voltage output. This will help determine if the motor is generating the necessary power to drive the movement of the treadmill belt.
To test the voltage output, keep the treadmill plugged in and turn it on. Set the multimeter to the AC voltage mode, similar to the previous step.
Locate the motor’s power terminals and identify the output terminals. These are usually labeled or colored differently from the input terminals. Place the multimeter probes on the output terminals, ensuring that the positive probe is connected to the positive output terminal and the negative probe to the negative output terminal.
Measure the voltage output by observing the multimeter reading. It should display the voltage value produced by the motor. Again, refer to your treadmill’s manual or specifications to determine the expected voltage range for the motor’s output.
If the voltage reading falls within the expected range, it indicates that the motor is generating the correct power output. This suggests that the motor is functioning properly, and any performance issues may lie elsewhere in the treadmill system.
However, if the voltage output reading is significantly lower than expected or shows zero voltage, it indicates a potential problem with the motor’s internal components. This could include issues with the brushes, windings, or other electrical elements.
In such cases, it is recommended to seek professional assistance from a qualified technician who can accurately diagnose and repair the motor or advise on the best course of action to resolve the issue.
If the voltage output test is successful, proceed to the next step to test the motor for resistance.
Step 5: Testing for Motor Resistance
Testing the motor’s resistance can provide valuable information about its internal components and overall health. Resistance testing helps determine if the motor’s windings are intact and functioning properly.
To begin the resistance test, ensure that the treadmill is unplugged and disconnected from the power source. Set the multimeter to the resistance mode, typically indicated by the Ω symbol.
Locate the motor’s power terminals and remove any wires connected to them. Place one multimeter probe on one terminal and the other probe on the other terminal. The multimeter will measure the resistance of the motor.
A normal range for a treadmill motor’s resistance can vary depending on its size and specifications. Consult your treadmill’s manual or contact the manufacturer to determine the expected resistance range for your specific motor.
If the resistance measurement falls within the expected range, it indicates that the motor’s windings are intact and functioning properly. This suggests that the internal electrical components of the motor are in good condition.
However, if the resistance reading is significantly higher or lower than the expected range, it could indicate a problem with the motor’s windings, such as a short circuit or an open circuit. In such cases, it is highly recommended to contact a professional technician who has the expertise to diagnose and repair motor issues.
Remember, working with electrical components can be dangerous, so if you are unsure or uncomfortable performing the resistance test, it is best to seek professional assistance.
Once you have completed the resistance test, you can move on to the next step to check for motor overheating.
Step 6: Checking for Motor Overheating
Motor overheating is a common issue that can affect the performance and longevity of a treadmill motor. Overheating can be caused by a variety of factors, including excessive usage, lack of proper ventilation, or a faulty cooling system.
To check for motor overheating, start by allowing the treadmill to run for a few minutes. Monitor the motor’s temperature by placing your hand near it. The motor should feel warm to the touch, but it should not be excessively hot.
If you notice that the motor is excessively hot to the point where it is uncomfortable to touch, it indicates that the motor is overheating. This can lead to potential damage to the motor and other components of the treadmill.
Here are a few steps you can take to address motor overheating:
- Ensure proper ventilation: Make sure the treadmill is placed in an area with sufficient airflow. Avoid operating the treadmill in cramped spaces or against a wall that restricts air circulation around the motor.
- Clean the motor: Dust and debris can accumulate on the motor, hindering its ability to dissipate heat. Regularly clean the motor and surrounding areas to remove any obstructions.
- Inspect the cooling system: Some treadmills are equipped with a cooling fan or a cooling system. Check to see if the fan is running smoothly and that there are no obstructions blocking its airflow.
- Consider professional assistance: If the motor continues to overheat despite taking preventive measures, it is worth contacting a professional technician who specializes in treadmill motor repairs. They can diagnose the underlying cause of the overheating and recommend appropriate solutions.
By regularly monitoring the motor’s temperature and addressing any signs of overheating, you can help prolong its lifespan and maintain optimal performance.
Once you have checked for motor overheating, proceed to the next step to test the motor speed control.
Step 7: Testing Motor Speed Control
The final step in testing a treadmill motor is to assess its speed control functionality. This test helps determine if the motor can maintain consistent and adjustable speeds, which are crucial for a smooth and enjoyable workout experience.
To perform the motor speed control test, start by turning on the treadmill and setting it to a specific speed. Observe if the motor is able to reach and maintain that speed without any fluctuation or irregularities.
Use the treadmill’s speed controls to increase and decrease the speed while closely monitoring the motor’s response. The motor should smoothly transition from one speed to another without any sudden jolts or sudden changes in speed.
If you notice any issues with the motor’s speed control, such as erratic speed changes or the inability to maintain a consistent pace, it could indicate a problem with the motor’s control board or the speed control mechanism.
In such cases, it is best to consult a professional technician who has the expertise to diagnose and repair issues related to motor speed control. They can determine the underlying cause of the problem and recommend the appropriate course of action.
Remember, a properly functioning motor with accurate speed control is crucial for a safe and effective workout experience. If you do not feel confident in your ability to test or repair the motor’s speed control, it is recommended to seek professional assistance.
With the motor speed control test complete, you have now successfully tested your treadmill motor and gained valuable insight into its functionality. Depending on the results of the tests, you can now make informed decisions regarding repairs, replacements, or further troubleshooting.
Conclusion
Testing a treadmill motor is a crucial step in diagnosing any potential issues and ensuring optimal performance. By following the step-by-step process outlined in this guide, you can effectively assess the health and functionality of your treadmill motor.
Through inspecting the motor for visible damage, testing connectivity, voltage input, voltage output, motor resistance, checking for motor overheating, and testing motor speed control, you can gather valuable information about the motor’s condition.
Remember, safety should always be a top priority when working with electrical components. Always ensure that the treadmill is unplugged and disconnected before conducting any tests. If you are unsure or uncomfortable performing the tests, it is recommended to seek professional assistance to avoid any potential risks.
Once you have completed the tests, you will have a better understanding of the motor’s functionality, and based on the results, you can make informed decisions on whether to repair or replace the motor or seek further assistance from a professional technician.
Maintaining a properly functioning treadmill motor is essential for a smooth and enjoyable exercise experience. Regularly conducting these tests and addressing any issues promptly can help extend the lifespan of your treadmill and ensure that your workouts are safe and effective.
Remember to refer to your treadmill’s manual for specific instructions and always consult a professional technician if you are unsure or unable to troubleshoot the motor issues on your own.
Keep your treadmill motor in good working condition, and enjoy your workouts with the peace of mind that comes from knowing your equipment is performing at its best.