Featured
How To Track A Workout On Apple Watch
Modified: January 2, 2024
Want to track your workouts on your Apple Watch? Learn how to use the featured workout tracking feature in just a few simple steps. Start reaching your fitness goals today!
Introduction
Welcome to the world of fitness tracking with Apple Watch! With its powerful features and sleek design, the Apple Watch has become a popular choice for individuals looking to monitor and improve their workout routines. Whether you’re a seasoned athlete or just starting on your fitness journey, the Apple Watch can be a valuable companion in helping you achieve your goals.
In this article, we will guide you through the process of tracking a workout on your Apple Watch. We’ll walk you through the steps from setting up your watch to viewing and syncing your workout data. So, grab your Apple Watch and get ready to take your fitness tracking to the next level!
Before we dive into the step-by-step process, it’s important to note that the instructions provided in this article may vary slightly depending on the model and version of your Apple Watch. However, the basic principles remain the same across most models.
Now, let’s get started with setting up your Apple Watch for workout tracking!
Step 1: Set Up Apple Watch
The first step in tracking your workout on Apple Watch is to set up your device. If you’ve already gone through the initial setup process, you can skip this step and proceed to the next section.
To set up your Apple Watch, follow these simple instructions:
- Turn on your Apple Watch by pressing and holding the side button until the Apple logo appears.
- Select your language and region preferences.
- Place your iPhone near your Apple Watch to pair them. Follow the onscreen instructions on your iPhone to complete the setup process.
- Once your Apple Watch is paired, you’ll be prompted to set up Apple Pay, Siri, and other features. You can choose to set these up now or later.
- Sign in with your Apple ID to enable features such as Apple Fitness+ and syncing your workout data with your iPhone and other Apple devices.
- Follow the onscreen instructions to complete the setup process.
Once your Apple Watch is set up, you’re ready to start tracking your workouts!
Note: Make sure that your Apple Watch is fully charged before starting your workout to ensure accurate tracking and to avoid interruptions during your session. It’s also a good idea to have your iPhone nearby for a seamless syncing experience.
Step 2: Open the Workout App
Now that your Apple Watch is set up, it’s time to open the Workout app, which is specifically designed to track various types of workouts.
Follow these steps to open the Workout app on your Apple Watch:
- Wake up your Apple Watch by tapping on the screen or raising your wrist.
- From the watch face, locate the icon that resembles a running figure. This is the Workout app.
- Tap on the Workout app icon to open it.
Alternatively, you can access the Workout app by pressing the Digital Crown on the side of your Apple Watch and searching for “Workout” using the built-in search feature.
Once you’ve successfully opened the Workout app, you’ll be presented with a variety of workout options to choose from. In the next step, we’ll explore how to select the appropriate workout type.
Step 3: Choose a Workout Type
After opening the Workout app on your Apple Watch, it’s time to select the specific workout type that you’ll be engaging in. Apple Watch offers a wide range of workout options to cater to different activities and fitness goals.
Follow these steps to choose a workout type:
- On the main screen of the Workout app, you’ll see a list of different workout types such as Outdoor Run, Cycling, HIIT, Yoga, and many more.
- Scroll through the list or use the Digital Crown to browse through the available options.
- Once you’ve found the desired workout type, tap on it to select it.
When you select a specific workout type, Apple Watch will automatically optimize the metrics and tracking features for that particular activity. For example, if you choose Outdoor Run, the workout app will track your distance, pace, and heart rate more accurately for running.
It’s worth mentioning that Apple Watch also includes a customizable “Other” workout option. This option allows you to track workouts that are not included in the predefined list. You can manually enter the name of the activity and adjust the metrics as needed.
Once you’ve chosen the appropriate workout type, you’re ready to customize the workout metrics to suit your preferences. We’ll explore this in the next step.
Step 4: Customize Workout Metrics
After selecting a workout type on your Apple Watch, you have the option to customize the workout metrics to align with your fitness goals and personal preferences. This allows you to track the specific data that matters most to you during your workouts.
Follow these steps to customize the workout metrics:
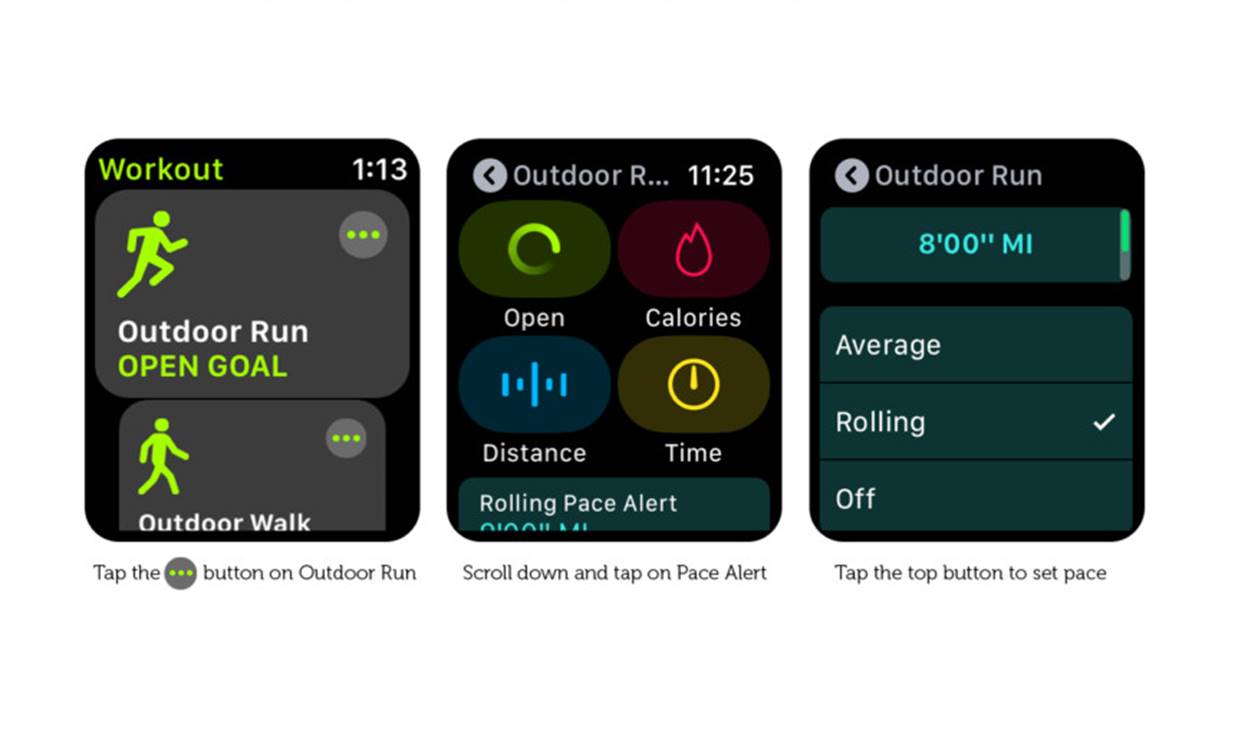
- On the screen where you selected the workout type, you’ll see an option that says “Set Goal” or “Customize.” Tap on this option.
- You’ll be presented with a list of available metrics that you can track during your workout. These may include metrics like distance, duration, calories, heart rate, and more.
- Scroll through the list and tap on the metrics that you wish to track during your workout. Selected metrics will appear with a checkmark.
- If you want to change the order in which the metrics are displayed, you can tap and hold on a metric, then drag it to the desired position.
- Once you’ve customized the workout metrics to your liking, tap on “Done” or a similar option to save your settings.
This customization feature allows you to focus on the data that is most important to you, making your workout tracking experience more personalized and meaningful.
It’s important to note that the available metrics may vary depending on the workout type you’ve selected. For example, for activities like Outdoor Run, you may have the option to track metrics such as pace, cadence, and elevation gain.
Now that you’ve customized your workout metrics, it’s time to start the actual workout! We’ll walk you through the steps in the next section.
Step 5: Start the Workout
Now that you’ve customized your workout metrics, it’s time to kick off your workout session on your Apple Watch. Starting a workout is quick and easy, allowing you to focus on your activity without any distractions.
Follow these steps to start your workout:
- On the main screen of the Workout app, you’ll see a countdown timer. This gives you a few seconds to prepare before the tracking begins. Take this time to adjust your gear and get into the proper mindset for your workout.
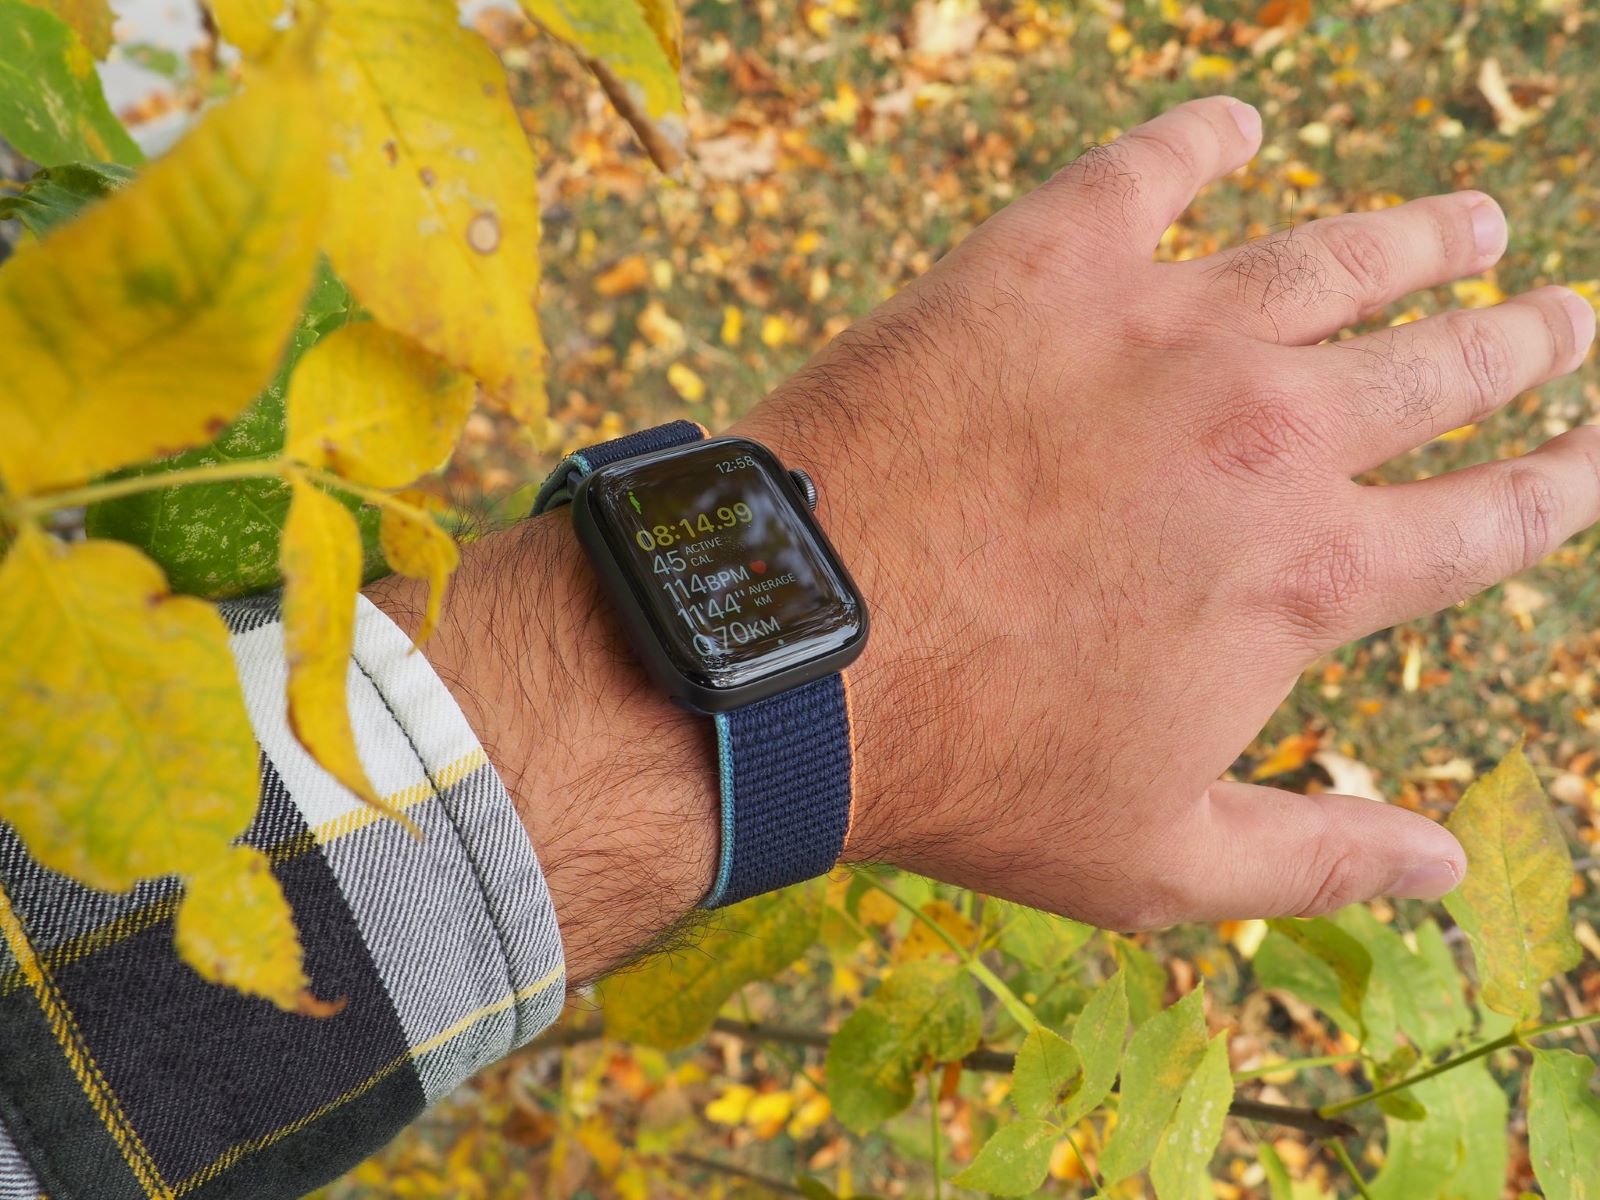
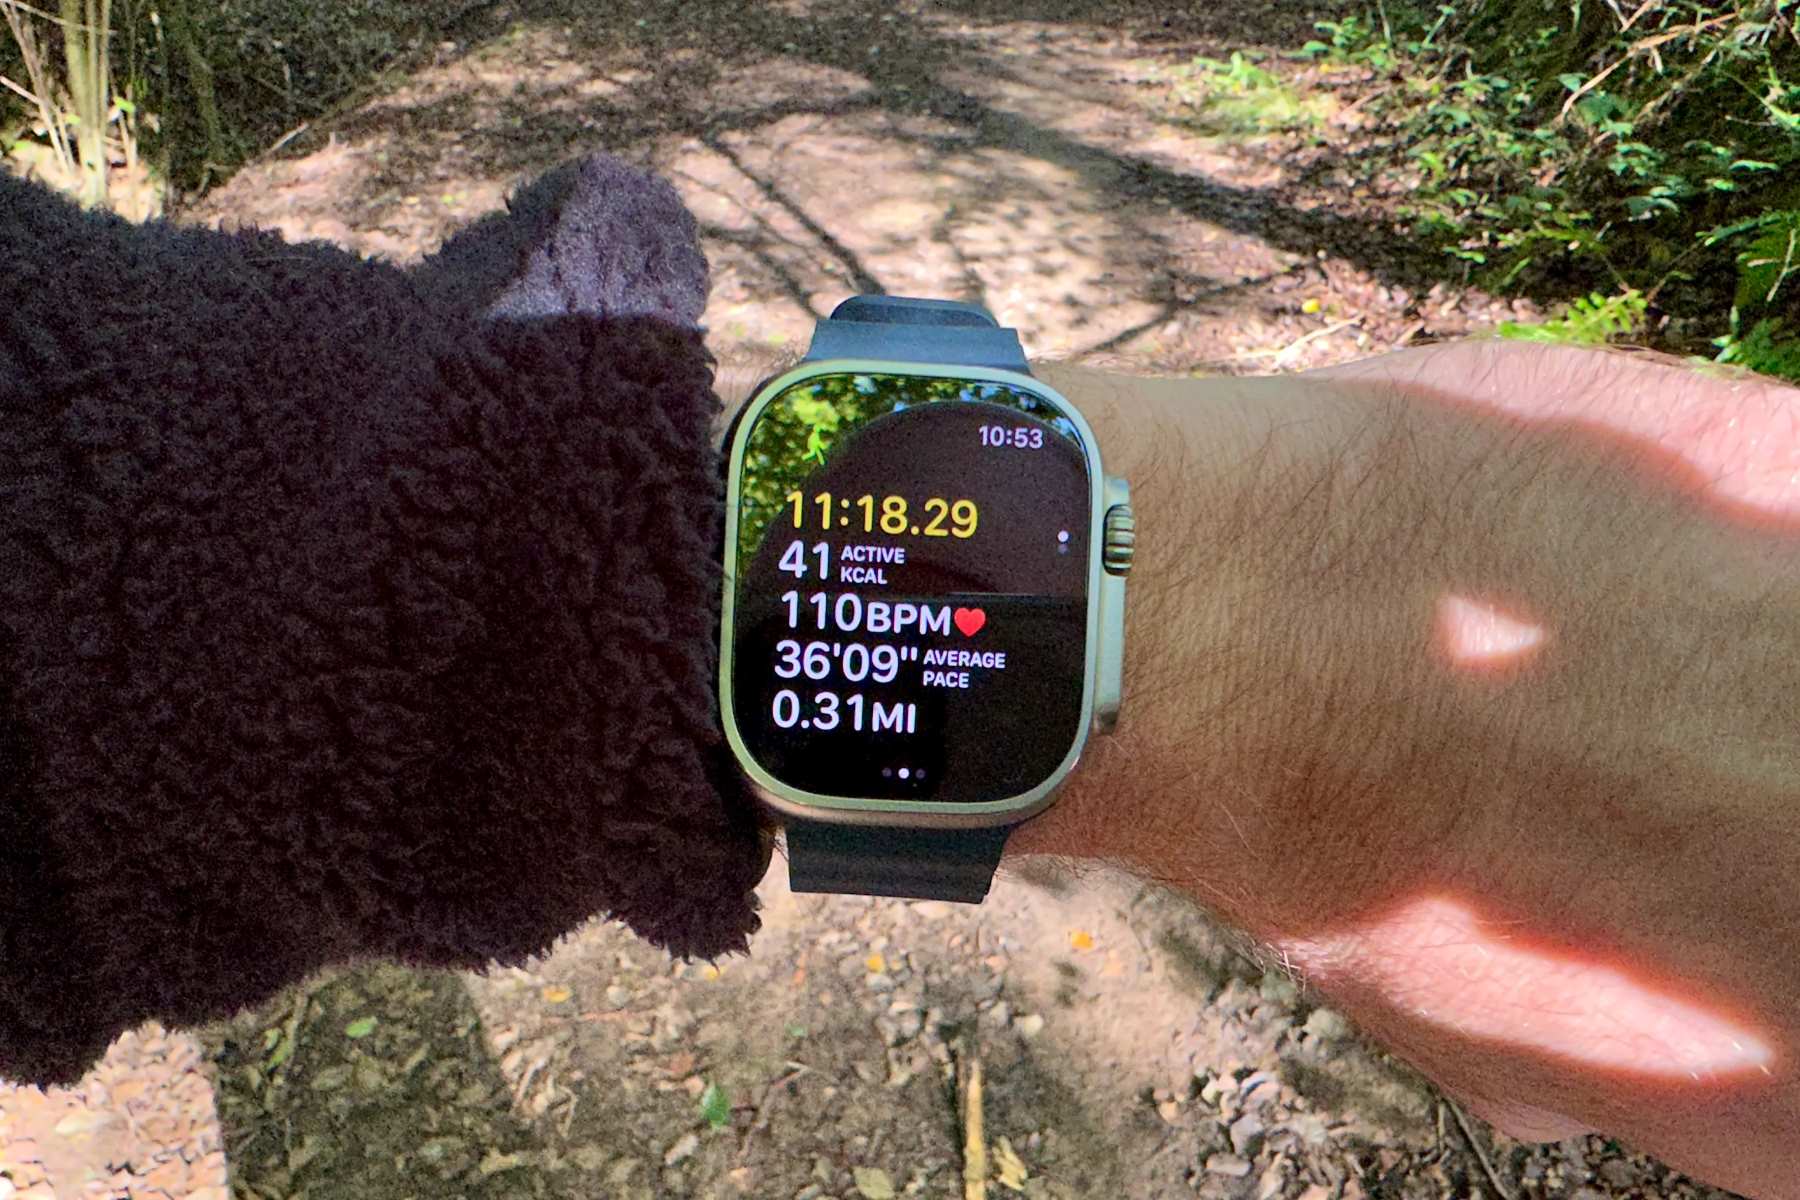
- After the countdown timer, the tracking will begin automatically. You’ll see a live display of the selected workout metrics and your progress as you engage in the activity.
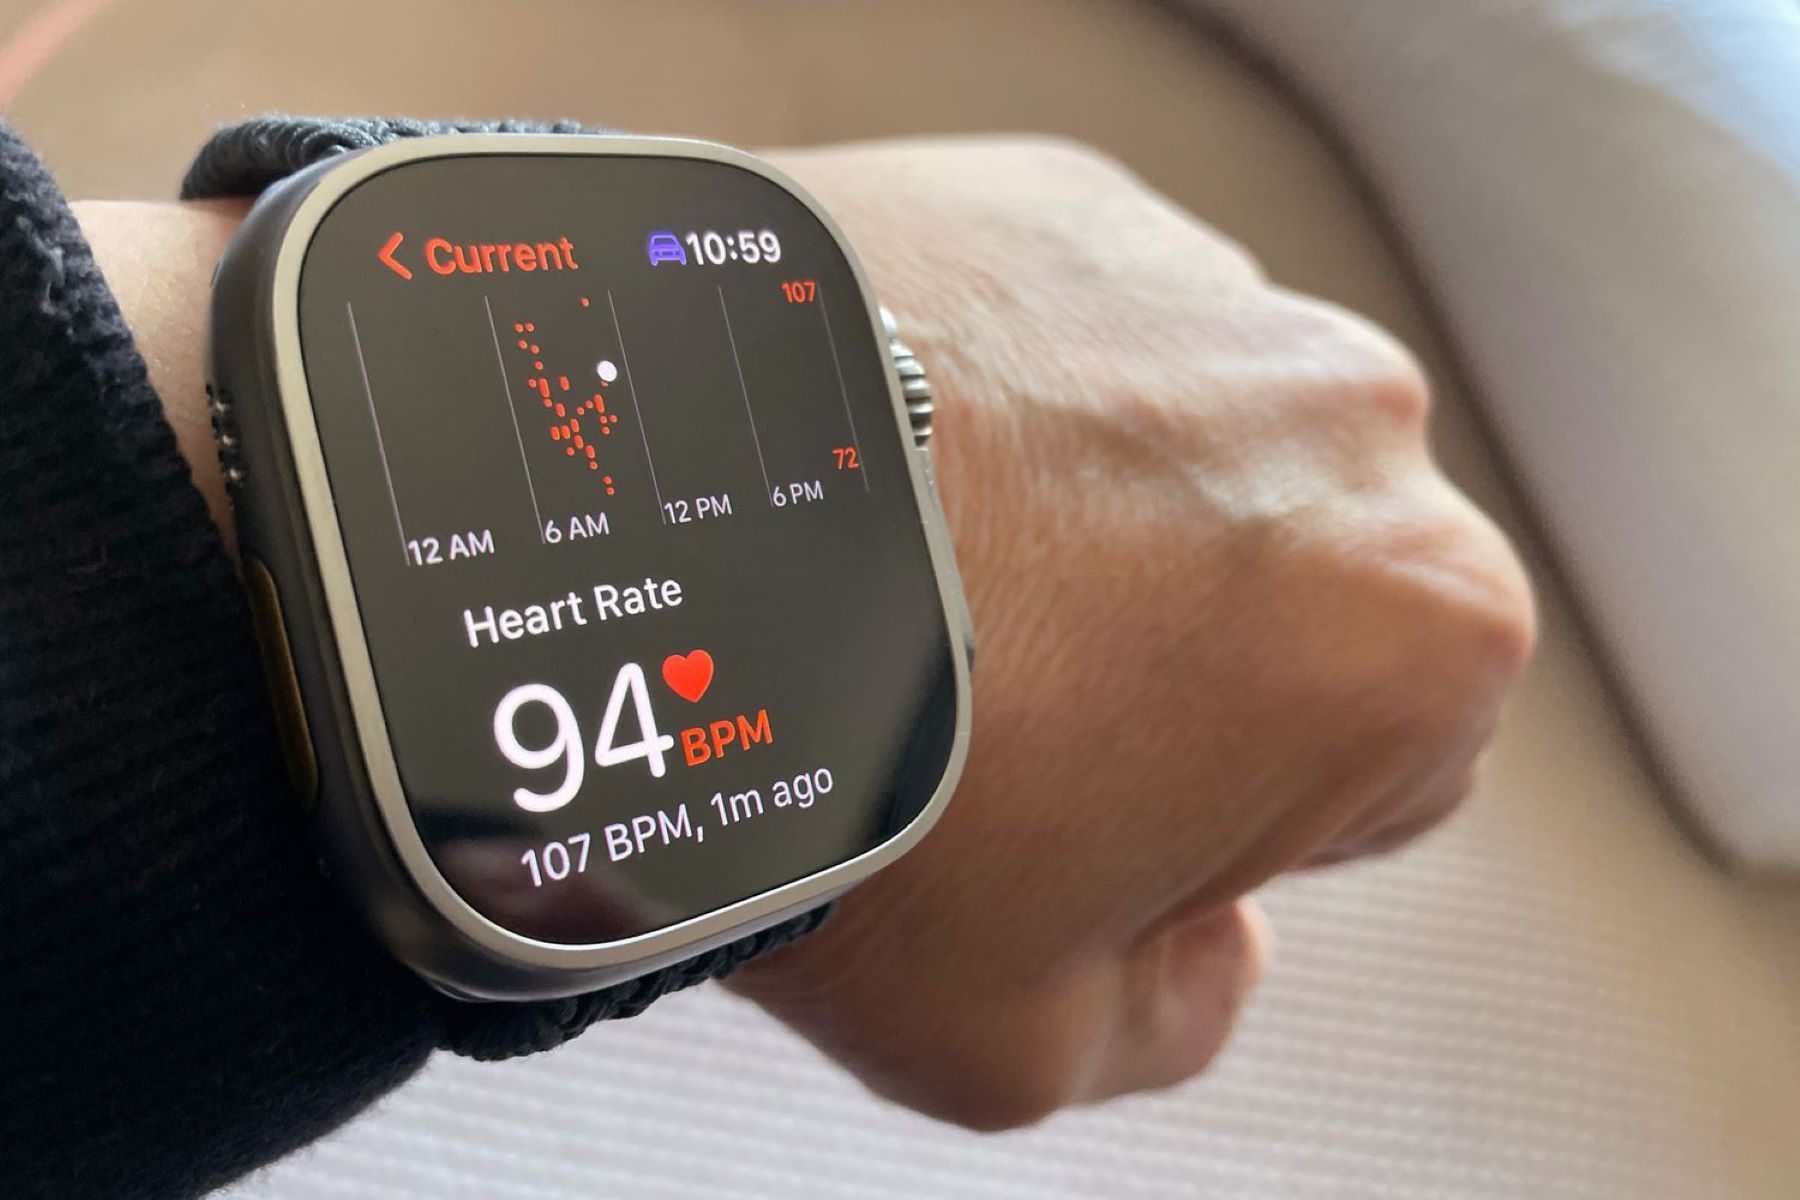
- During your workout, you can easily see your metrics by glancing at your wrist. Apple Watch provides real-time updates for metrics such as distance, duration, heart rate, and more.
- If you need to pause your workout for any reason, simply tap on the screen and select the “Pause” option. This is useful when taking breaks, catching your breath, or addressing any interruptions.
- To resume your workout after pausing, tap on the screen again and select the “Resume” option. This allows you to seamlessly continue your activity without losing any tracking data.
Starting a workout on your Apple Watch allows you to accurately track your progress, monitor your performance, and stay motivated throughout your session. The real-time feedback and tailored metrics help you stay on track and make adjustments as needed.
Now that you’re well into your workout, let’s move on to the next step: pausing and resuming your workout.
Step 6: Pause and Resume the Workout
During your workout, there may be times when you need to pause and take a break. Whether it’s to catch your breath, hydrate, or address any interruptions, Apple Watch makes it easy to pause and resume your workout without losing any tracking data.
Follow these steps to pause and resume your workout on Apple Watch:
- When you’re ready to pause your workout, tap on the screen to bring up the workout summary.
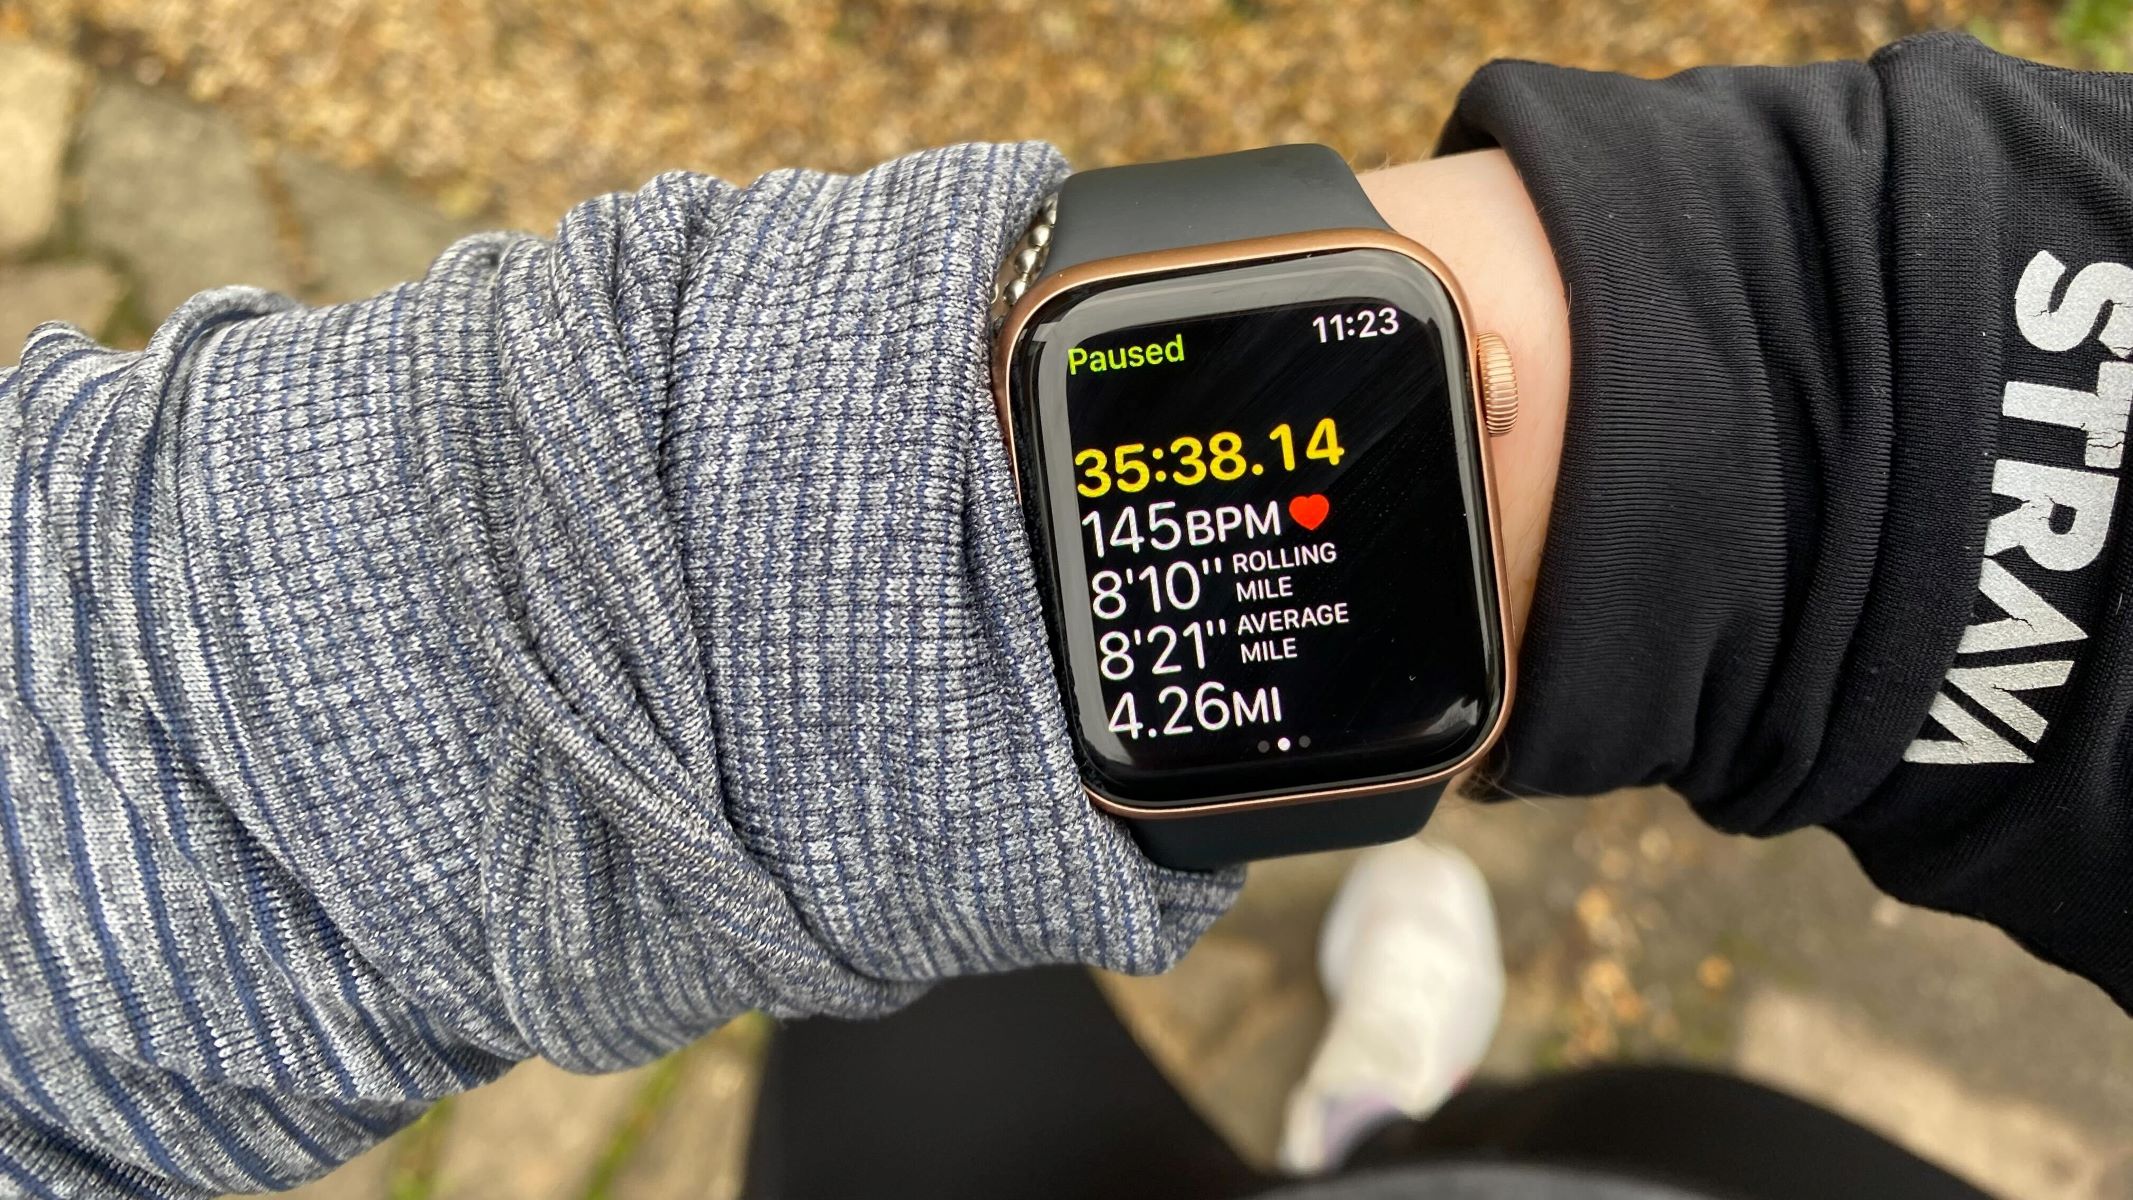
- You’ll see an option that says “Pause” or “Resume.” Tap on “Pause” to temporarily stop tracking your workout.
- During the paused state, you can take your time to rest, stretch, or address any other needs. Your Apple Watch will continue to display the duration and other relevant metrics, allowing you to monitor your workout progress.
- To resume your workout, tap on the screen again and select the “Resume” option. The tracking will seamlessly resume, and you can continue with your activity.
Pausing and resuming your workout provides flexibility and allows you to adjust your workout experience according to your needs. It’s particularly useful for activities that involve intermittent effort, such as interval training, or when you encounter unexpected interruptions.
During the paused state, it’s important to note that Apple Watch will continue to monitor your heart rate and other passive metrics. This ensures that your overall fitness data remains accurate and comprehensive.
Now that you’re familiar with pausing and resuming your workout, let’s move on to the next step: ending and saving your workout data.
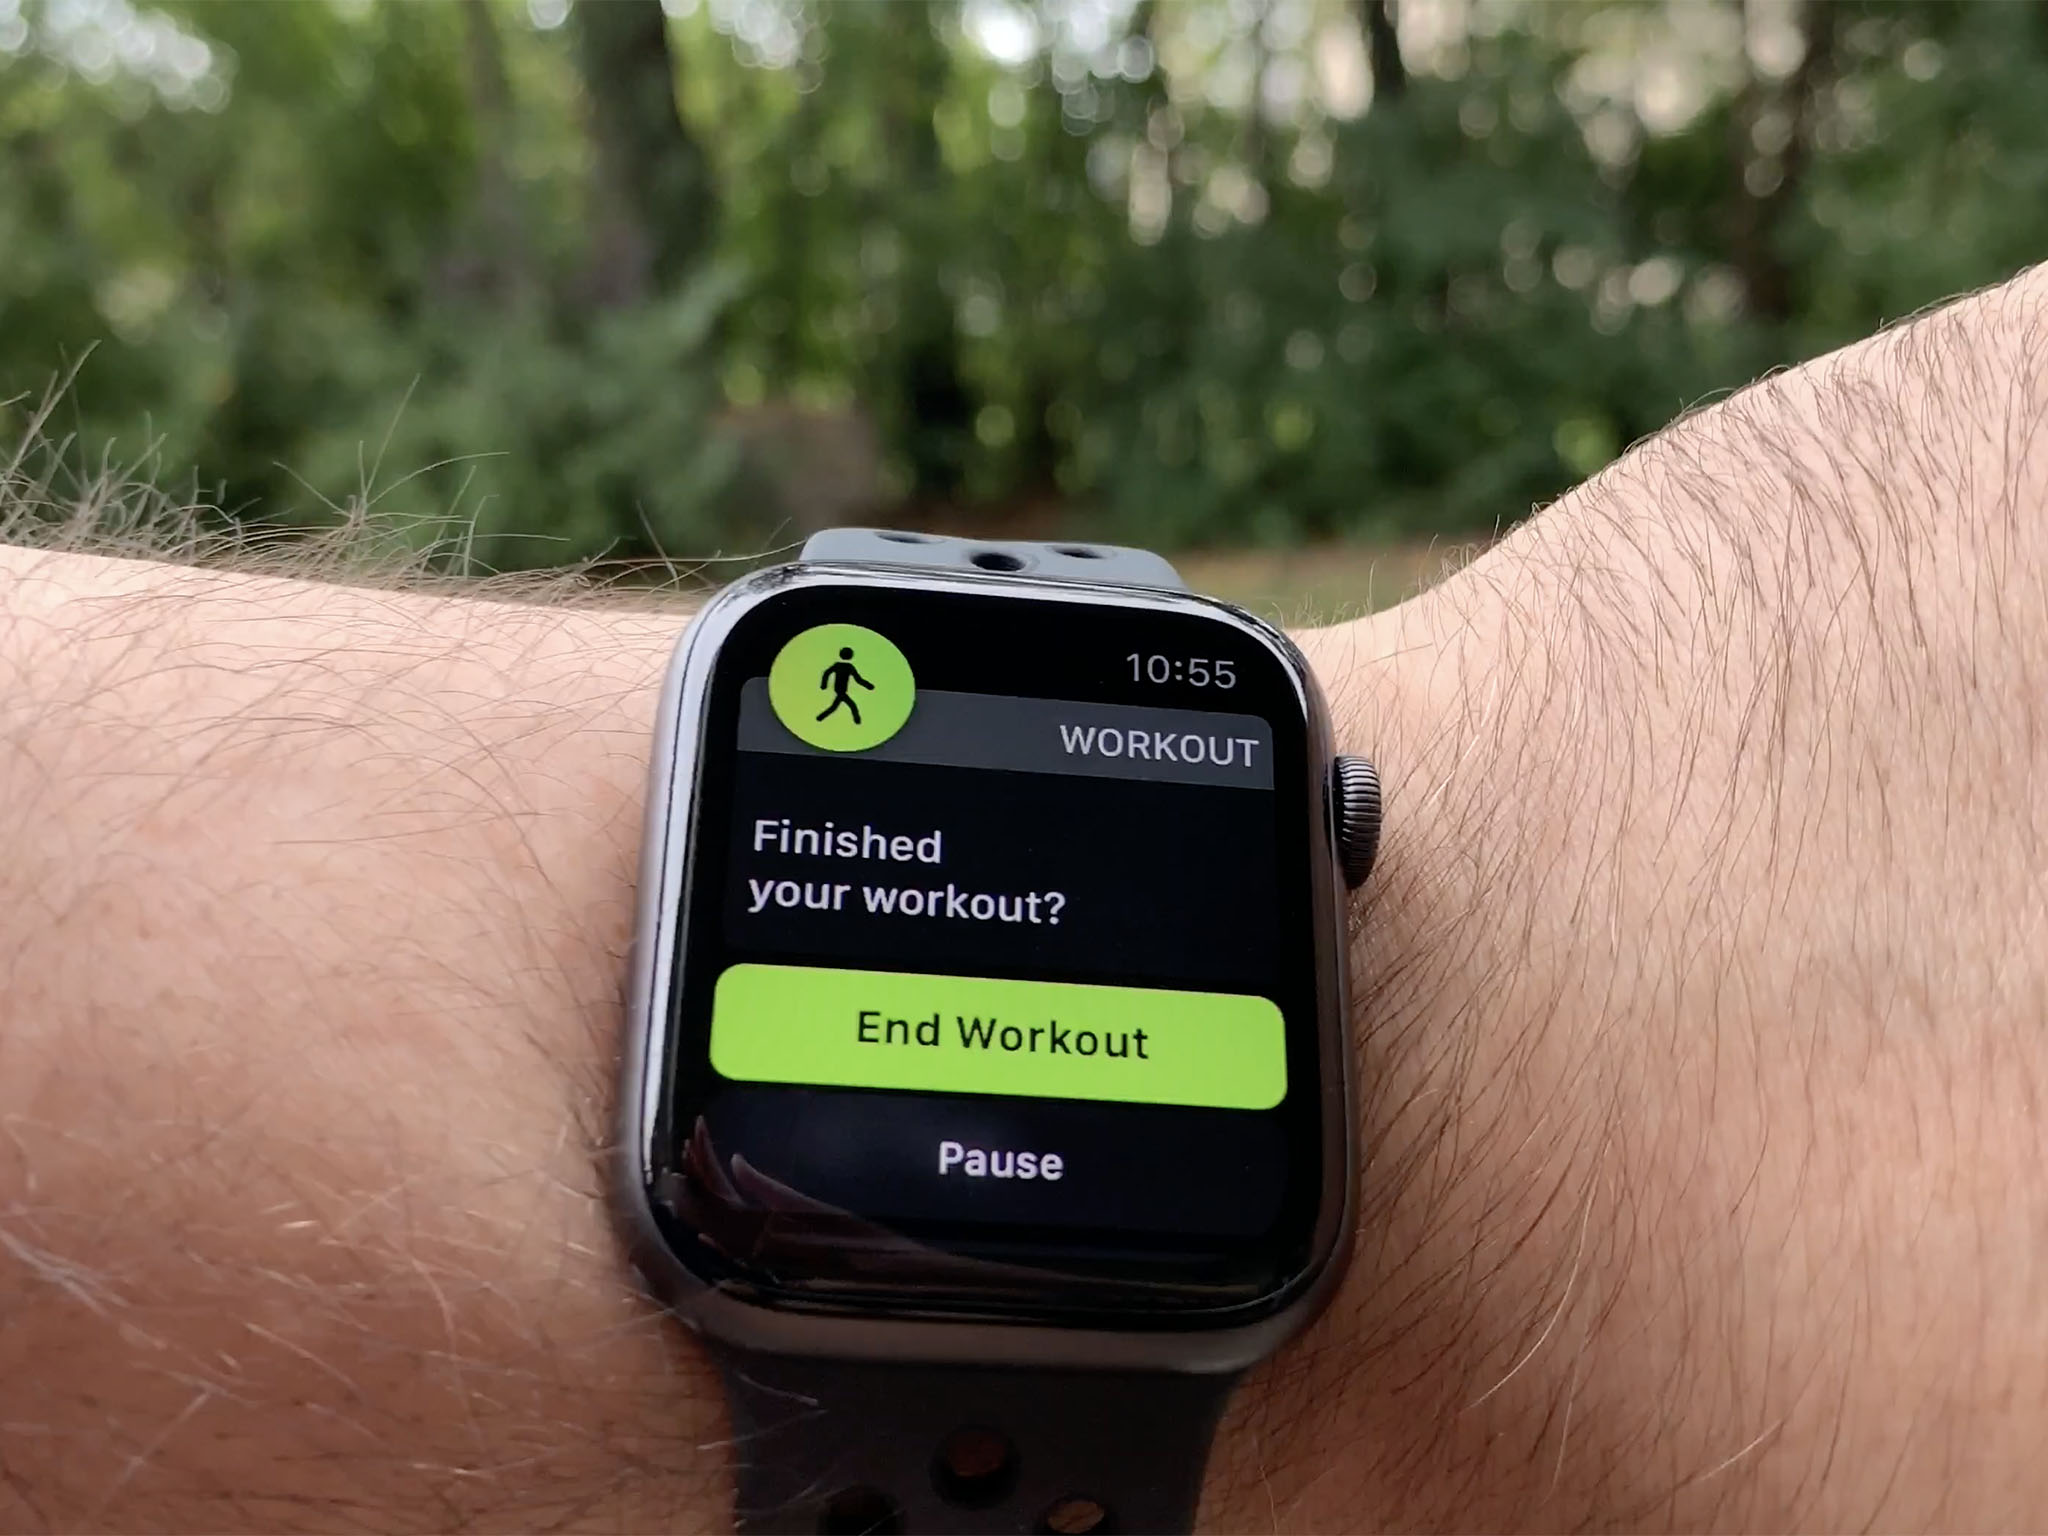
Step 7: End and Save the Workout
After completing your workout, it’s time to wrap things up and save your workout data on your Apple Watch. Ending and saving your workout is a crucial step as it allows you to review your performance, monitor progress, and track your fitness improvements over time.
Follow these steps to end and save your workout on Apple Watch:
- When you’re ready to finish your workout, tap on the screen to bring up the workout summary.
- Scroll down to the bottom of the summary screen until you see an option that says “End” or “Finish.”
- Tap on this option to stop the workout tracking and finalize your session.
- After ending the workout, you’ll have the option to either “Save” or “Discard” the workout data.
- If you’re satisfied with your session and want to keep the data for future reference, tap on “Save.”
- If you accidentally ended the workout or do not wish to keep the data, you can select “Discard” to delete the workout information.
By saving your workout data, you’ll have access to detailed information such as distance, duration, calories burned, heart rate trends, and more. This data can be synced to your iPhone and other Apple devices, allowing you to analyze your progress and track your fitness journey over time.
It’s important to note that saving your workout data requires a connection between your Apple Watch and iPhone. Make sure your devices are paired and in close proximity to ensure a seamless syncing process.
Now that you’ve successfully ended and saved your workout, let’s move on to the next step: viewing the workout summary.
Step 8: View Workout Summary
After completing your workout and saving the data, you can easily view a detailed summary of your session on your Apple Watch. The workout summary provides valuable insights into your performance, progress, and training metrics.
Follow these steps to view your workout summary:
- On your Apple Watch home screen, locate and select the Fitness app, which resembles a colored rings icon.
- Scroll down to the section labeled “Workouts” and tap on it.
- You’ll see a list of your recent workouts, including the most recent one you just completed.
- Tap on the specific workout to view the detailed summary.
In the workout summary, you’ll find information such as the workout type, duration, distance, average heart rate, calories burned, and more. You may also see additional insights, depending on the workout type you selected.
Exploring the workout summary allows you to analyze your performance, determine areas of improvement, and track your progress over time. By monitoring the metrics and trends, you can make informed decisions to optimize your training and achieve your fitness goals.
Additionally, the Fitness app on your iPhone provides a more comprehensive view of your workout data, including trends, goals, and achievements. By syncing your Apple Watch with your iPhone, you can access even more powerful features to enhance your fitness journey.
Now that you know how to view your workout summary, let’s move on to the final step: syncing your workout data with your iPhone.
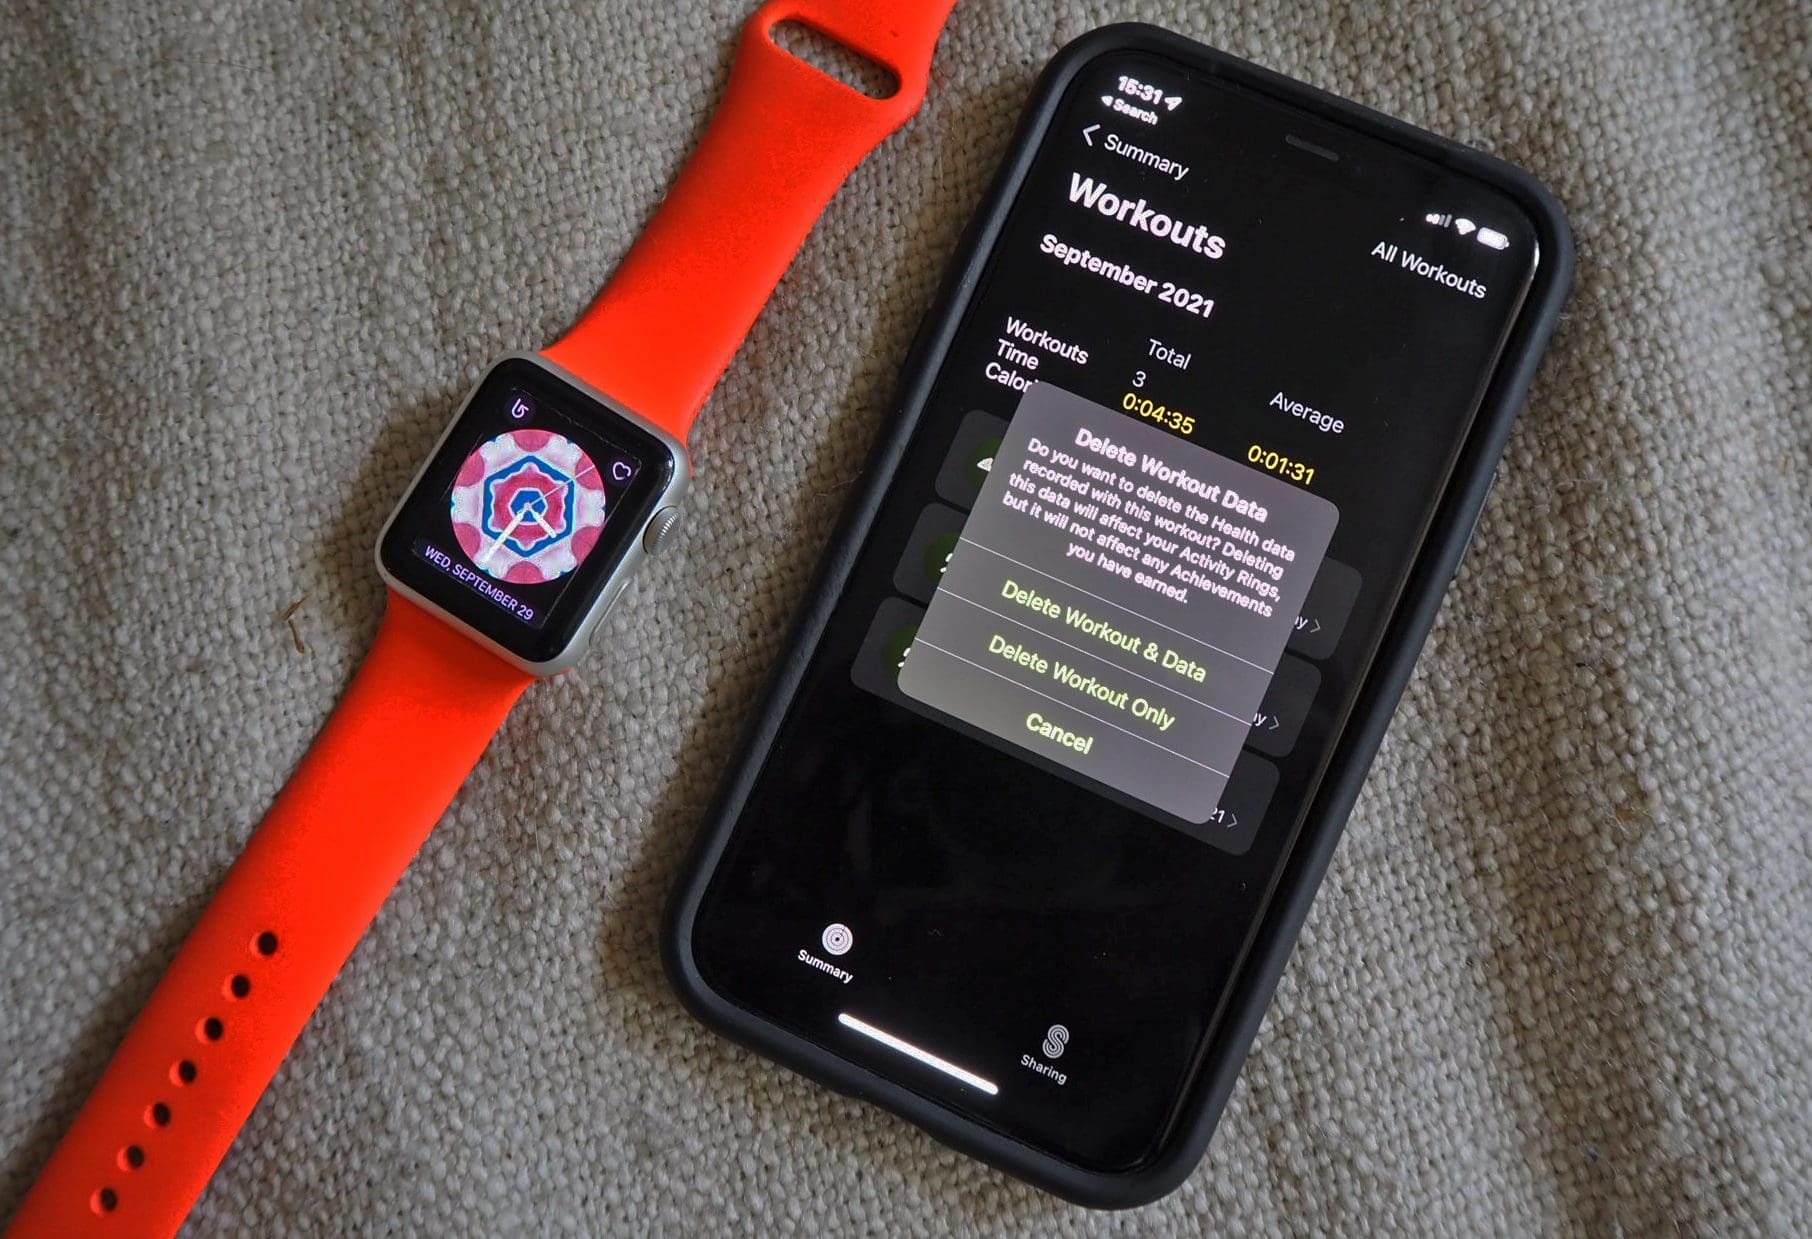
Step 9: Sync Workout Data with iPhone
Syncing your workout data from your Apple Watch to your iPhone allows you to have a centralized hub for all your fitness information. By transferring your workout data, you can access a more comprehensive view of your progress, engage in in-depth analysis, and even share your achievements with others.
Follow these steps to sync your workout data with your iPhone:
- Make sure that your Apple Watch and iPhone are connected and in close proximity.
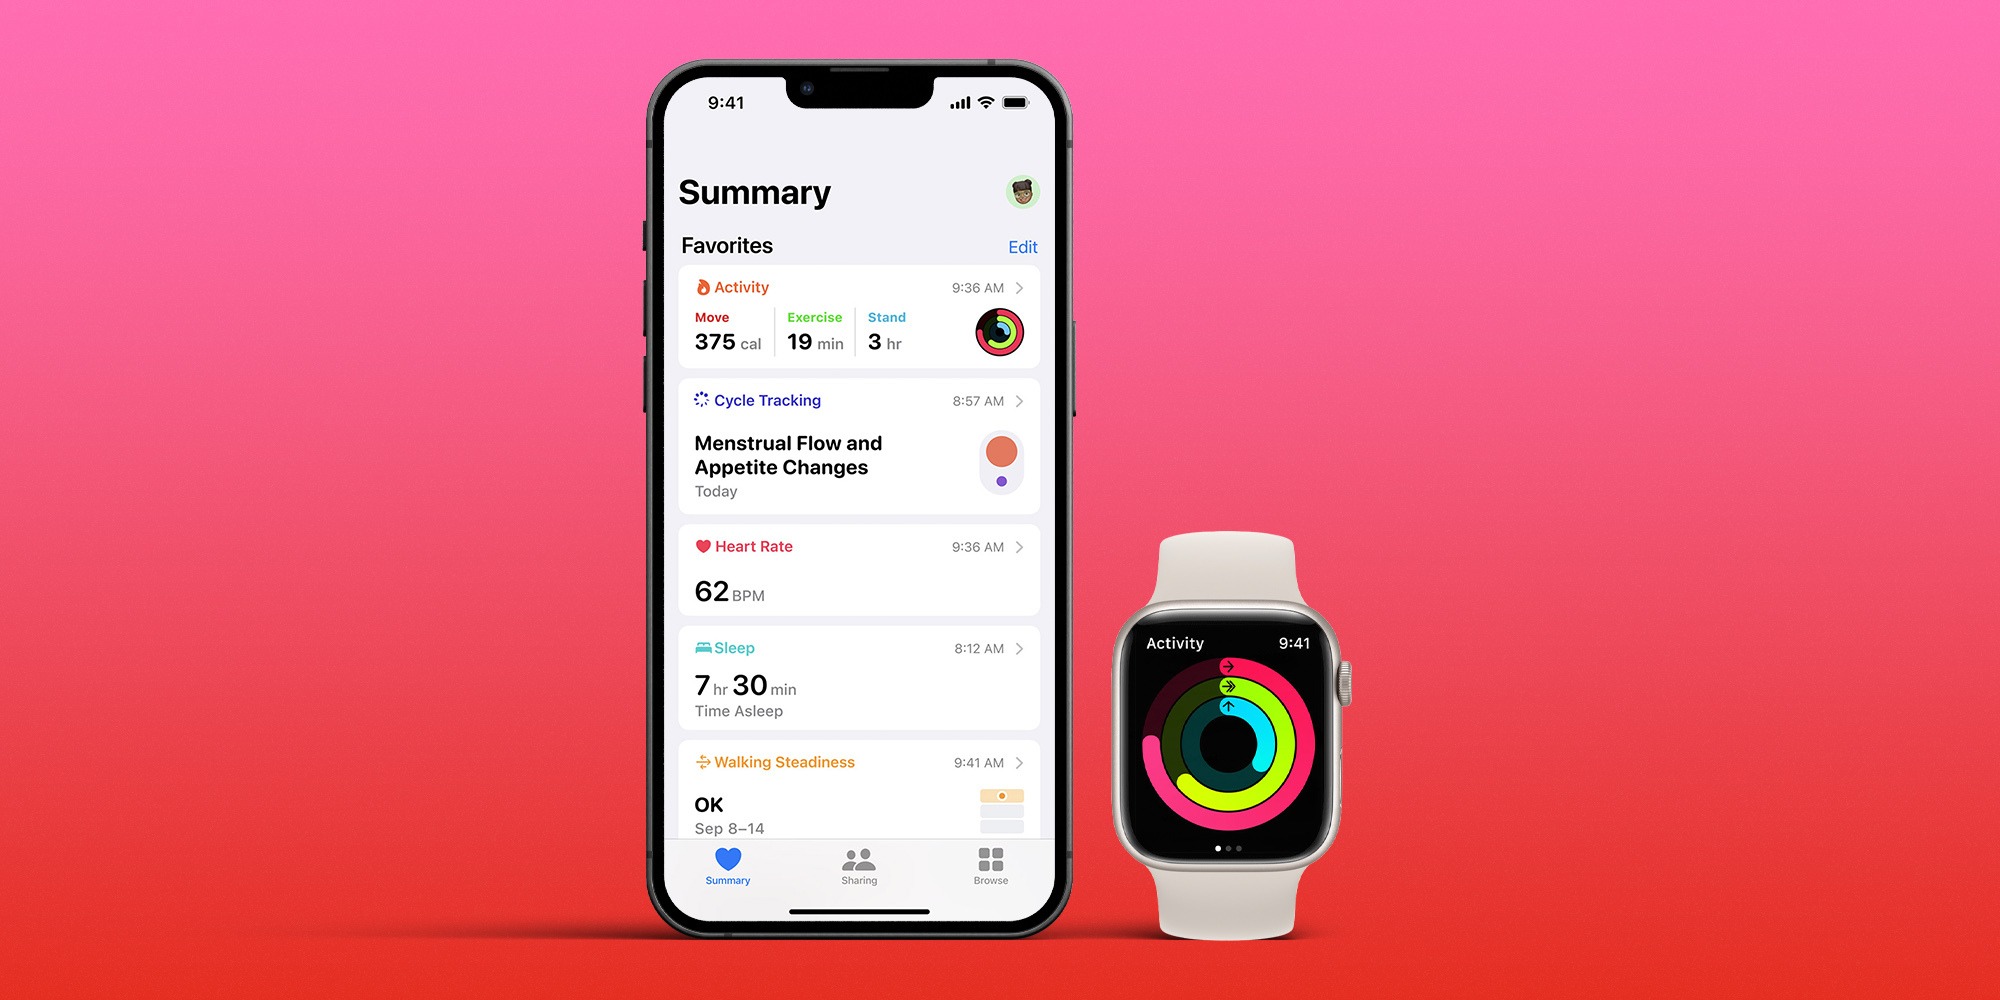
- Open the Health app on your iPhone, which is pre-installed and represented by a white icon with a red heart inside.
- Navigate to the “Browse” tab at the bottom of the screen and select “Workouts.”
- You’ll see a list of your recent workouts, including those tracked on your Apple Watch.
- Scroll through the list to find the specific workout you wish to view or analyze in more detail.
- Tapping on a specific workout will open a detailed view, showing all the relevant information and metrics recorded during that session.
By syncing your workout data with your iPhone, you can take advantage of the powerful analysis tools available in the Health app. You can delve into trends, set goals, monitor your heart rate, track your overall activity levels, and even share your progress with friends and family.
Furthermore, syncing your workout data allows for seamless integration with other fitness apps, such as MyFitnessPal, Strava, or Nike Run Club. This enables you to consolidate your fitness information in one place and utilize a wide range of third-party services to enhance your workout experience.
Now that you’ve successfully synced your workout data with your iPhone, you can explore the various features and benefits offered by the Health app. Use the data to stay motivated, set new challenges, and monitor your progress as you continue on your fitness journey.
Conclusion
Tracking your workouts on Apple Watch is a fantastic way to monitor your progress, stay motivated, and achieve your fitness goals. By following the simple steps outlined in this article, you can make the most out of your Apple Watch’s workout tracking capabilities.
From setting up your Apple Watch to customizing workout metrics, starting and pausing workouts, ending and saving your data, and syncing it with your iPhone, each step plays a crucial role in enhancing your workout experience.
Through the Workout app on Apple Watch, you have access to a vast array of workout types tailored to various activities. Customizing the metrics allows you to track the data that matters most to you, giving you insights into your performance and progress.
The ability to pause and resume workouts ensures flexibility during your sessions, allowing you to adapt to interruptions or take necessary breaks. Once you’ve completed your workout, ending and saving the data provides valuable information that can be reviewed and analyzed at your convenience.
By syncing your workout data with your iPhone, you unlock a host of features and benefits within the Health app. From in-depth analysis to setting goals, tracking trends, and sharing achievements, the app becomes a central hub for your fitness journey.
With the power of Apple Watch and its seamless integration with the Health app, you have all the tools you need to take your workouts to the next level. So, put on your Apple Watch, start tracking your workouts, and embrace a healthier and more active lifestyle.